Background
On the startup team at Gamania, our product iterated fast, so during development I was constantly hunting for feature rules and specifications. Everything was documented clearly — in Confluence, Jira tickets, and Figma — but it lived in three different places. When I needed an answer, I often couldn’t find it, and worse, didn’t know where to start looking.
The pain was structural. Our features were organized by module, but the boundaries between modules were fuzzy, so a given rule could plausibly belong to any of several modules. I’d click around for ages, fail to find it, and burn time. That frustration led to an idea: build an assistant that could answer questions about our features on demand.
My first instinct was to build an AI chatbot with LangChain. When I floated the idea with my manager, C, he suggested I try Amazon Q Business instead — so that’s where this project began.
The result worked well. If your team already has thorough documentation and the budget for it, it’s worth considering.
Step 1: Prerequisites
1. Create an AWS account
- If you don’t have one yet, sign up first: AWS sign-up.
- Sign in to the AWS Management Console.
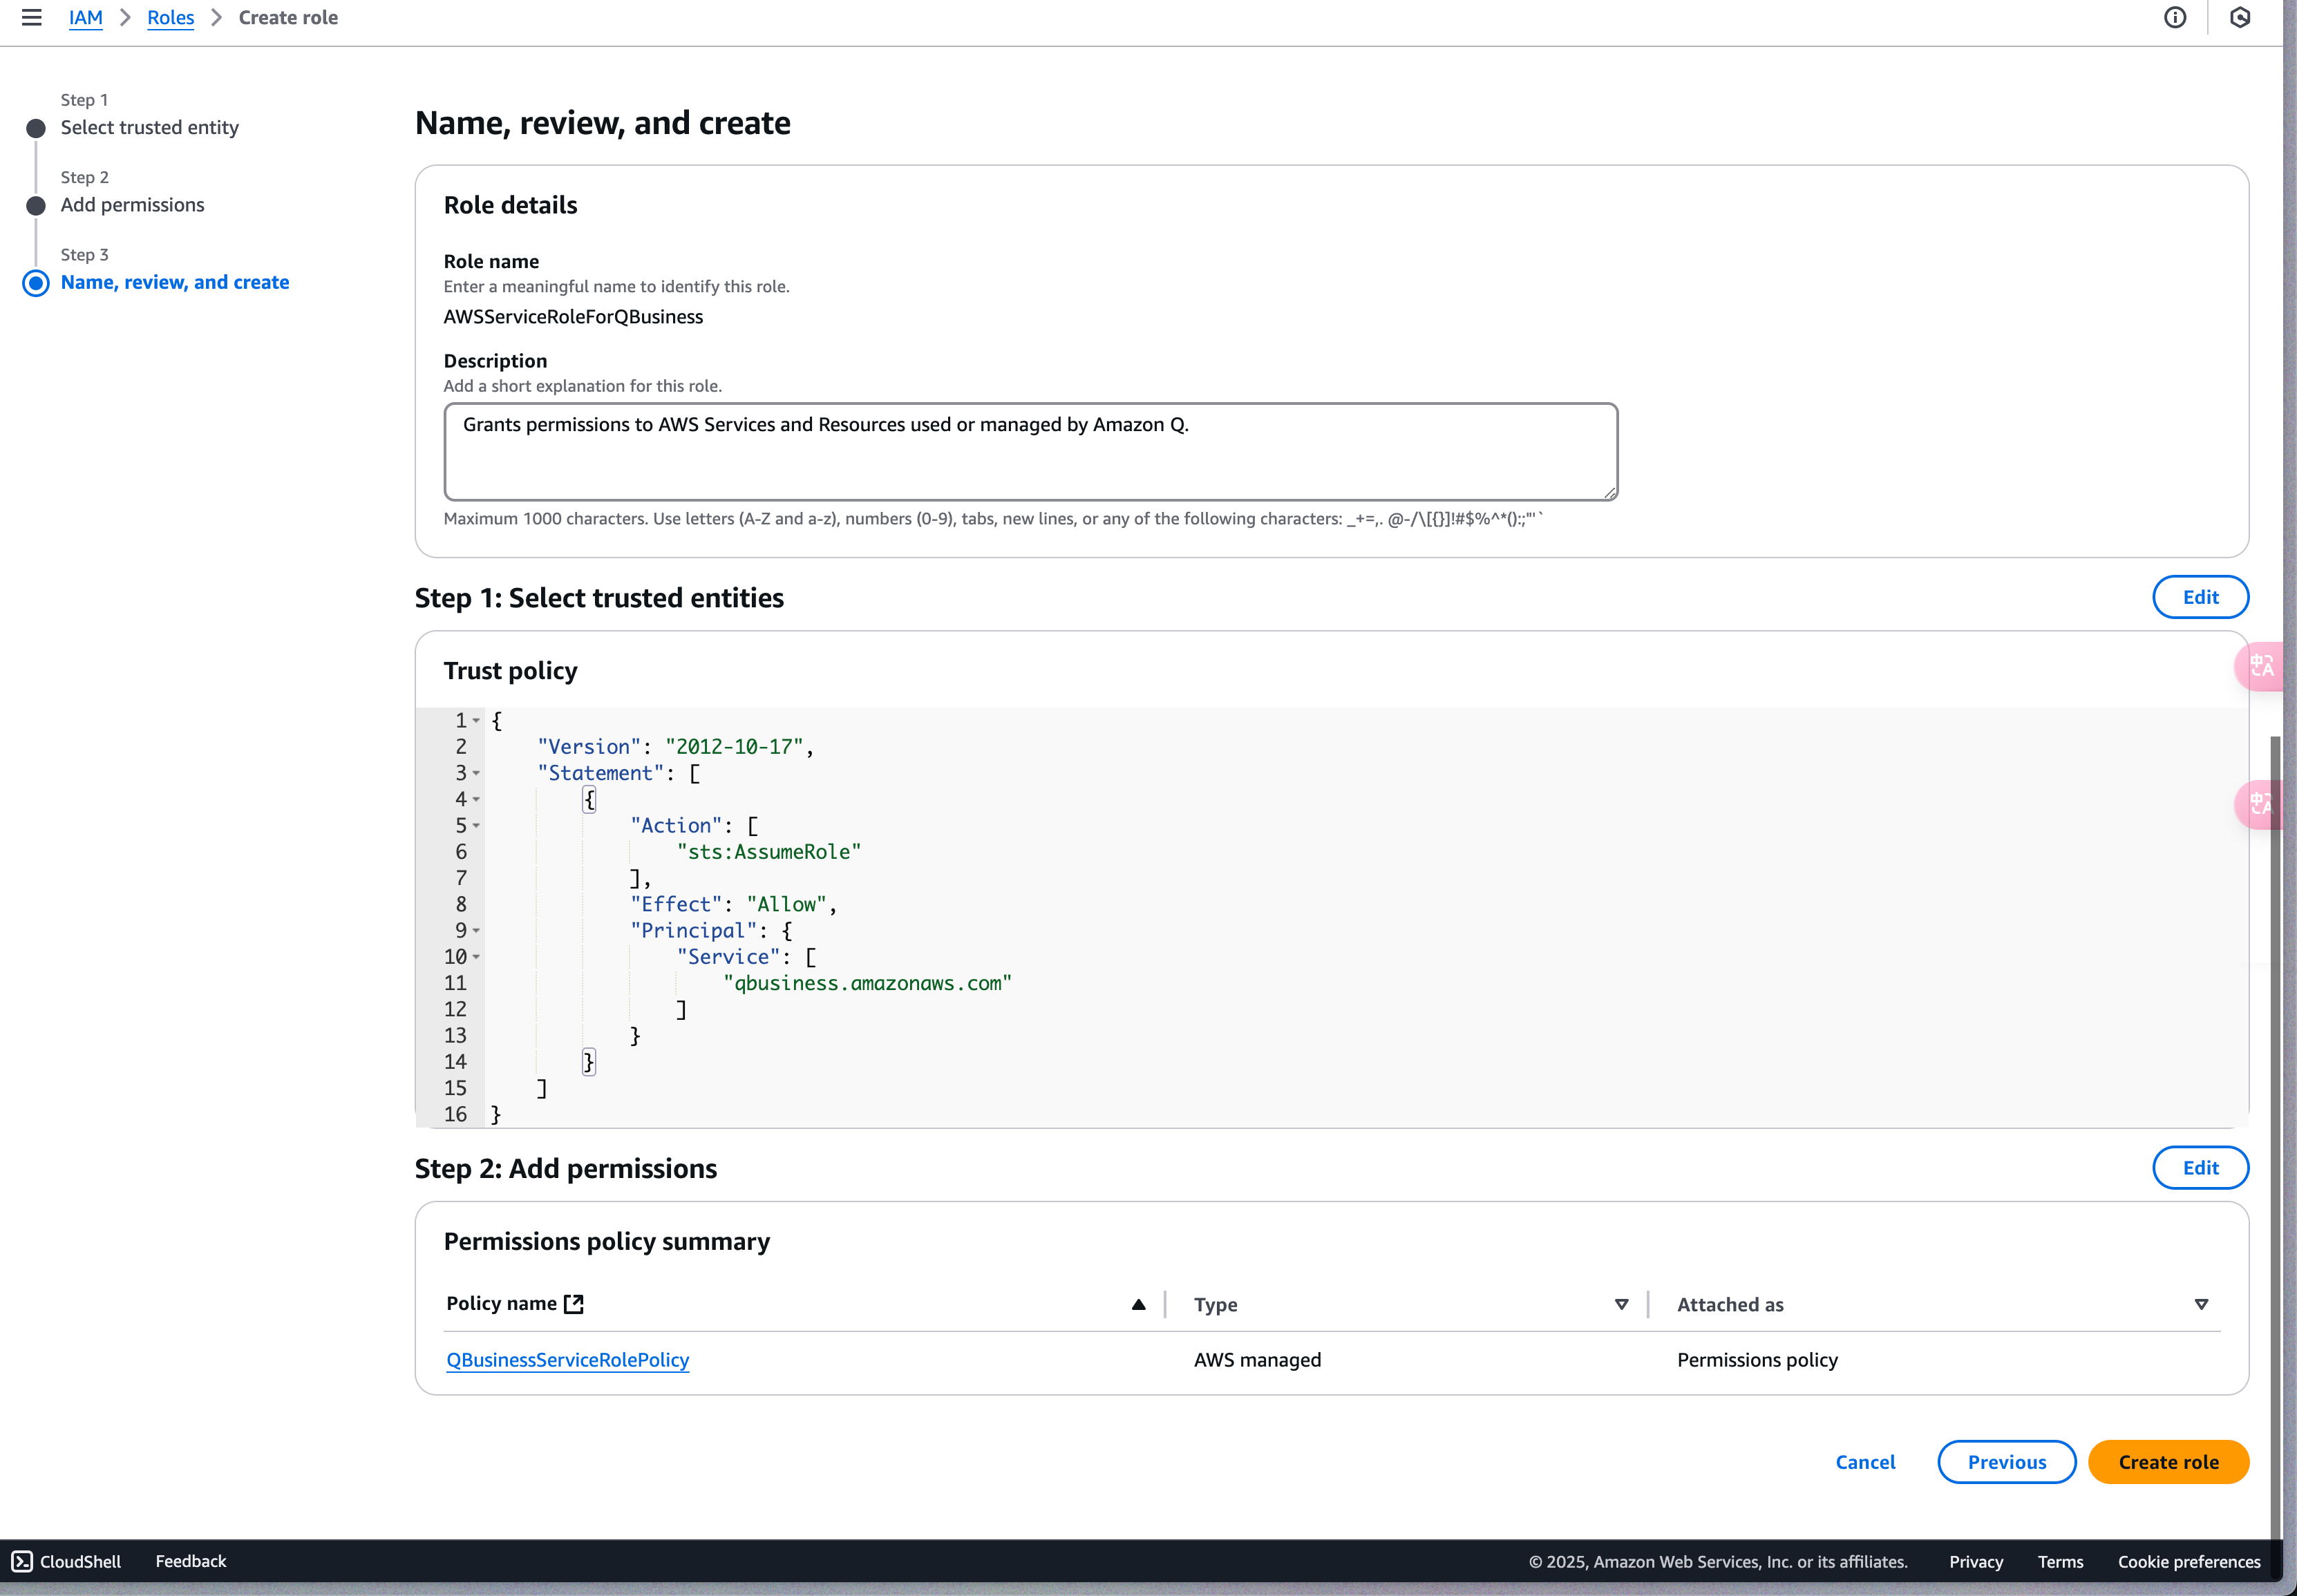
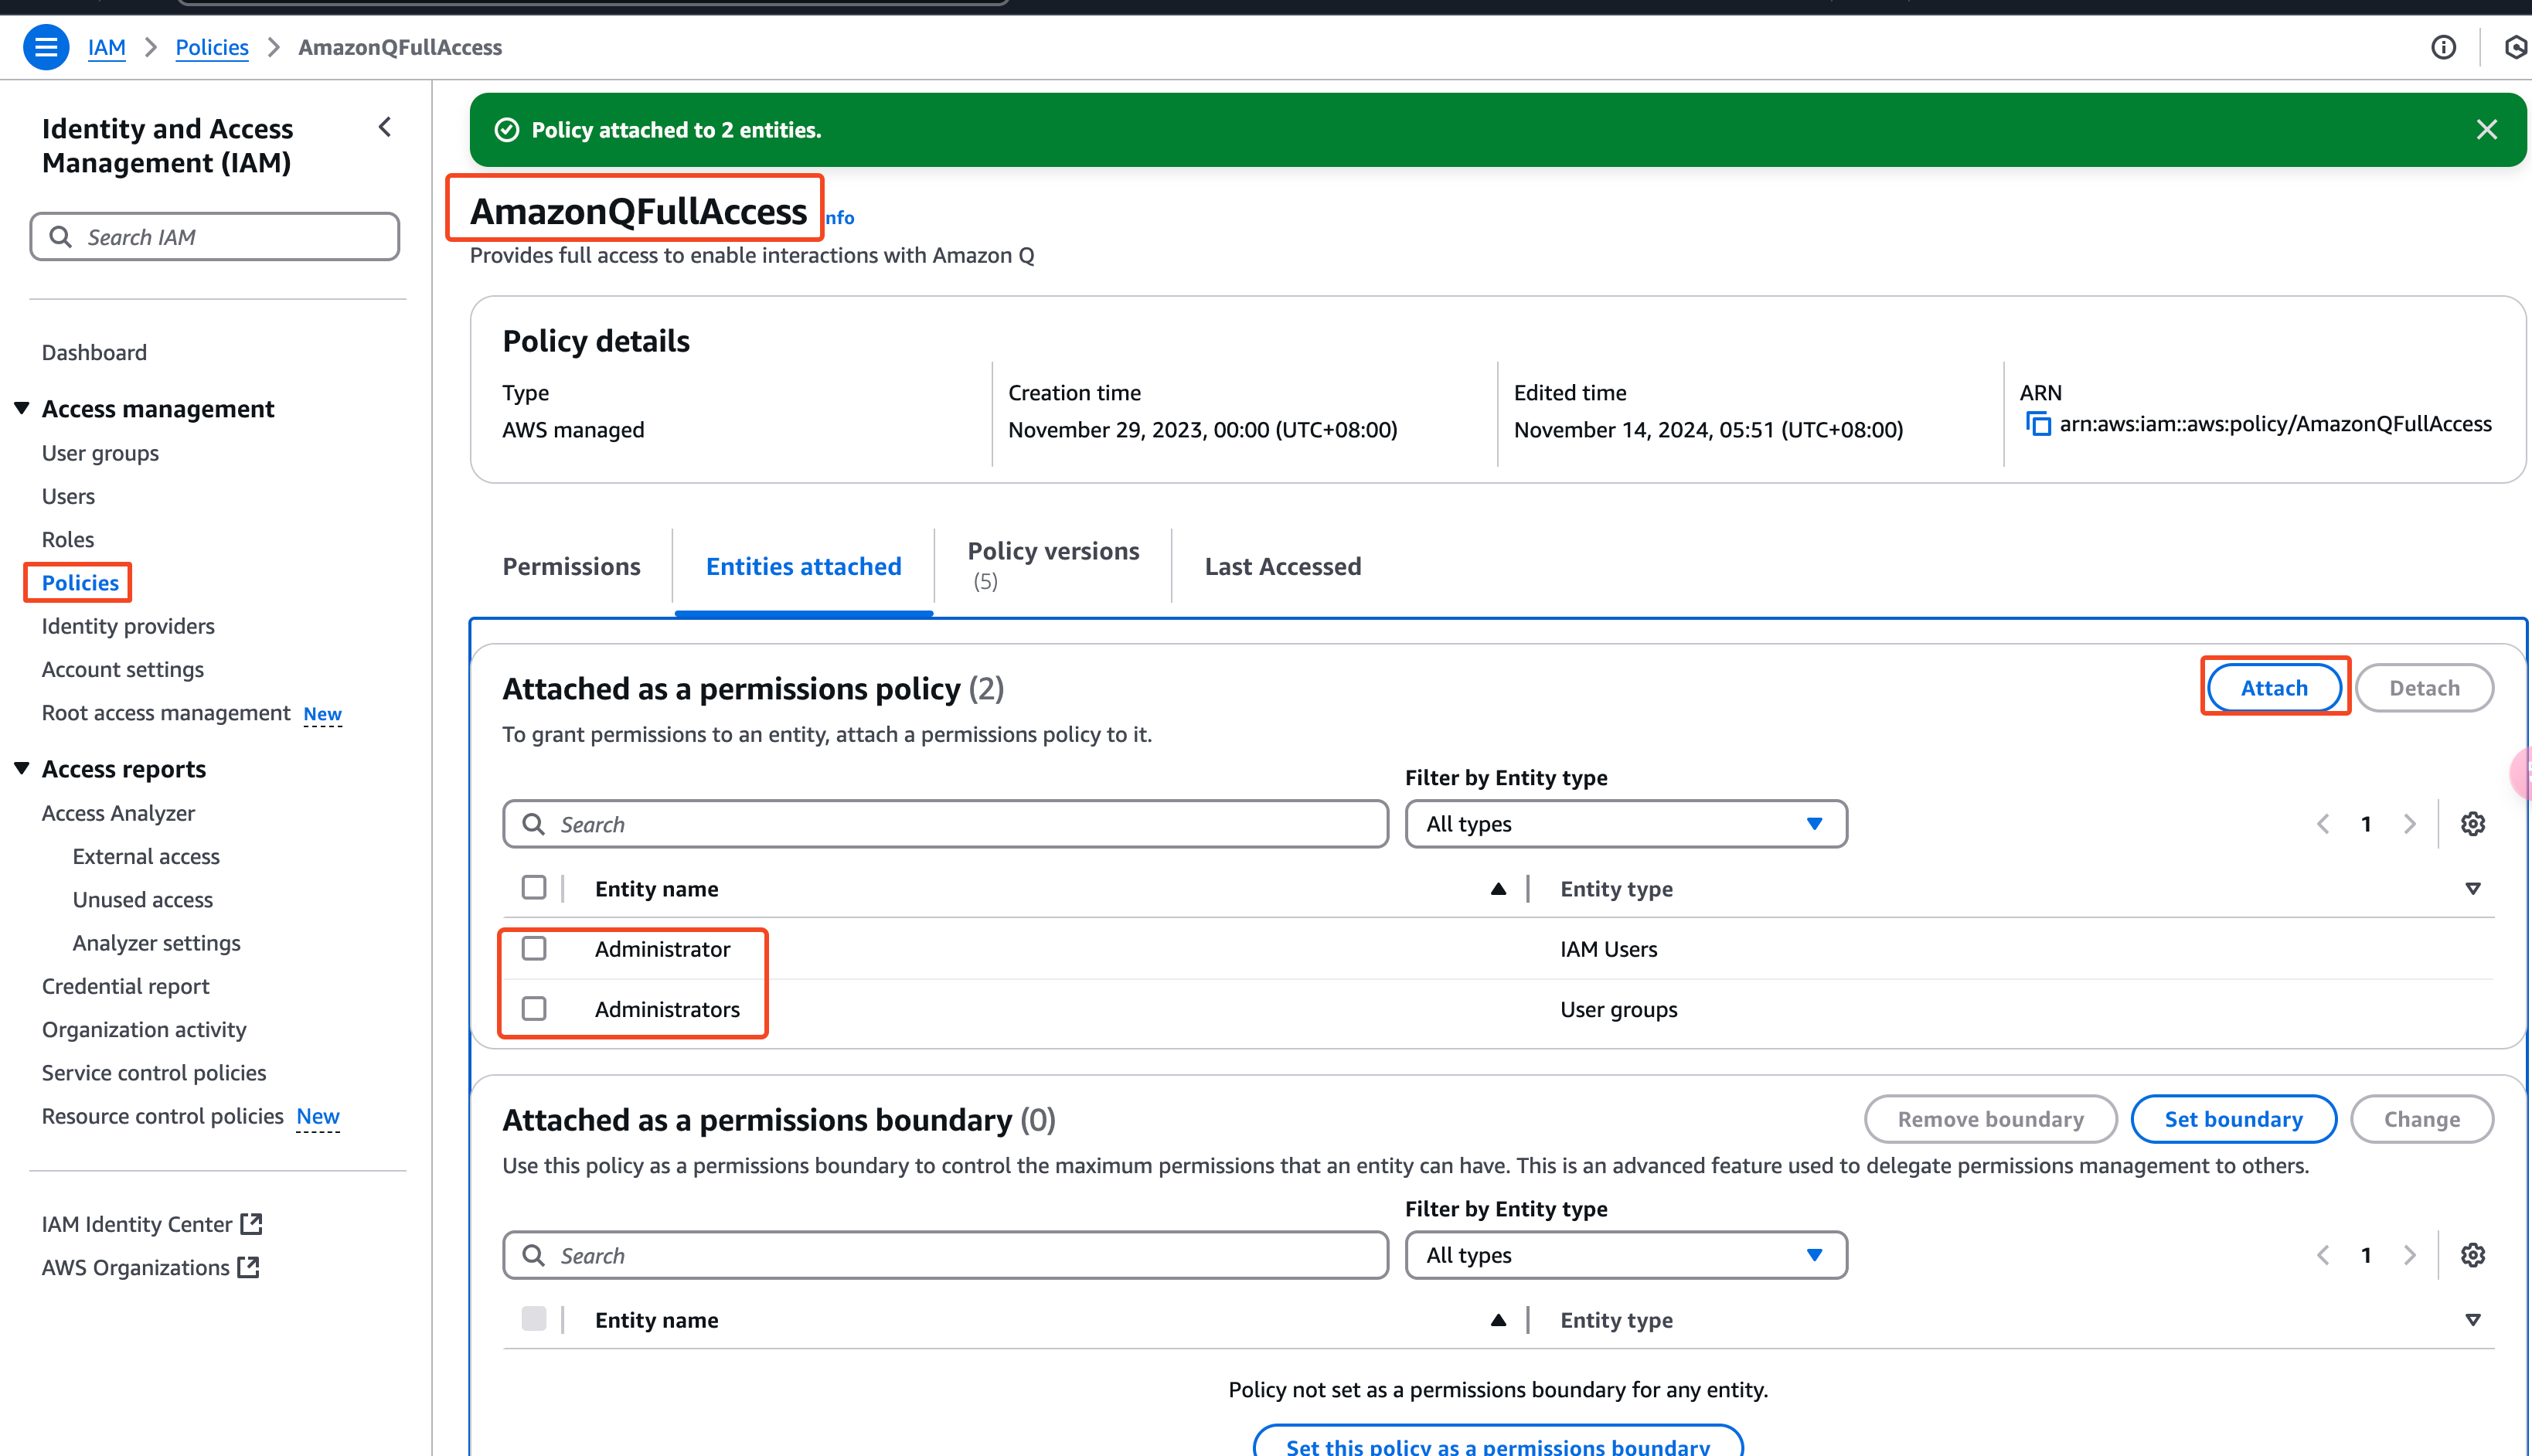
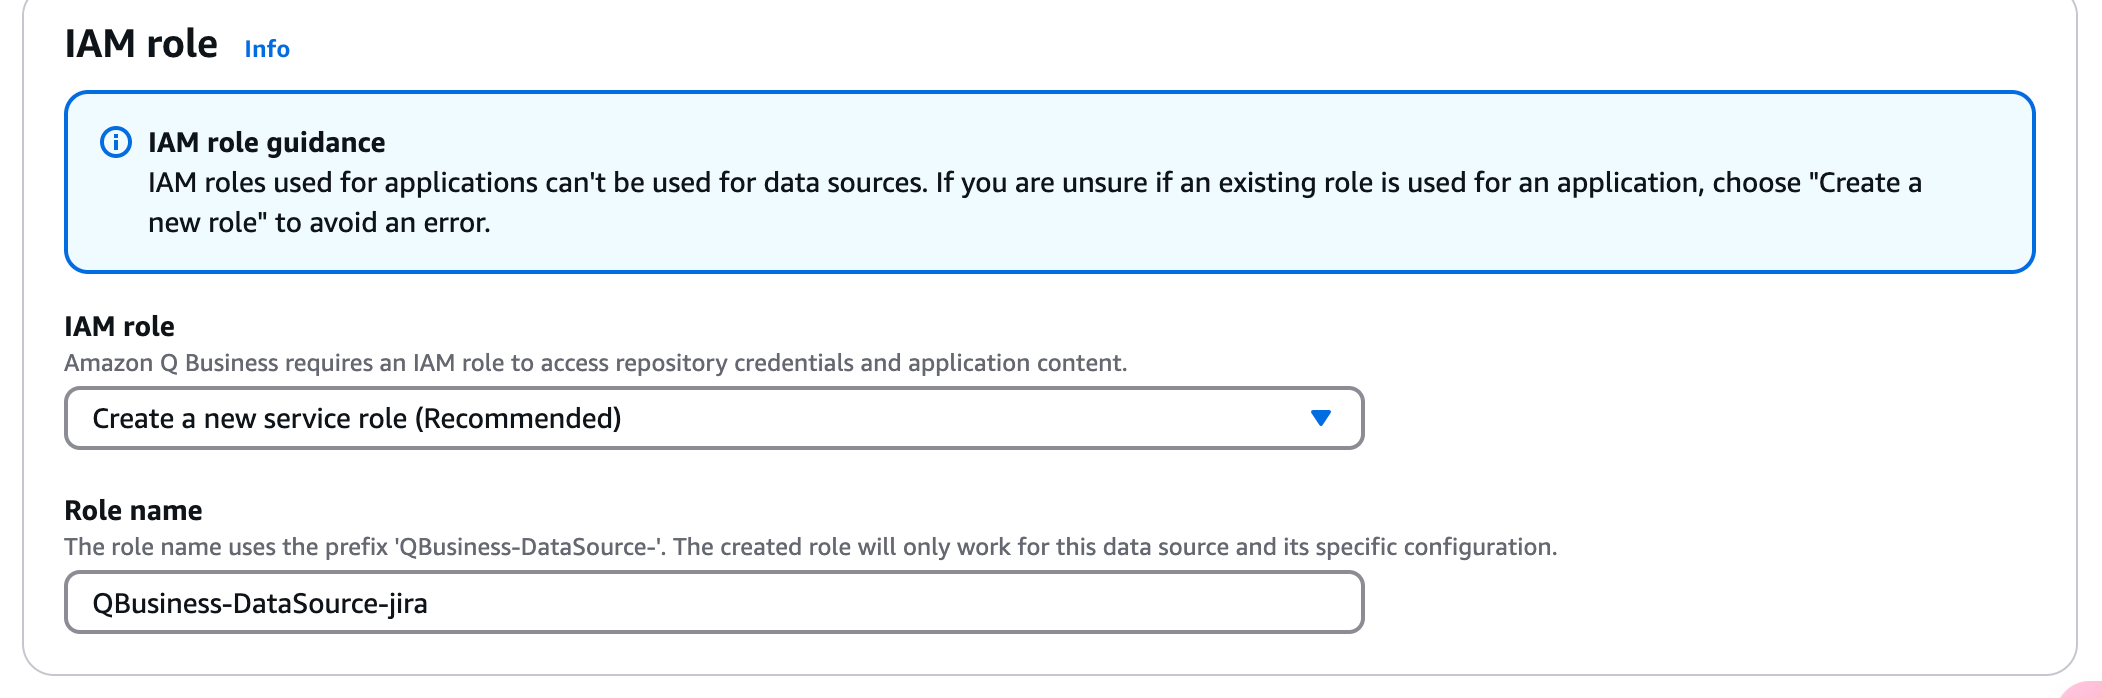
2. Create the IAM role AWSServiceRoleForQBusiness
Create an IAM role for Amazon Q Business and grant it:
AmazonQFullAccess- Permissions to reach Confluence and Figma (needed if you’re pulling data from external APIs).
Reference: Creating IAM roles.
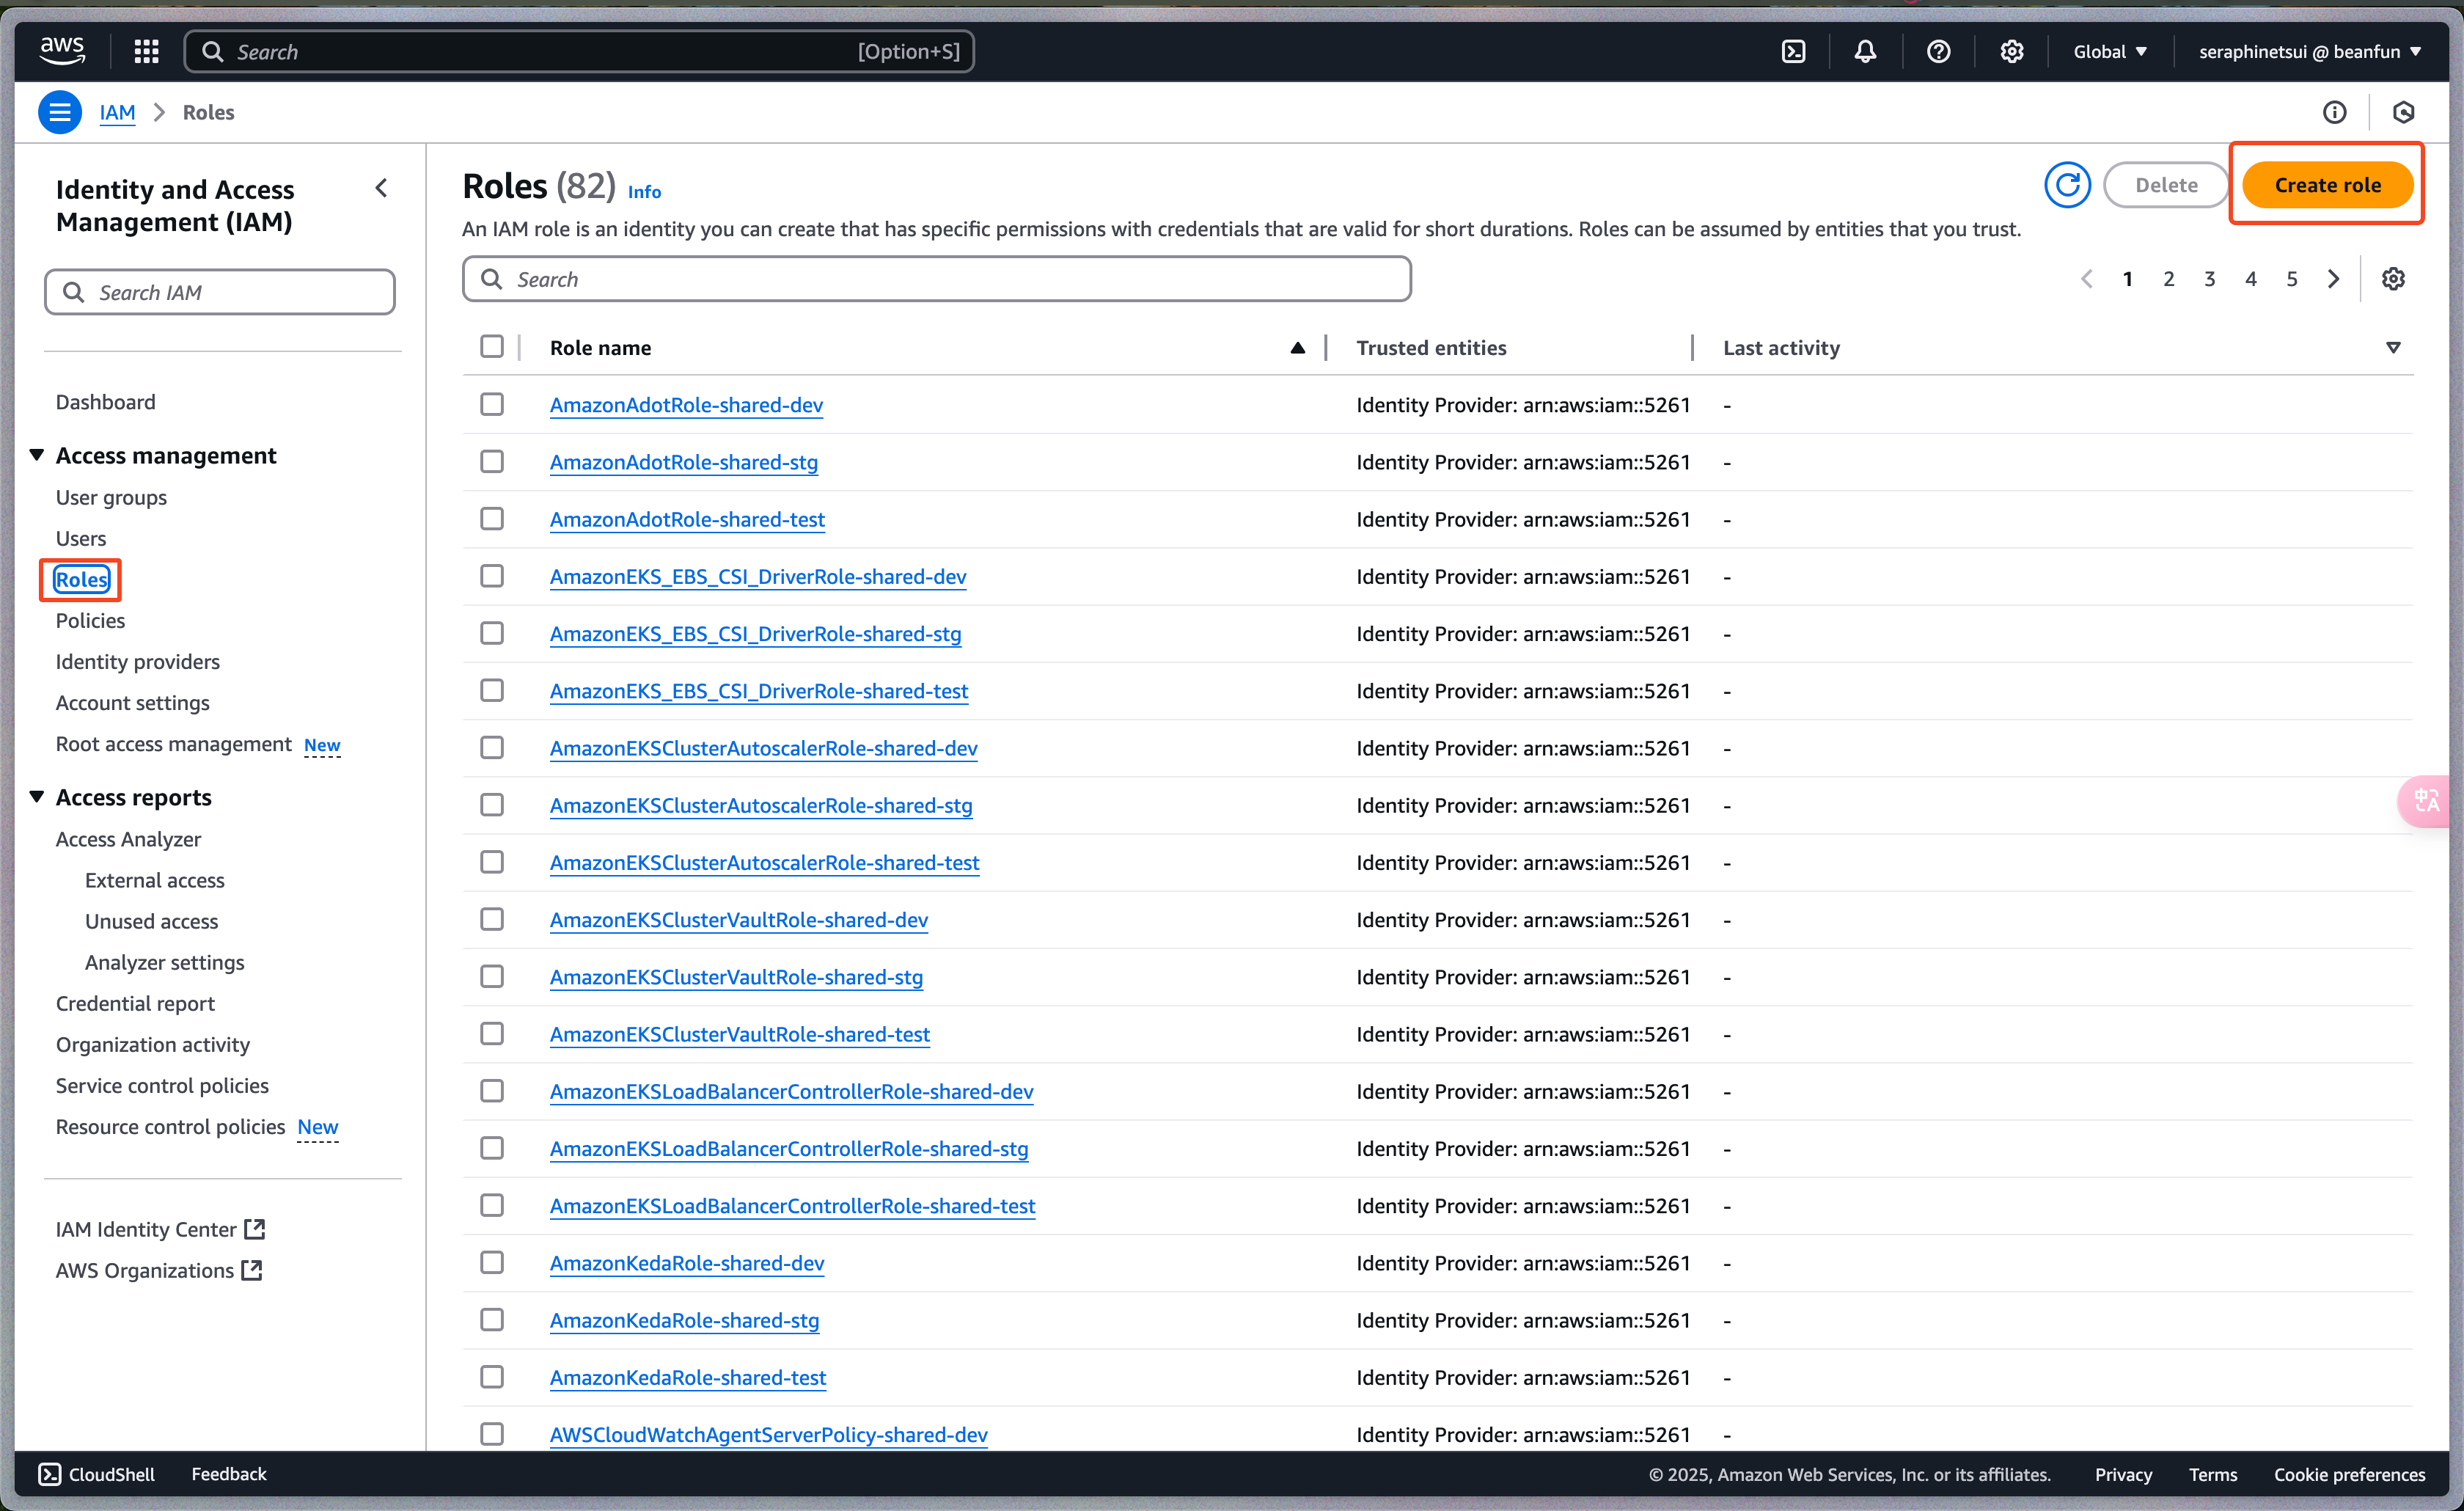
In the IAM console, click Roles in the left navigation.
Click Create role.
On the Select trusted entity page:
- Choose AWS service.
- Under Use case, choose Q Business (if it isn’t listed, pick EC2 or another related service and edit the trust policy afterward).
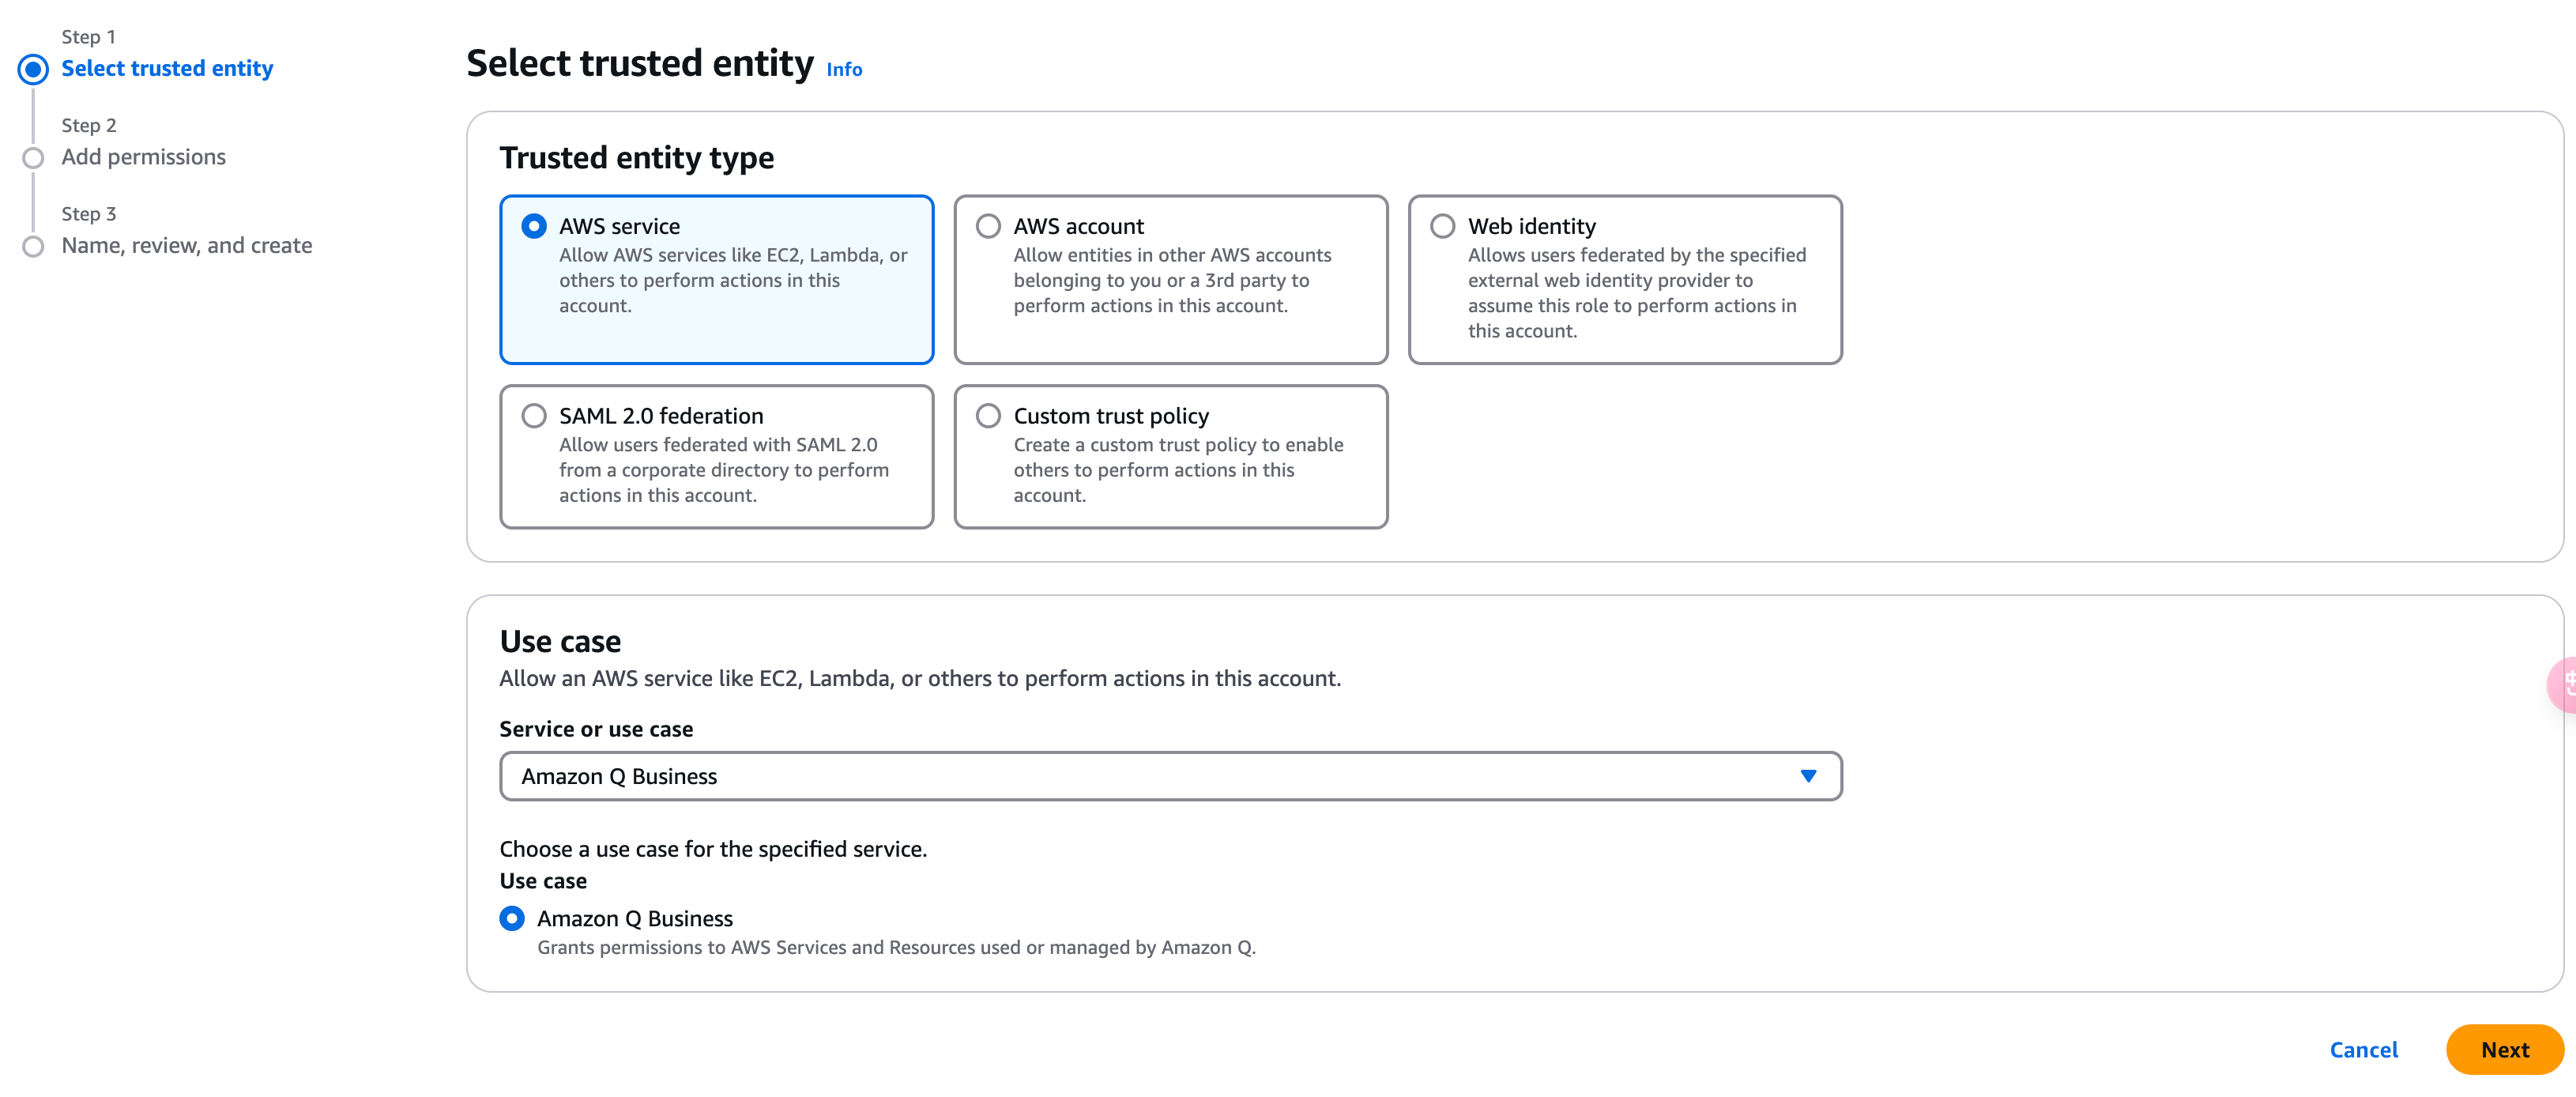
Click Next.

Click Create role.
3. Give your identity permission to run Amazon Q Business
In the IAM console, click Policies in the left navigation.
Search for
AmazonQBusinessFullAccess.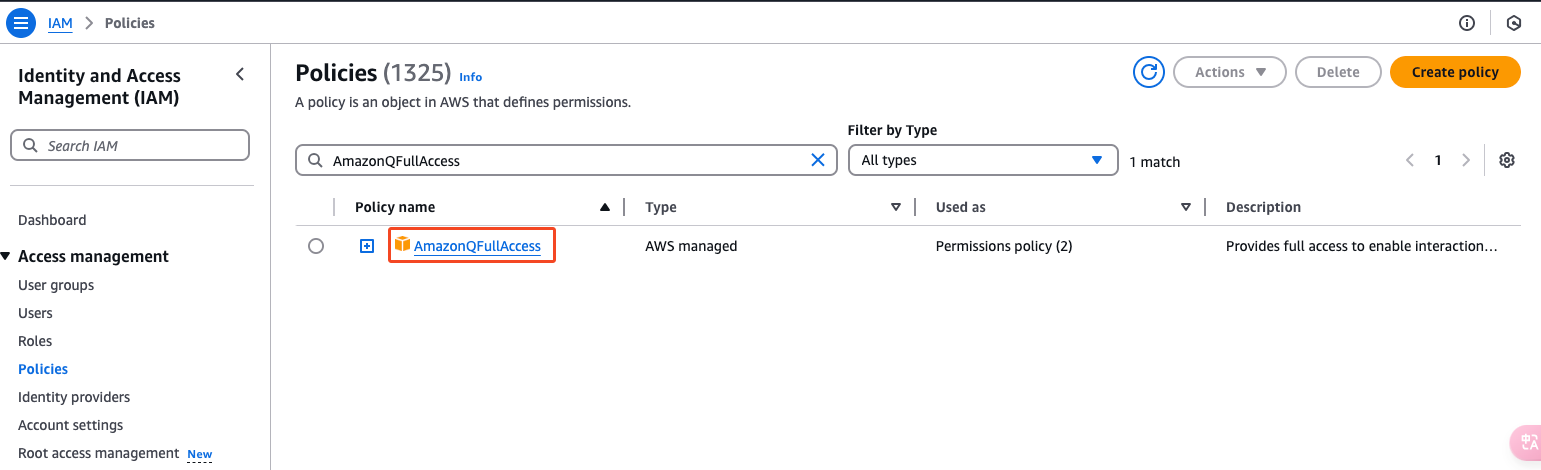
Open the Entities attached tab > Attach permissions policies, and select the identity you want to enable the service for.
This is what lets that identity create the Amazon Q service.
Step 2: Integrate the Confluence API
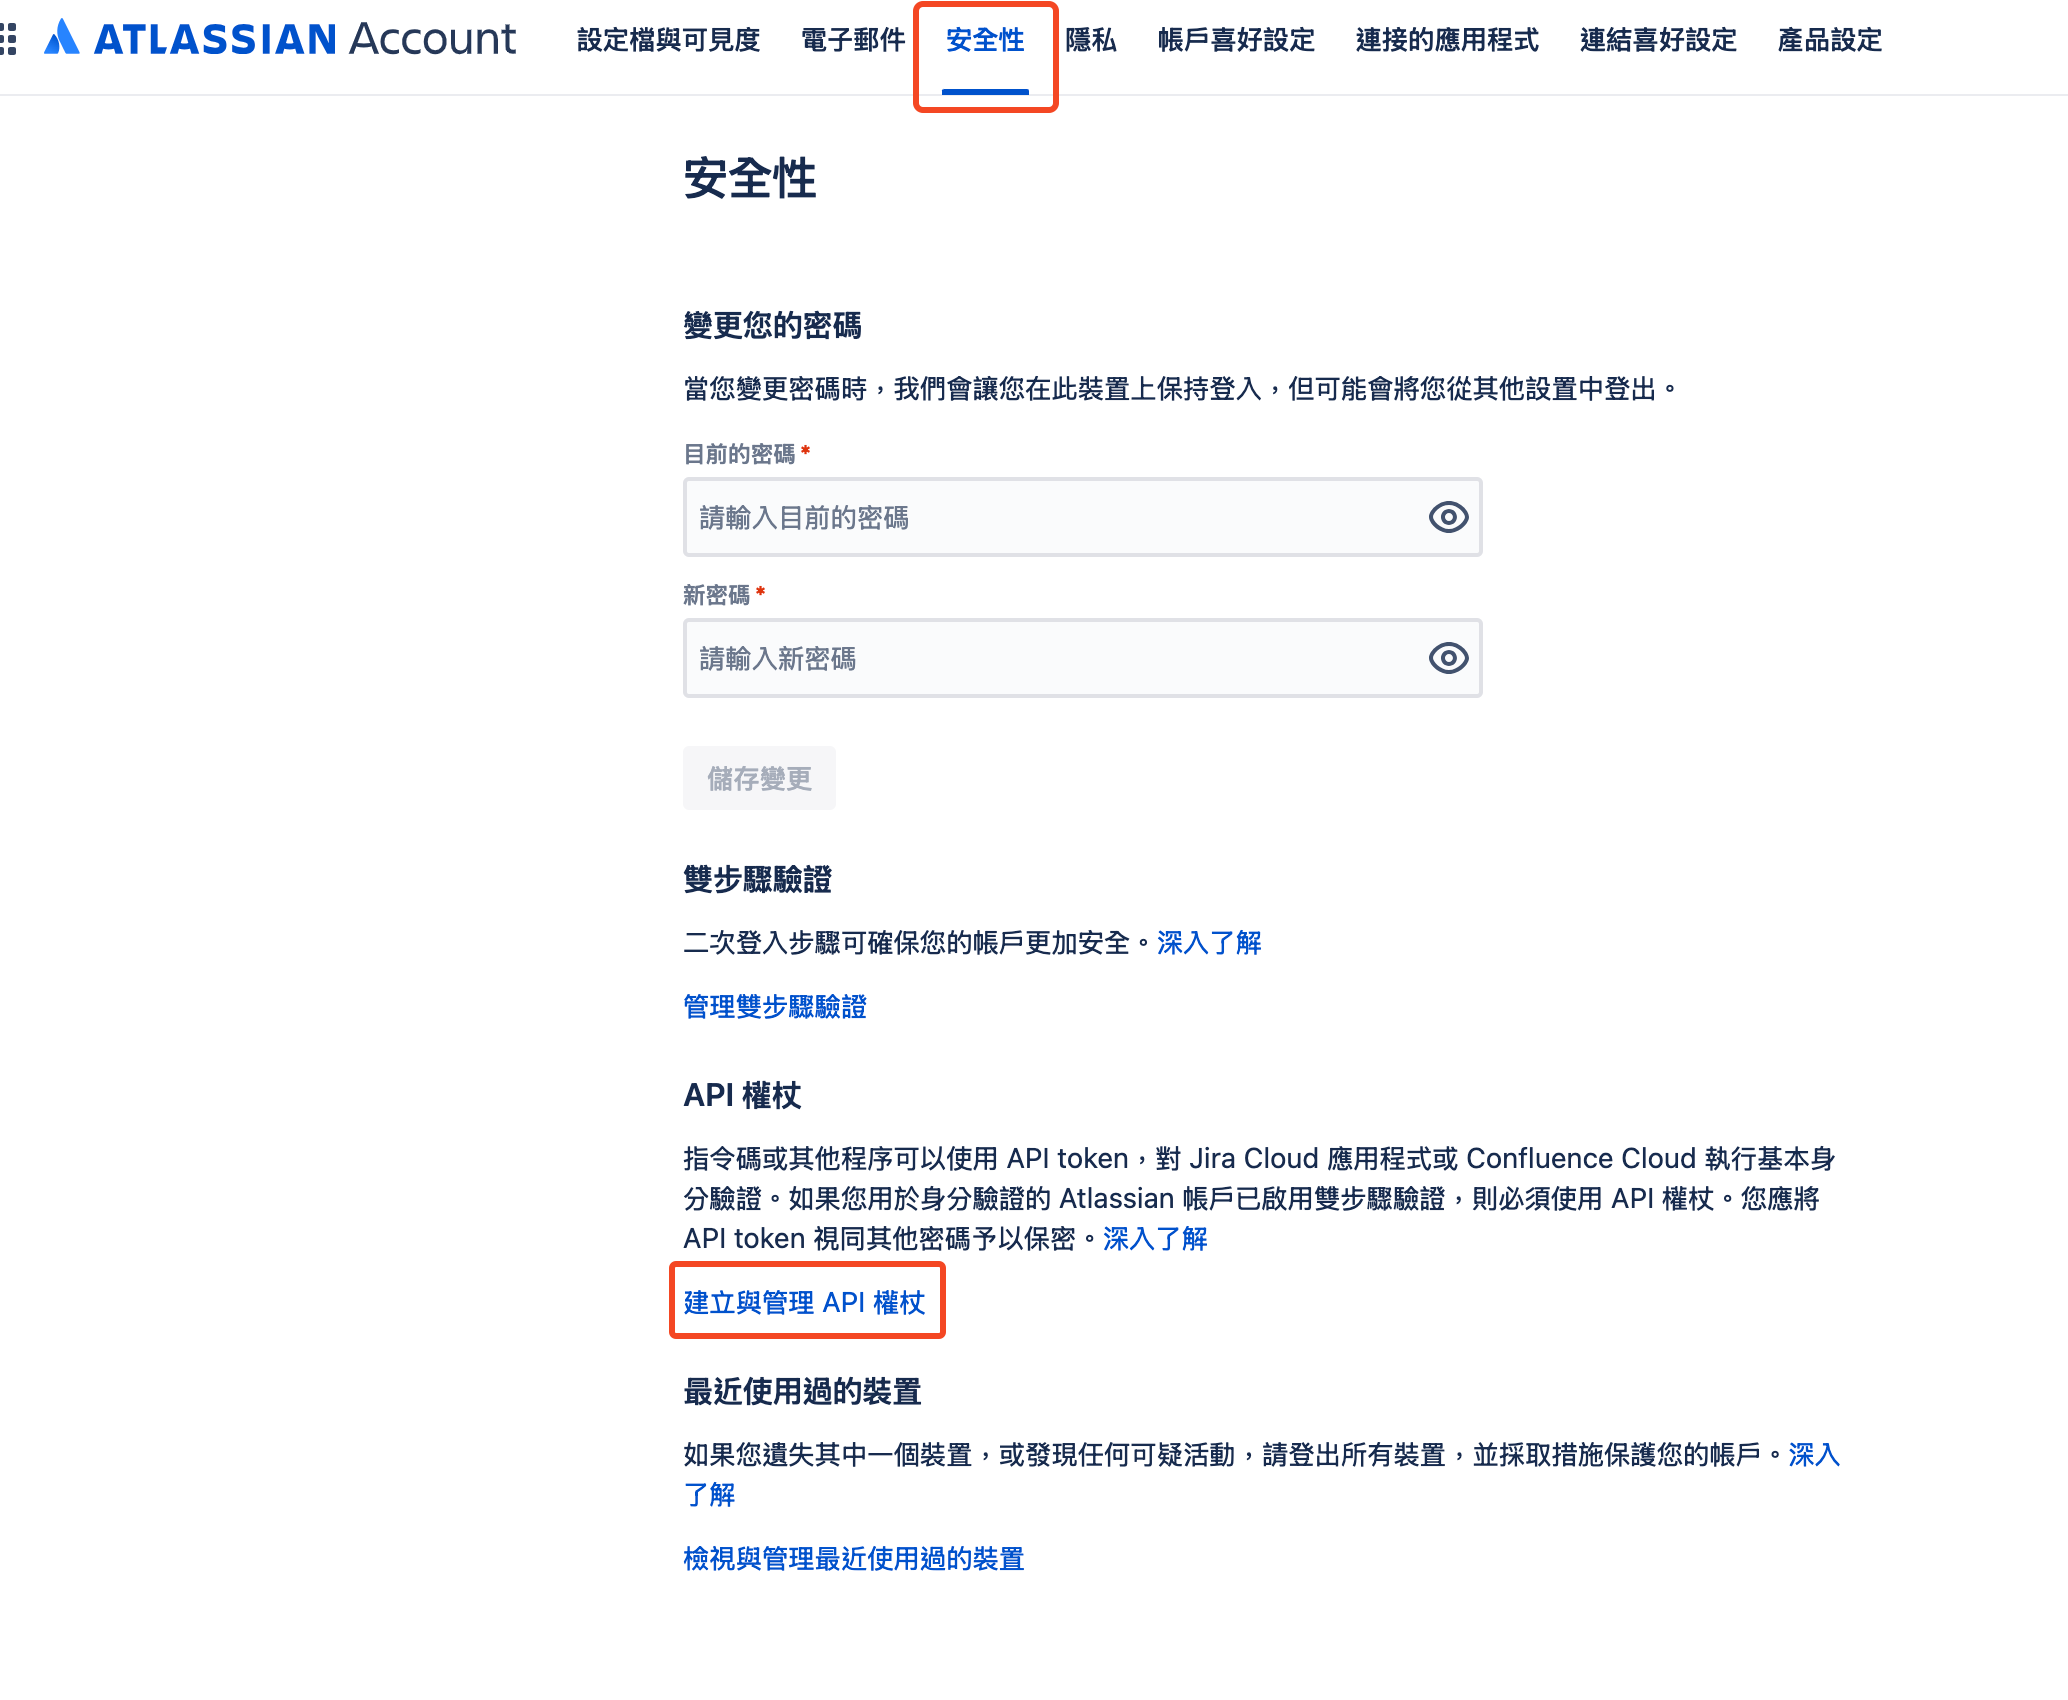
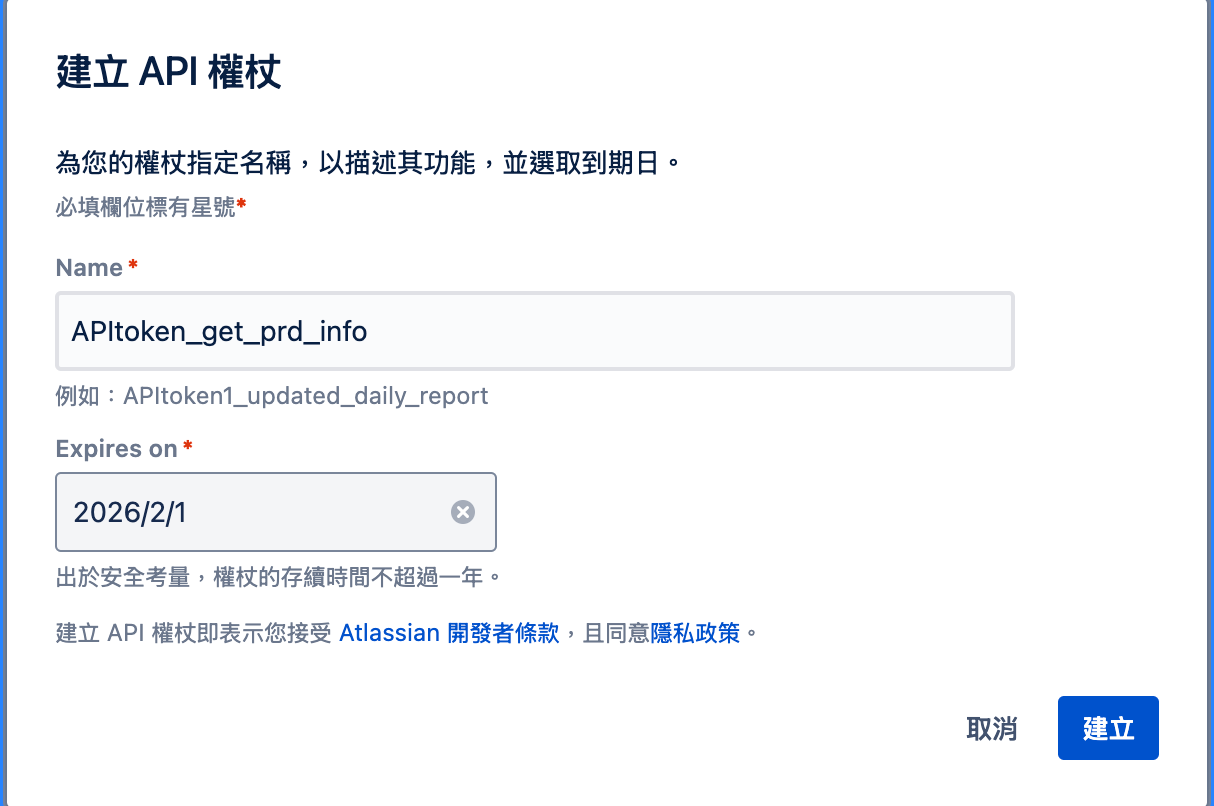
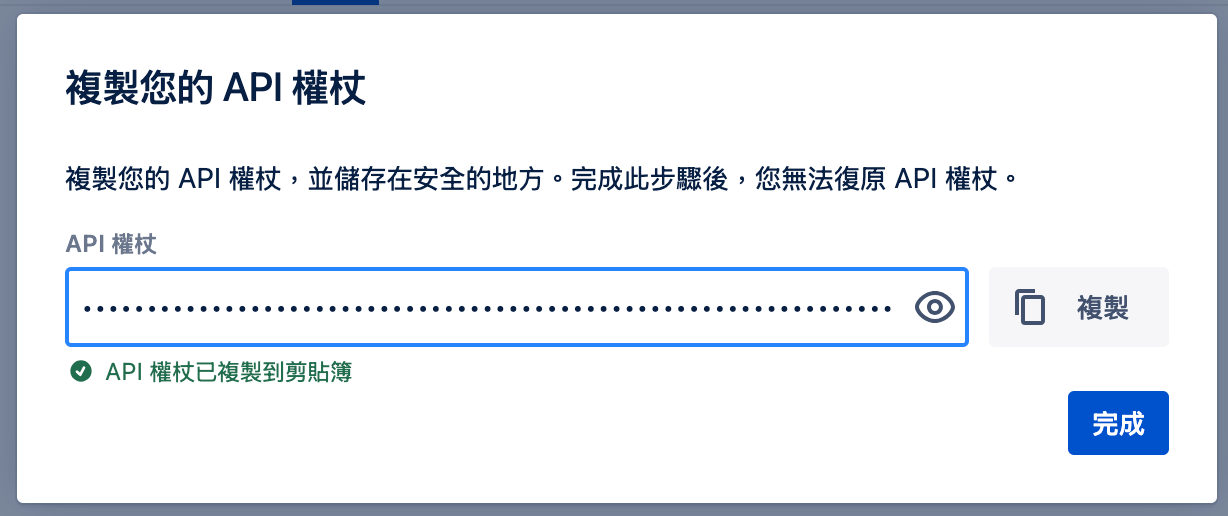
Get a Confluence API token
Sign in to Confluence and go to Manage account > Security > Create and manage API tokens.
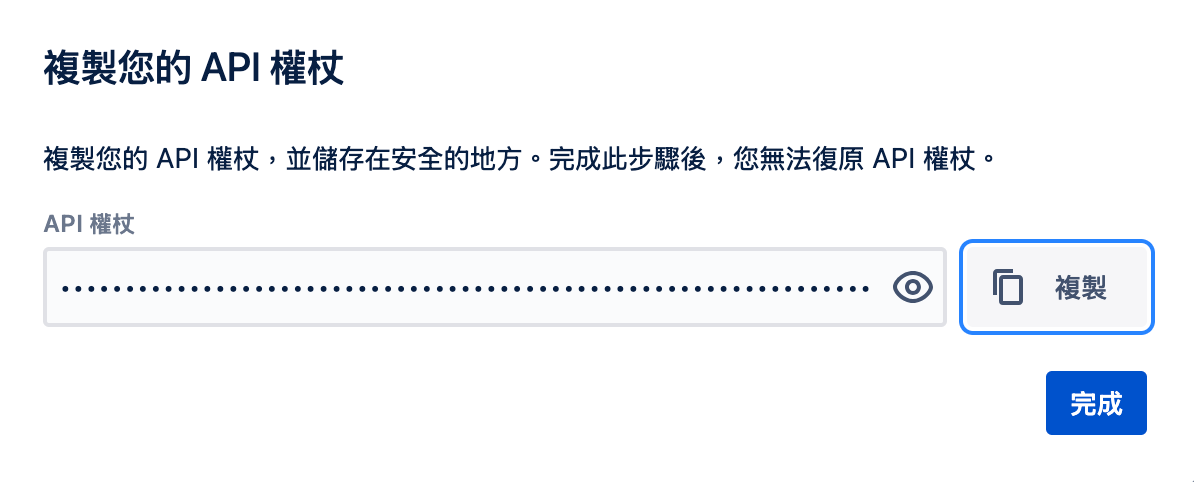
Generate an API token and store it safely.
Step 3: Set up Amazon Q Business
1. Create the Amazon Q Business application
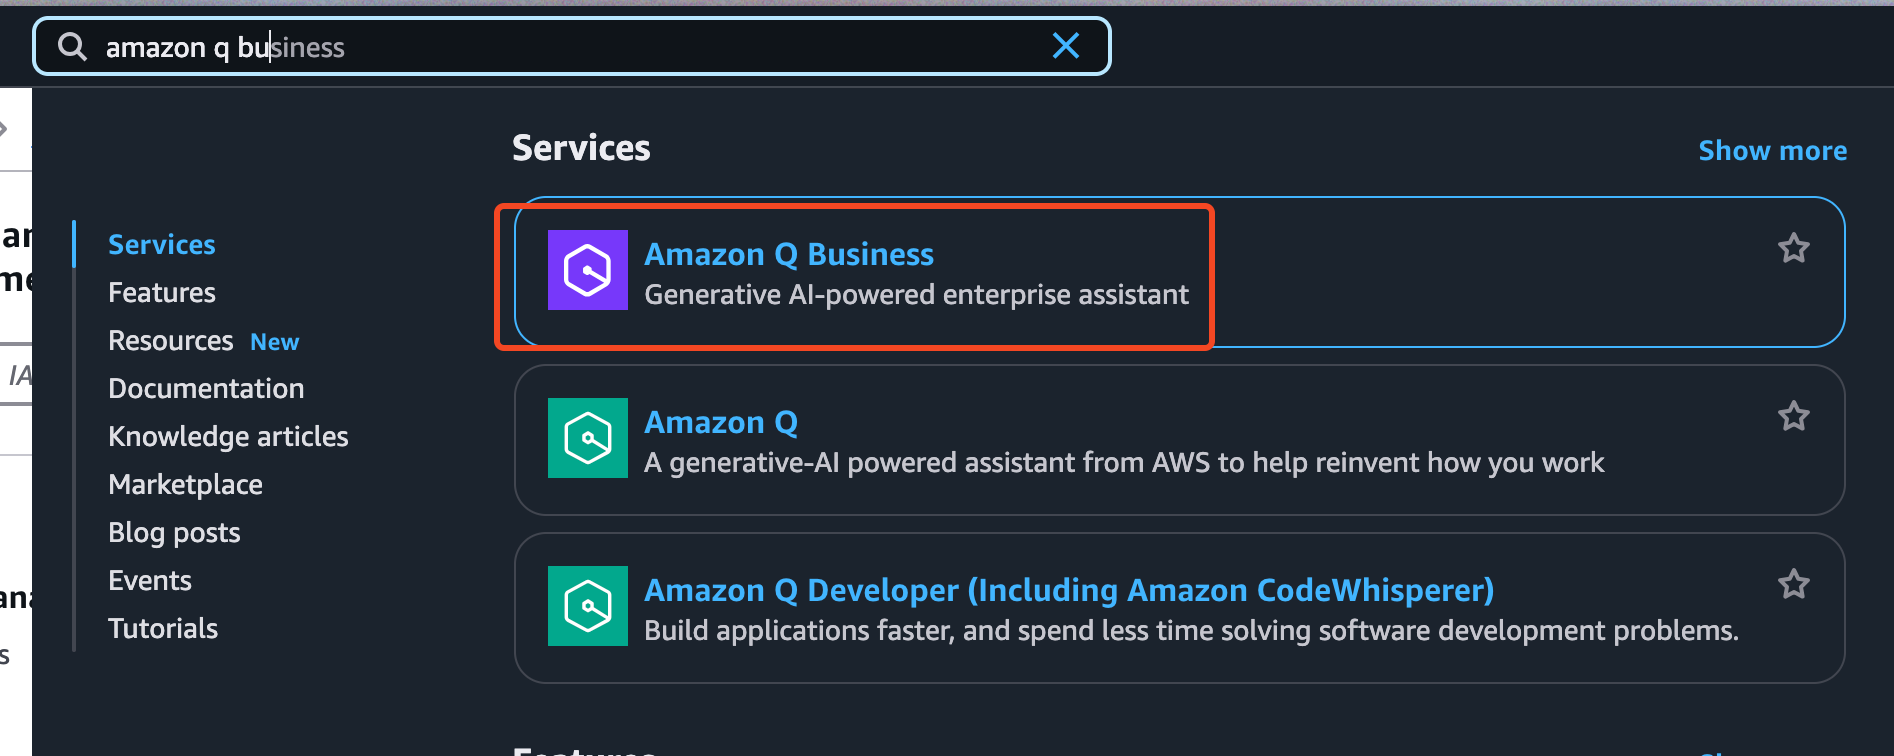
In the AWS Management Console, search for Amazon Q Business.
Click Create application and enter a name (e.g.
ProductRulesChatbot).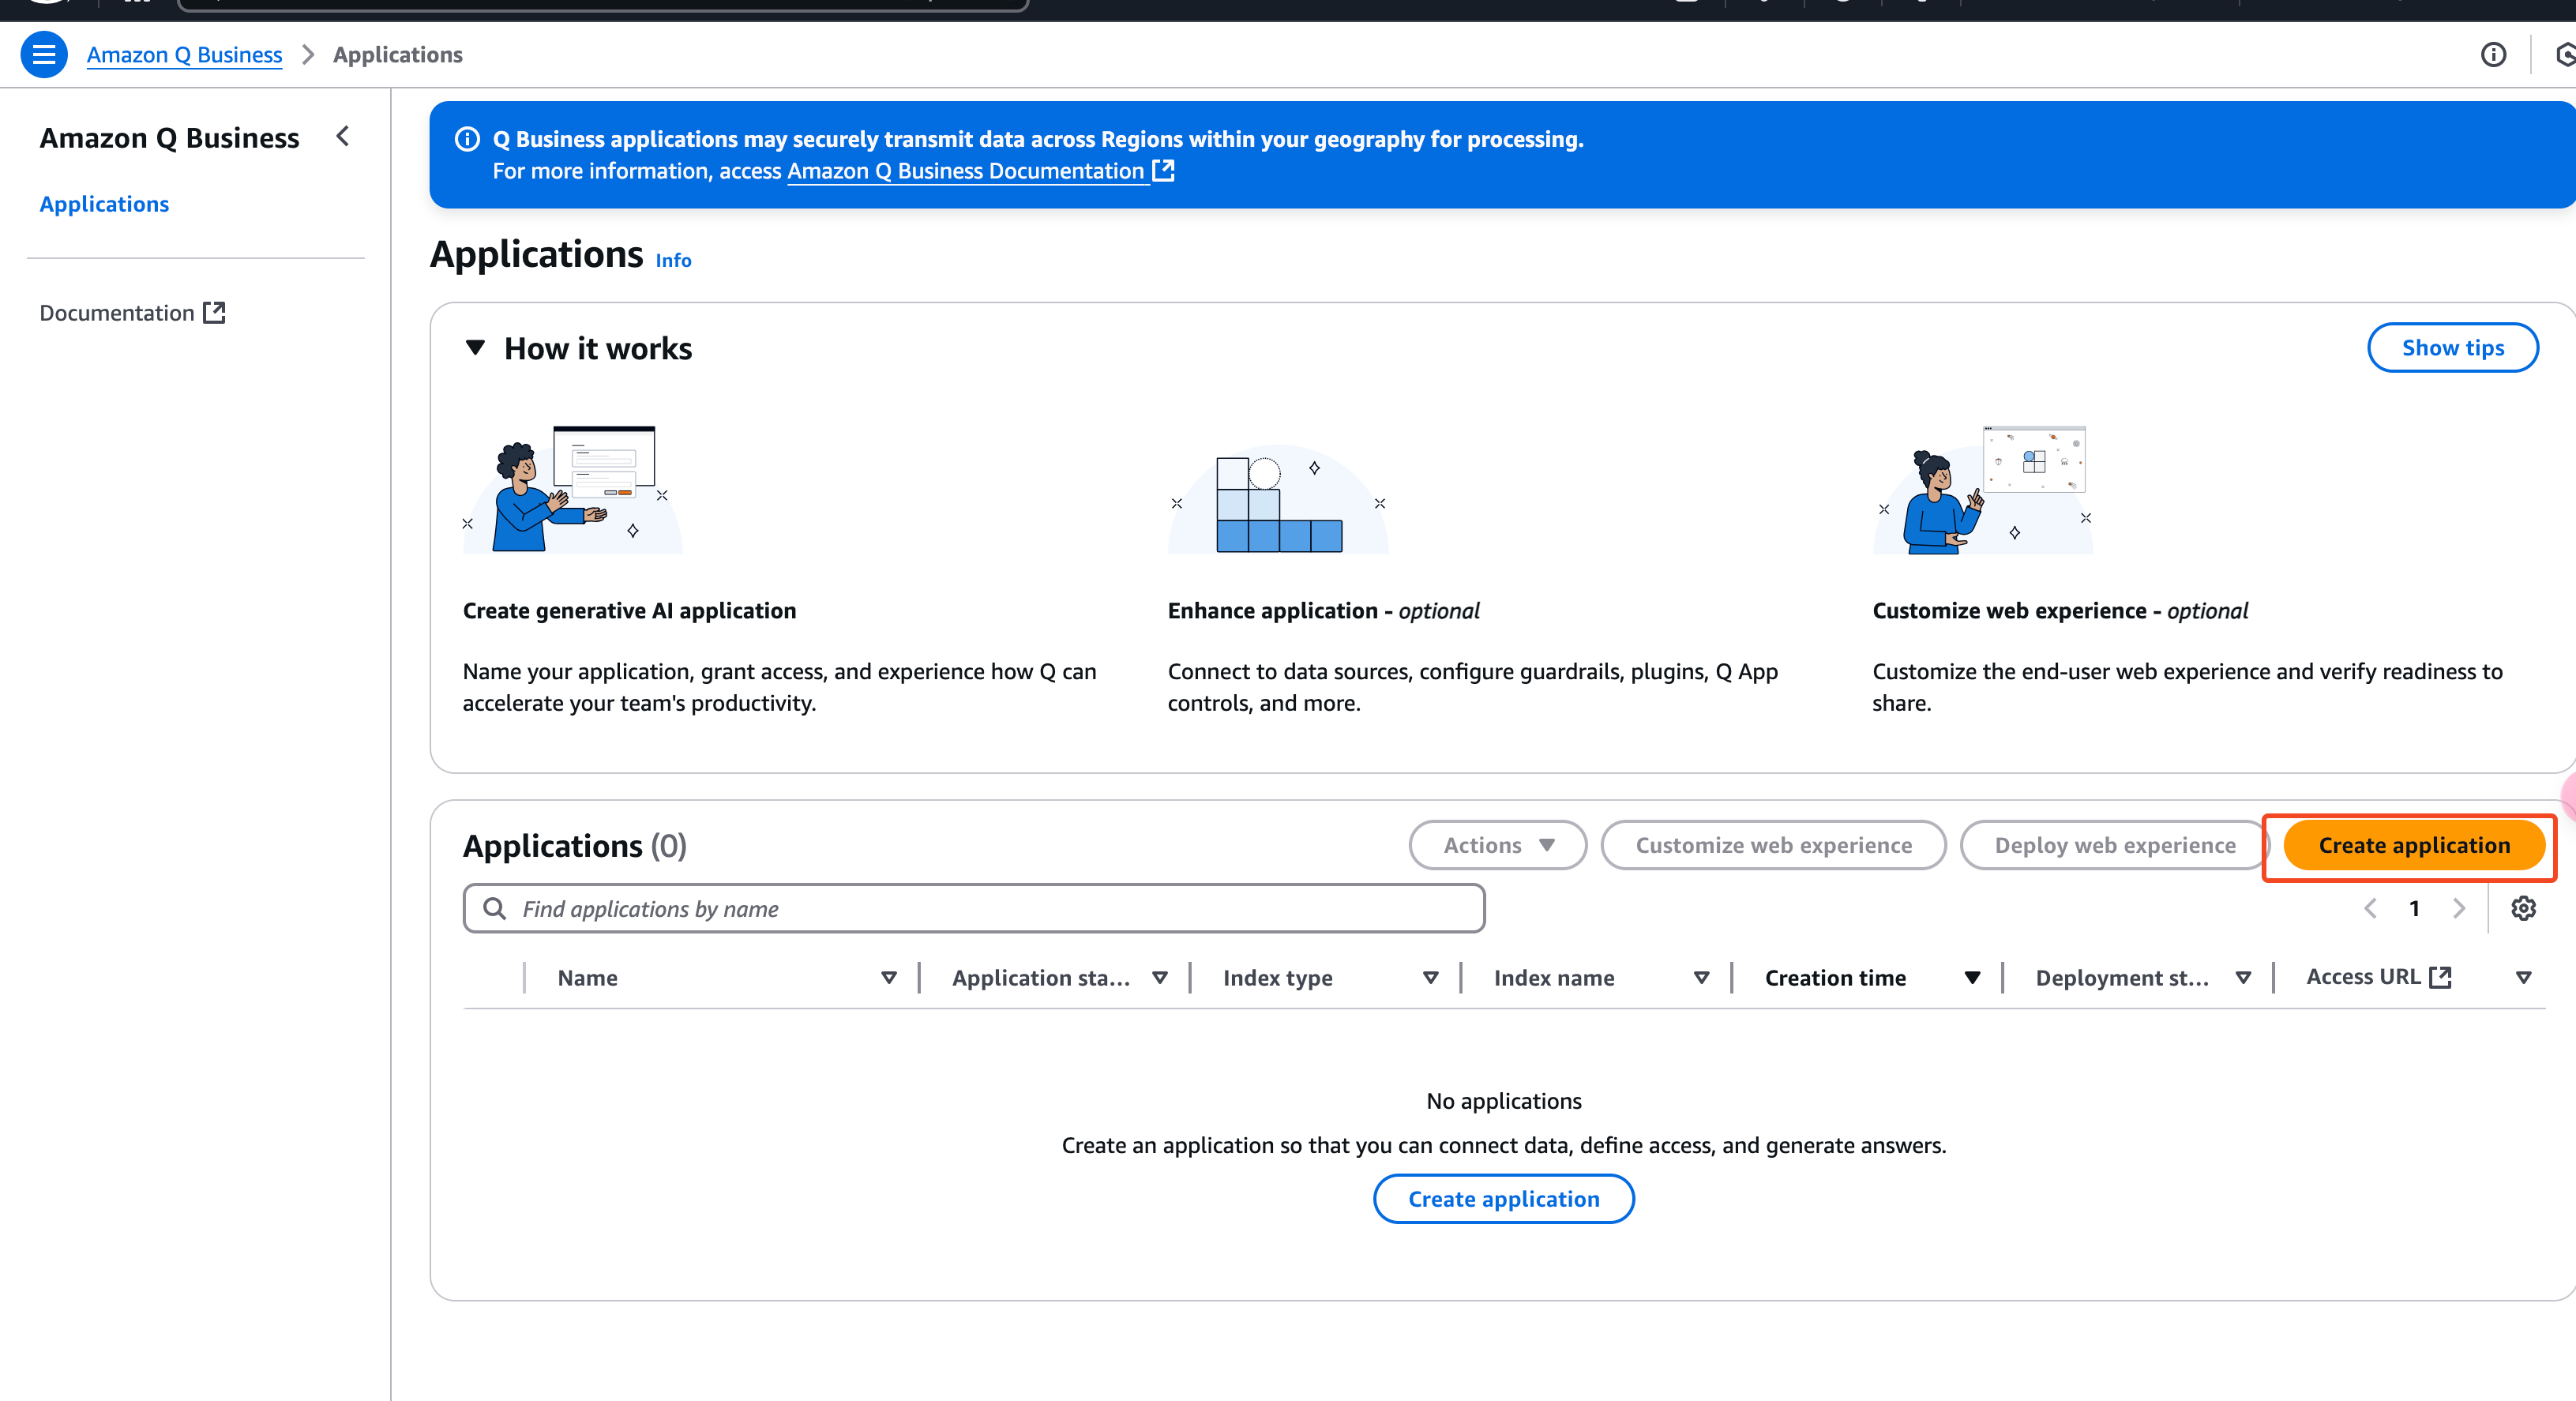
Choose Business as the application type.
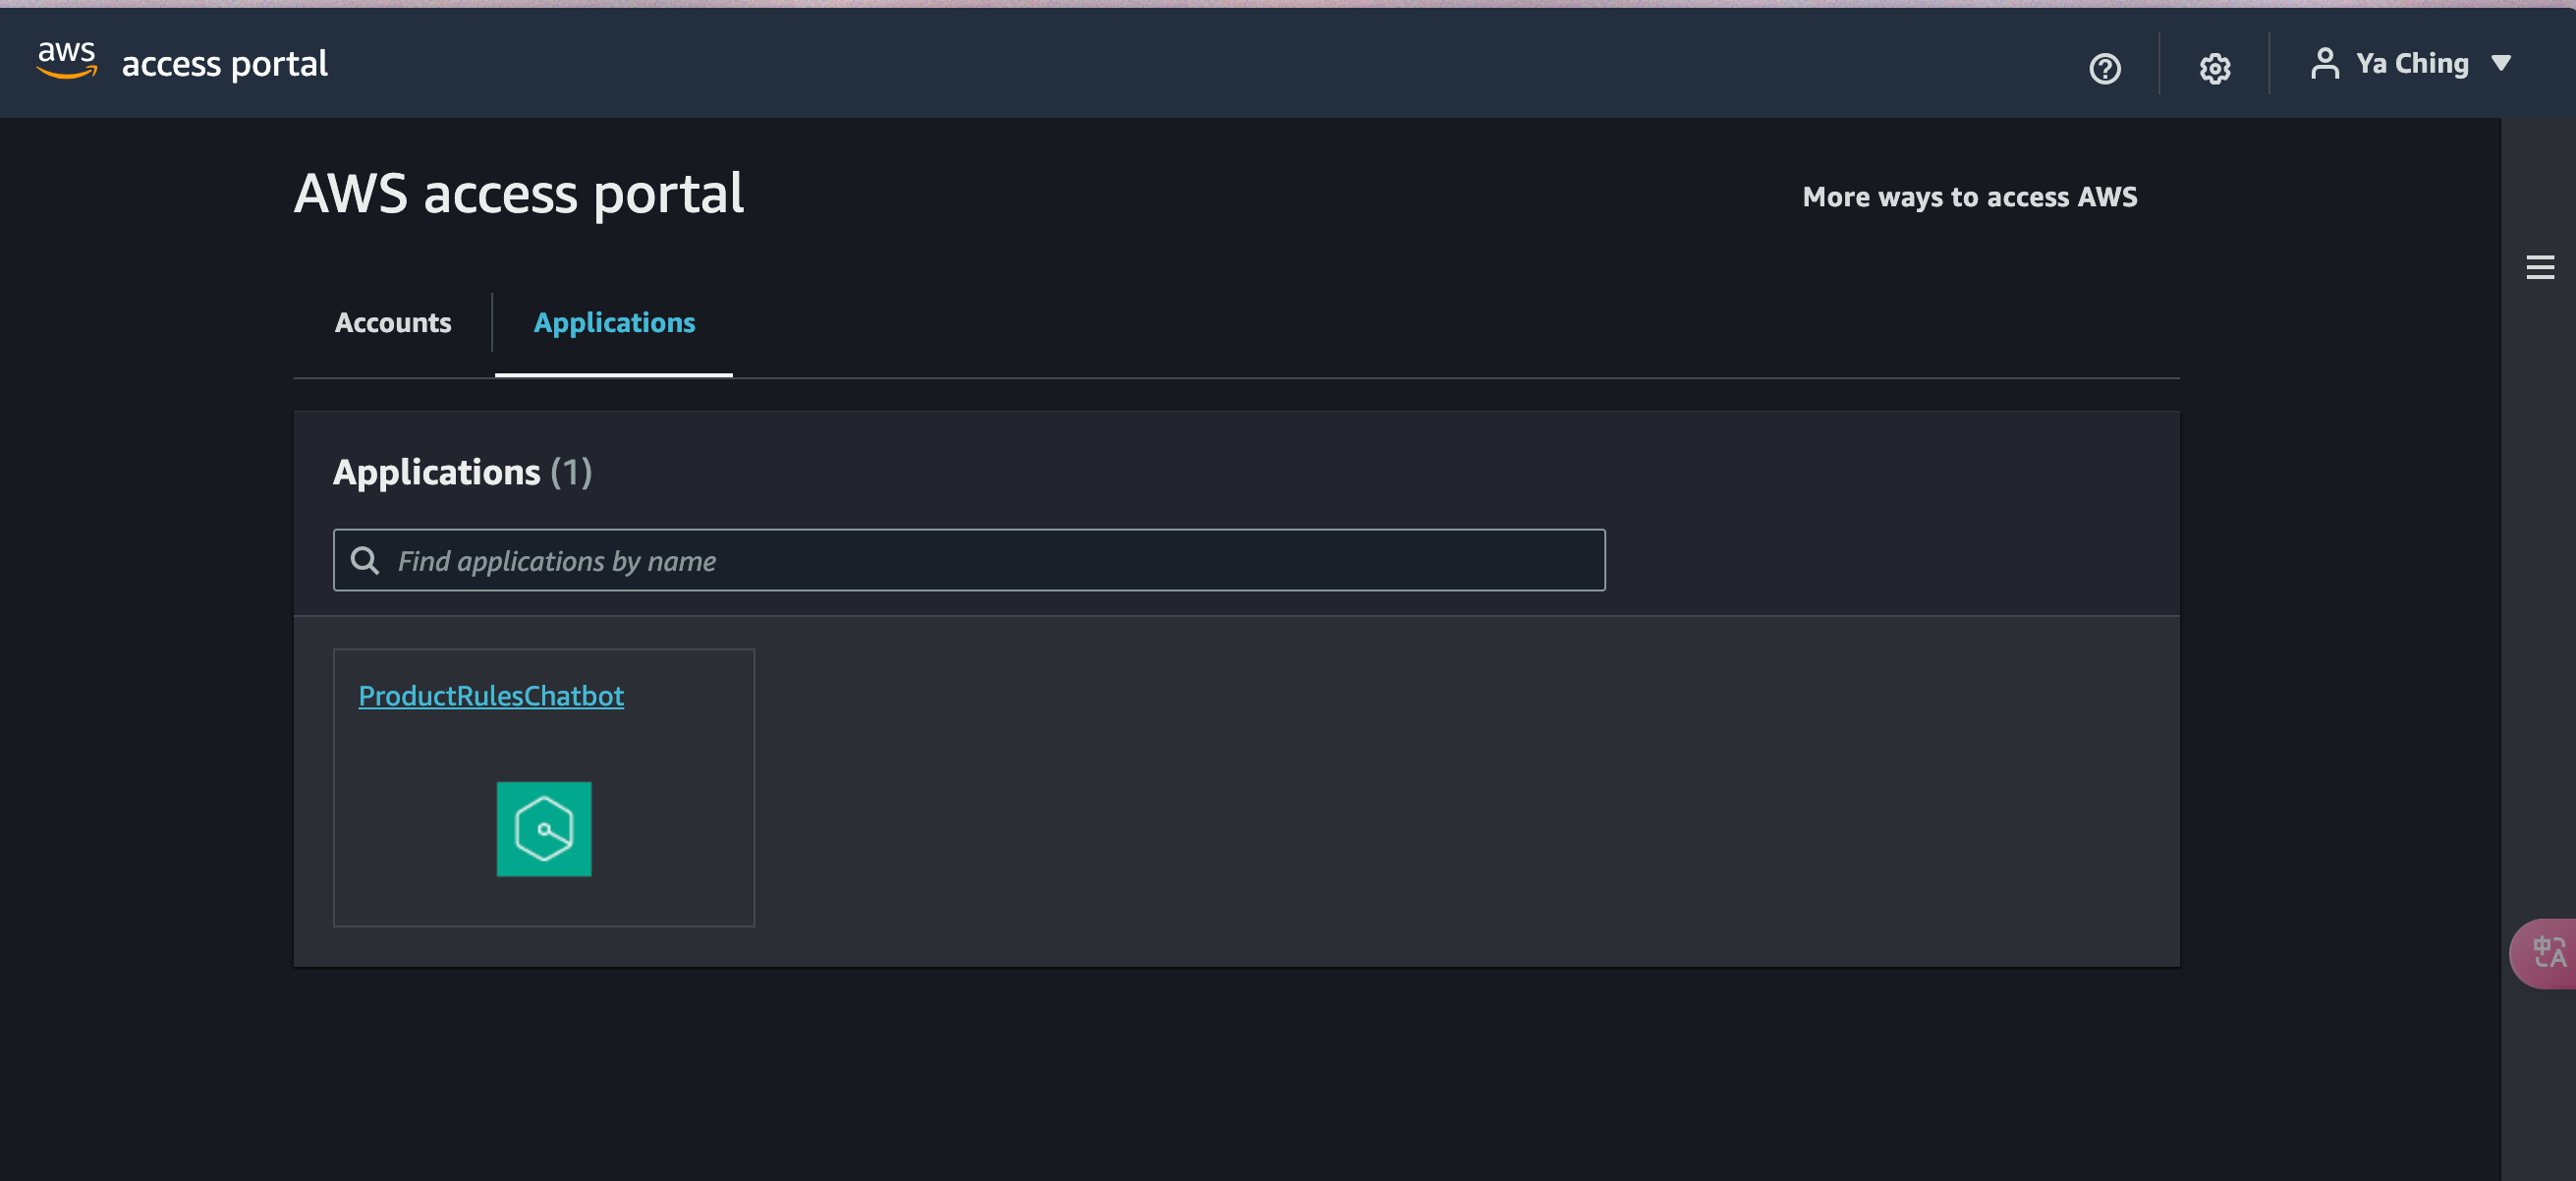
Create user.
Once that’s done, sign in and you’re ready to go.

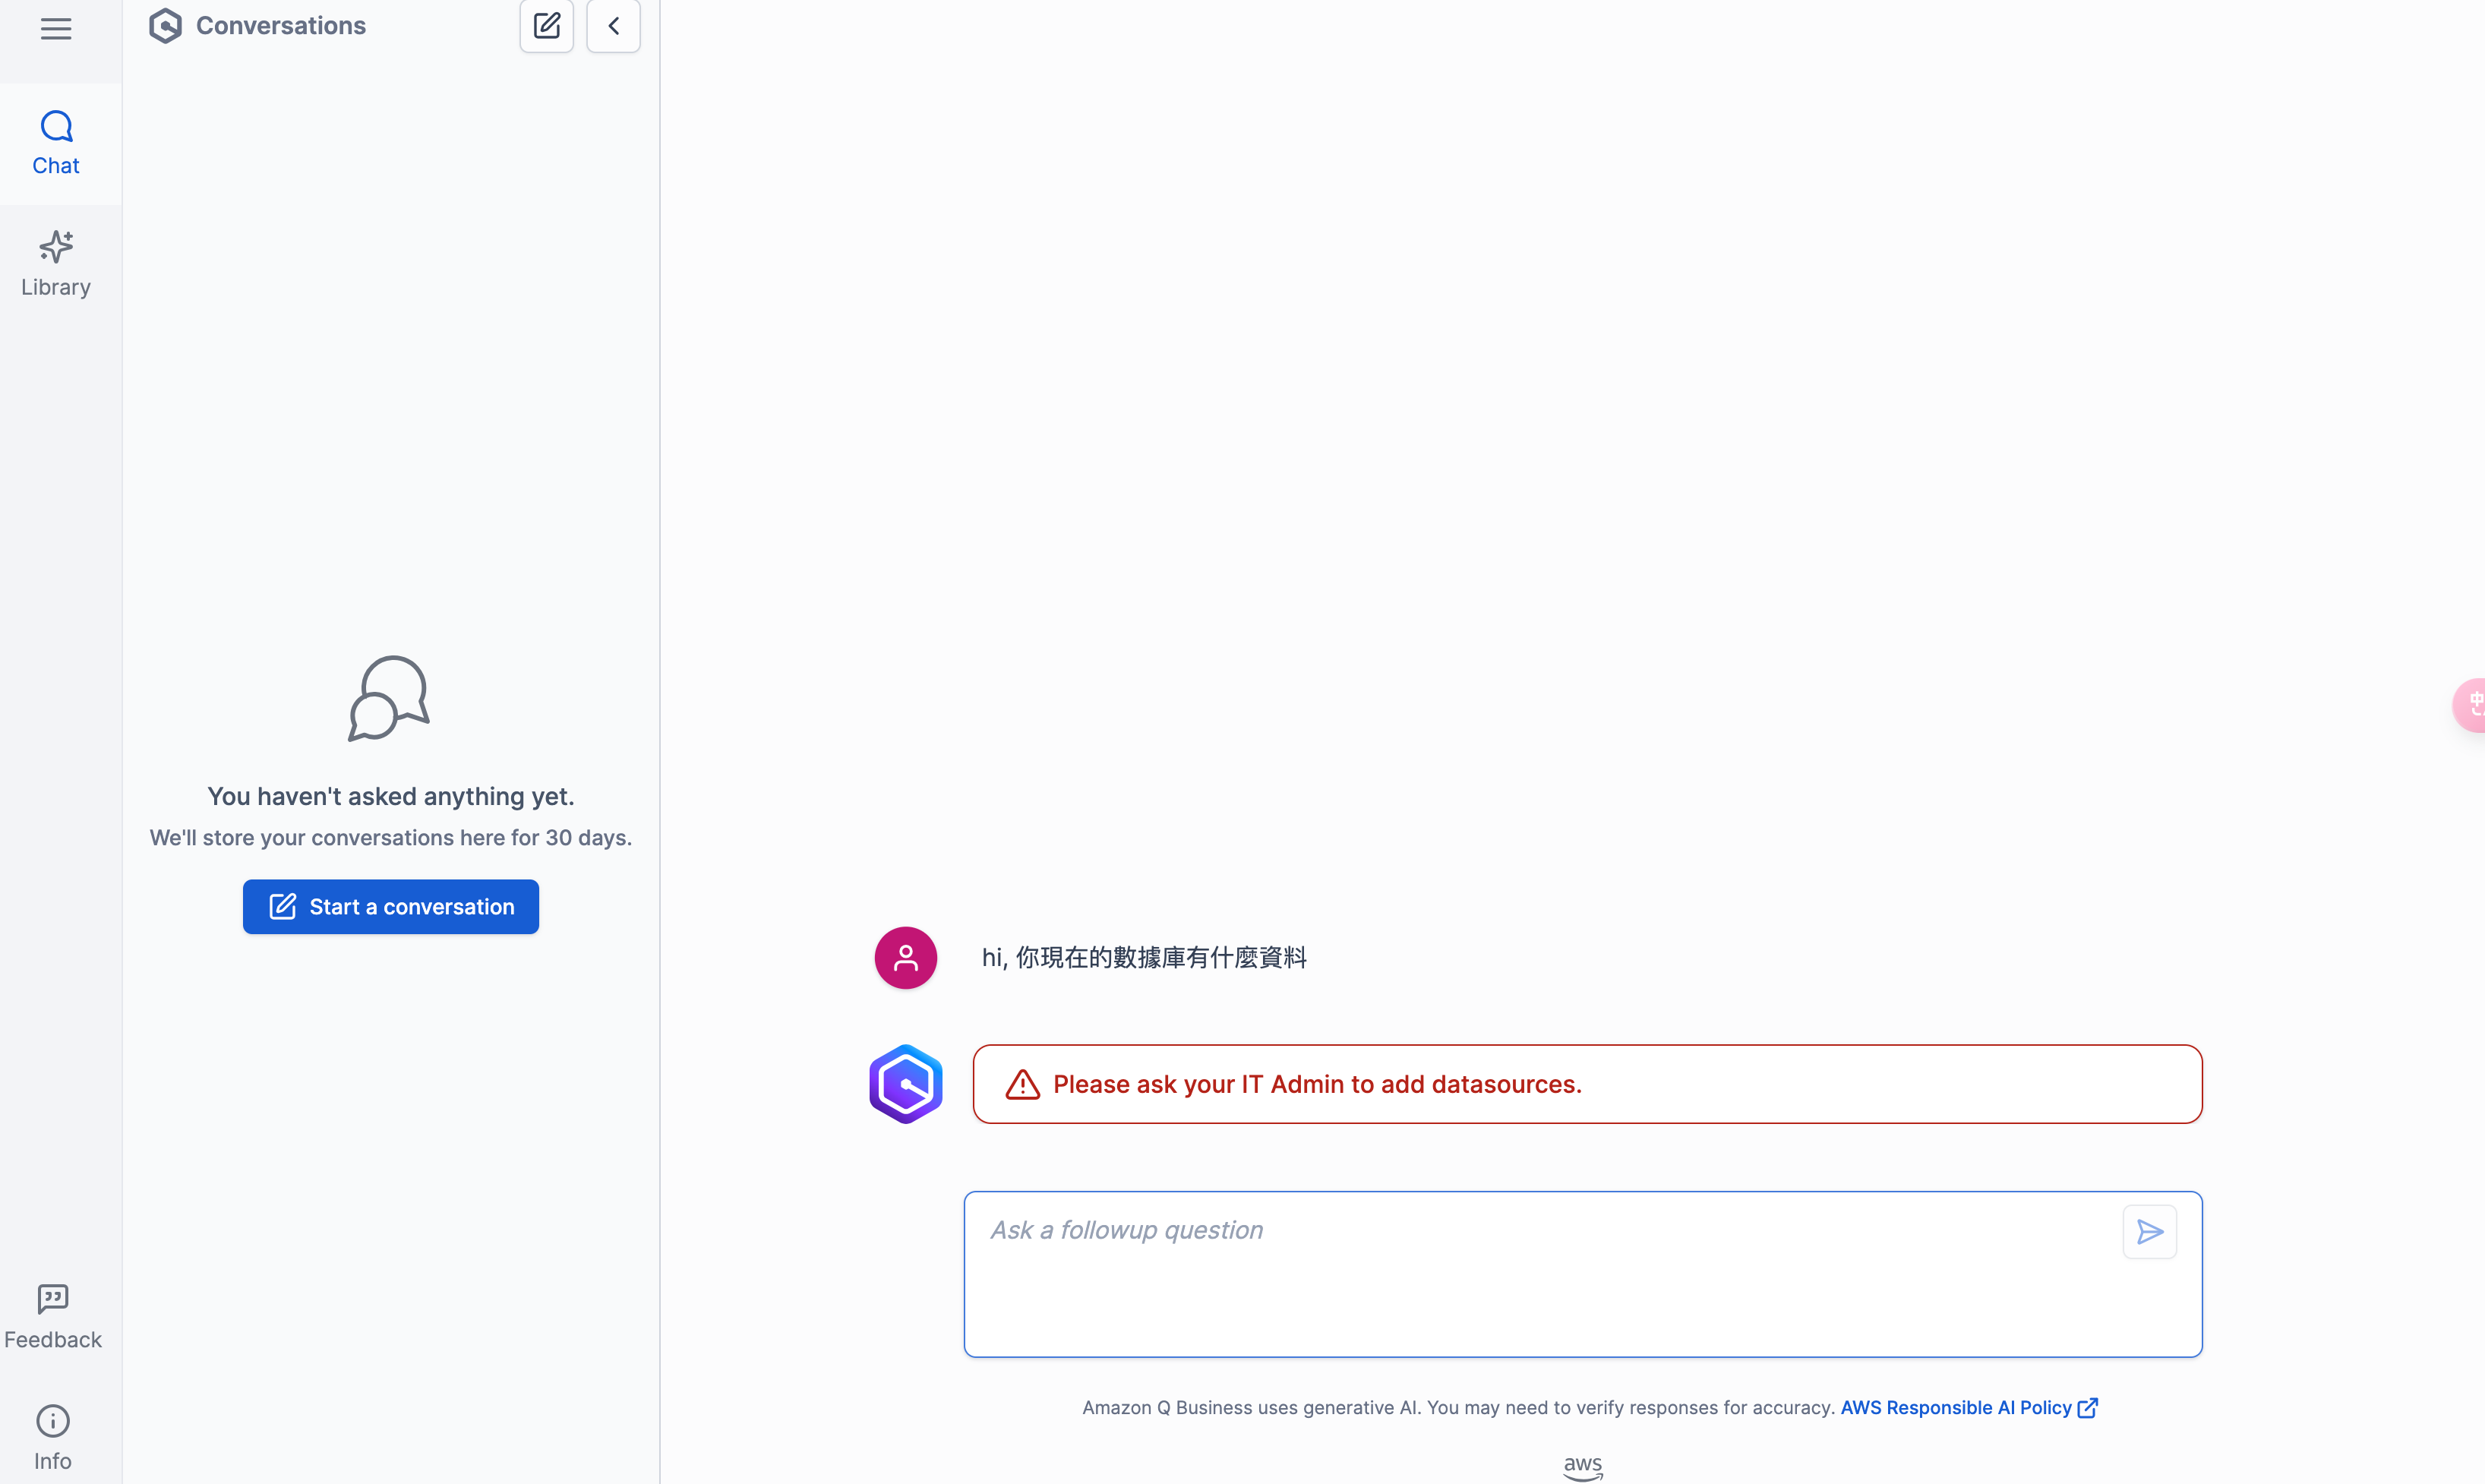
At this point it won’t answer anything yet — there’s no data indexed.
2. Configure the Confluence data source
In the Amazon Q Business console, click Data source.
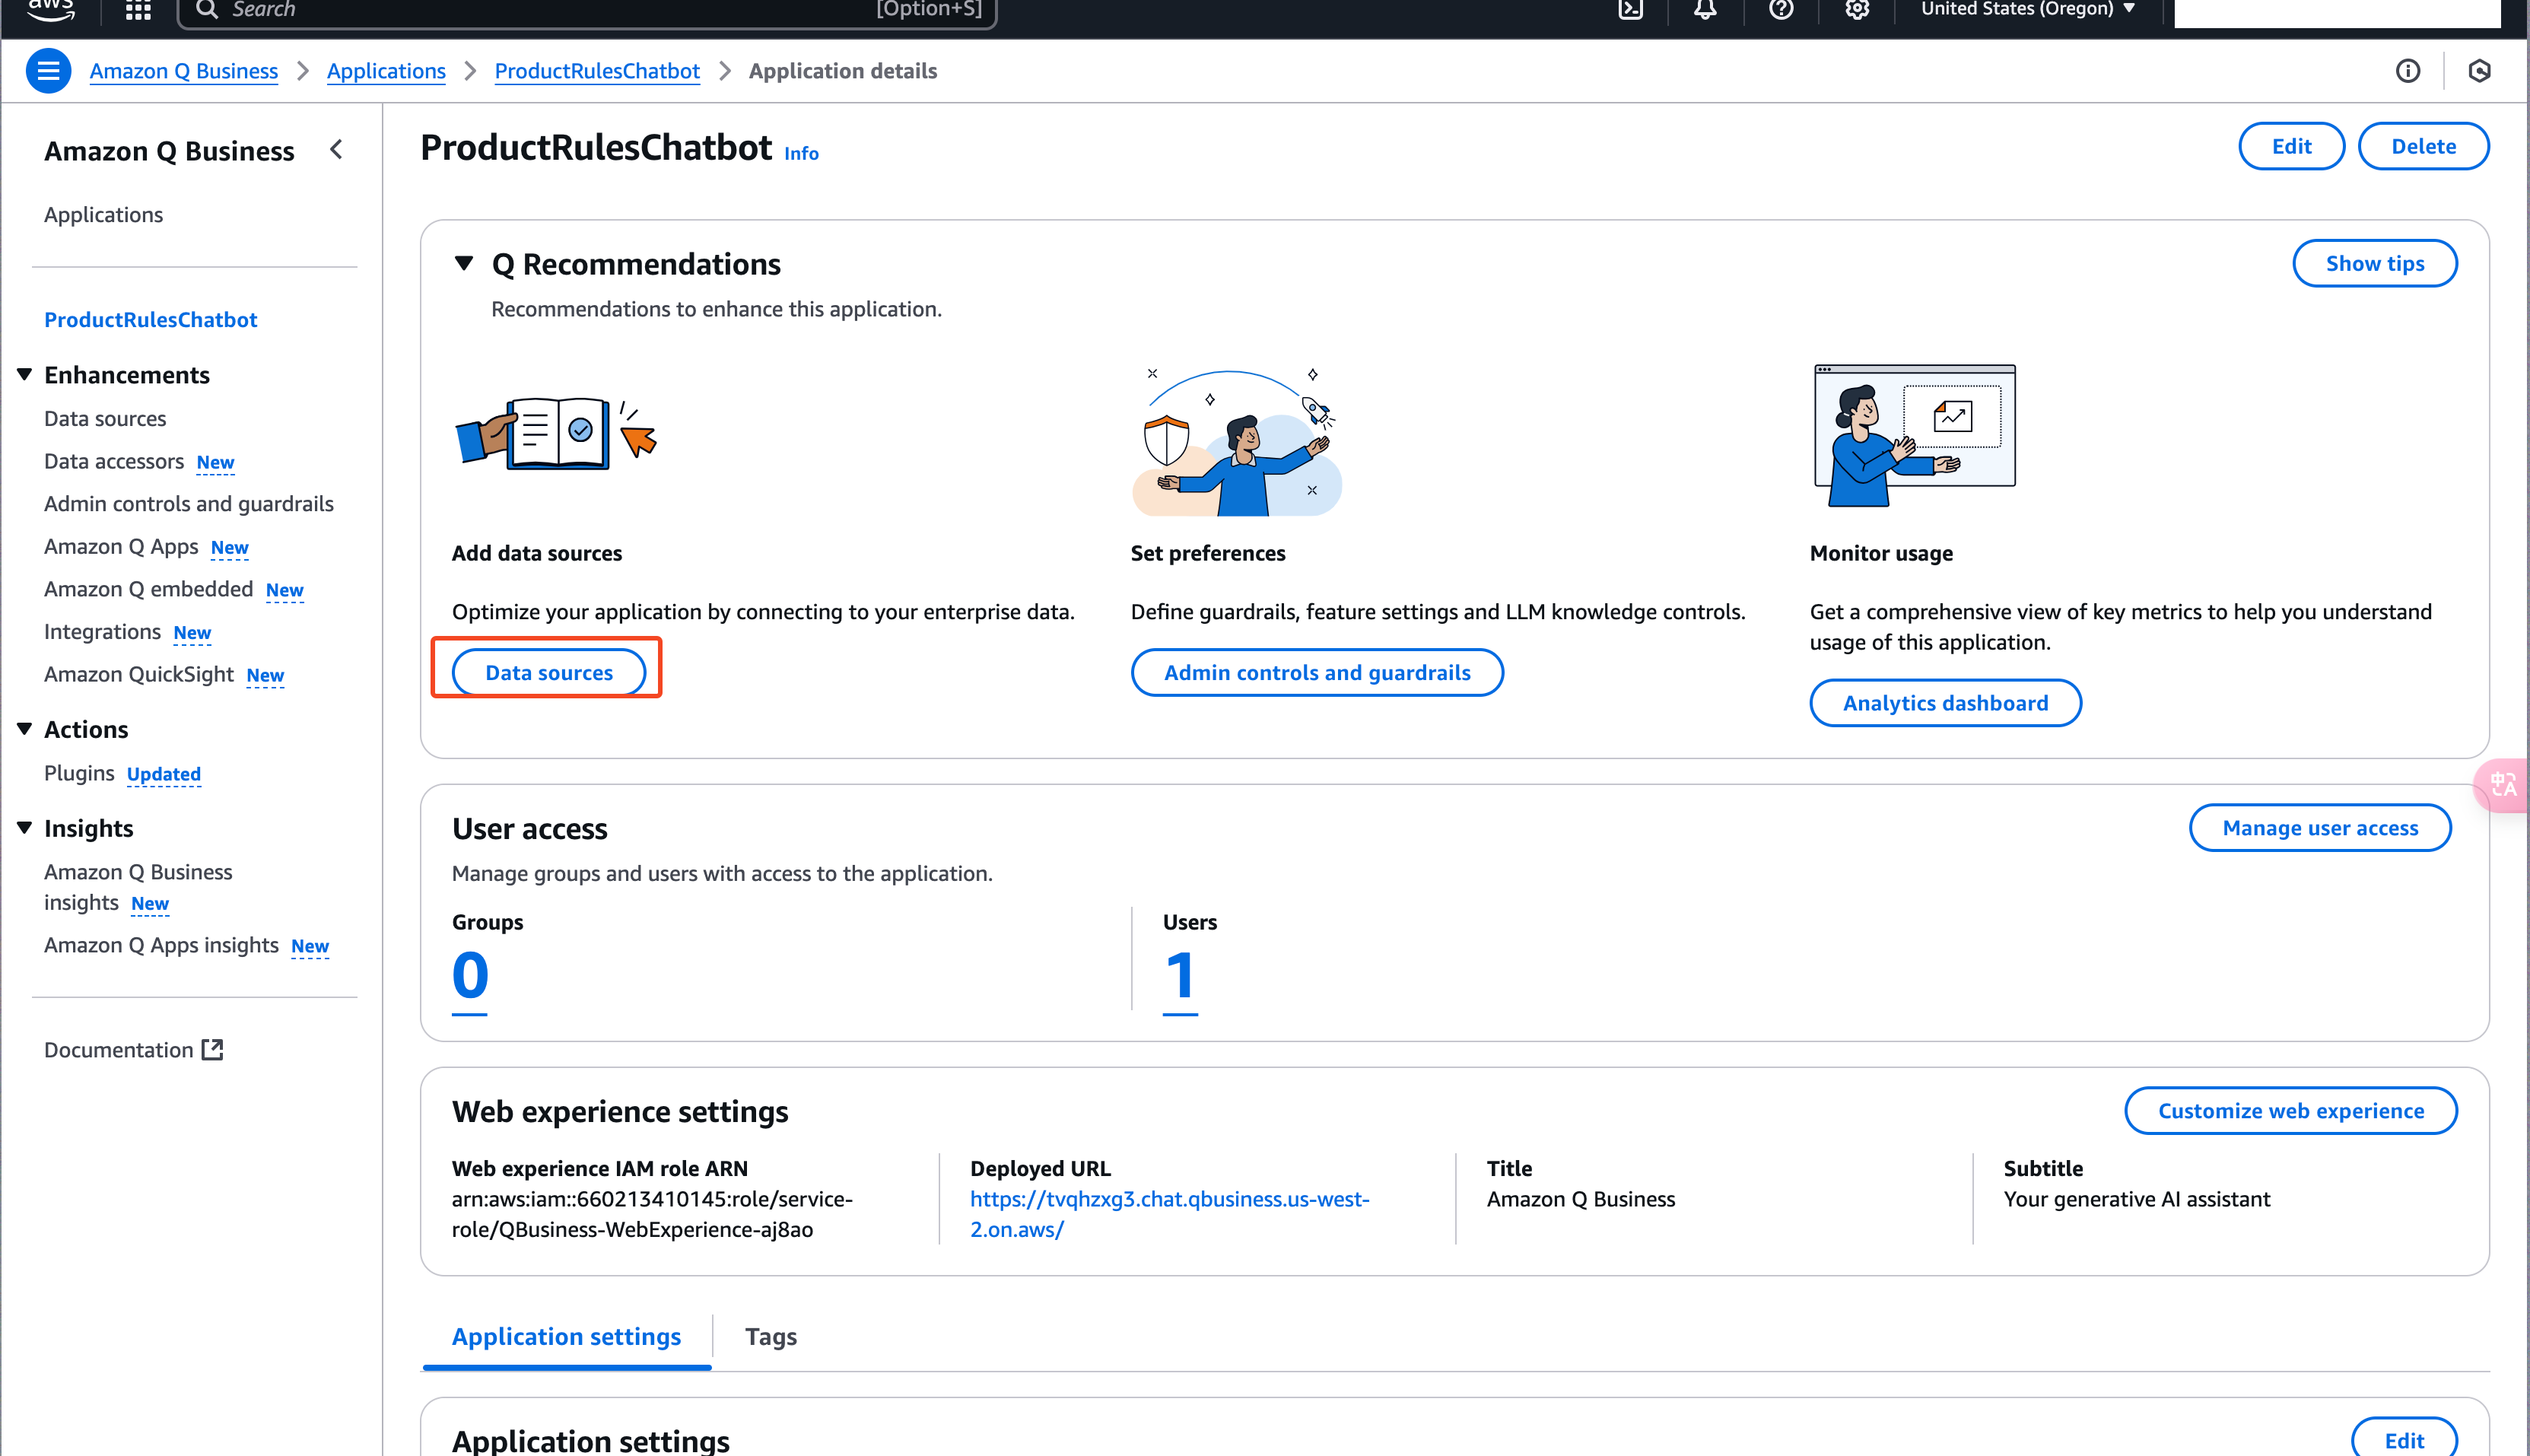
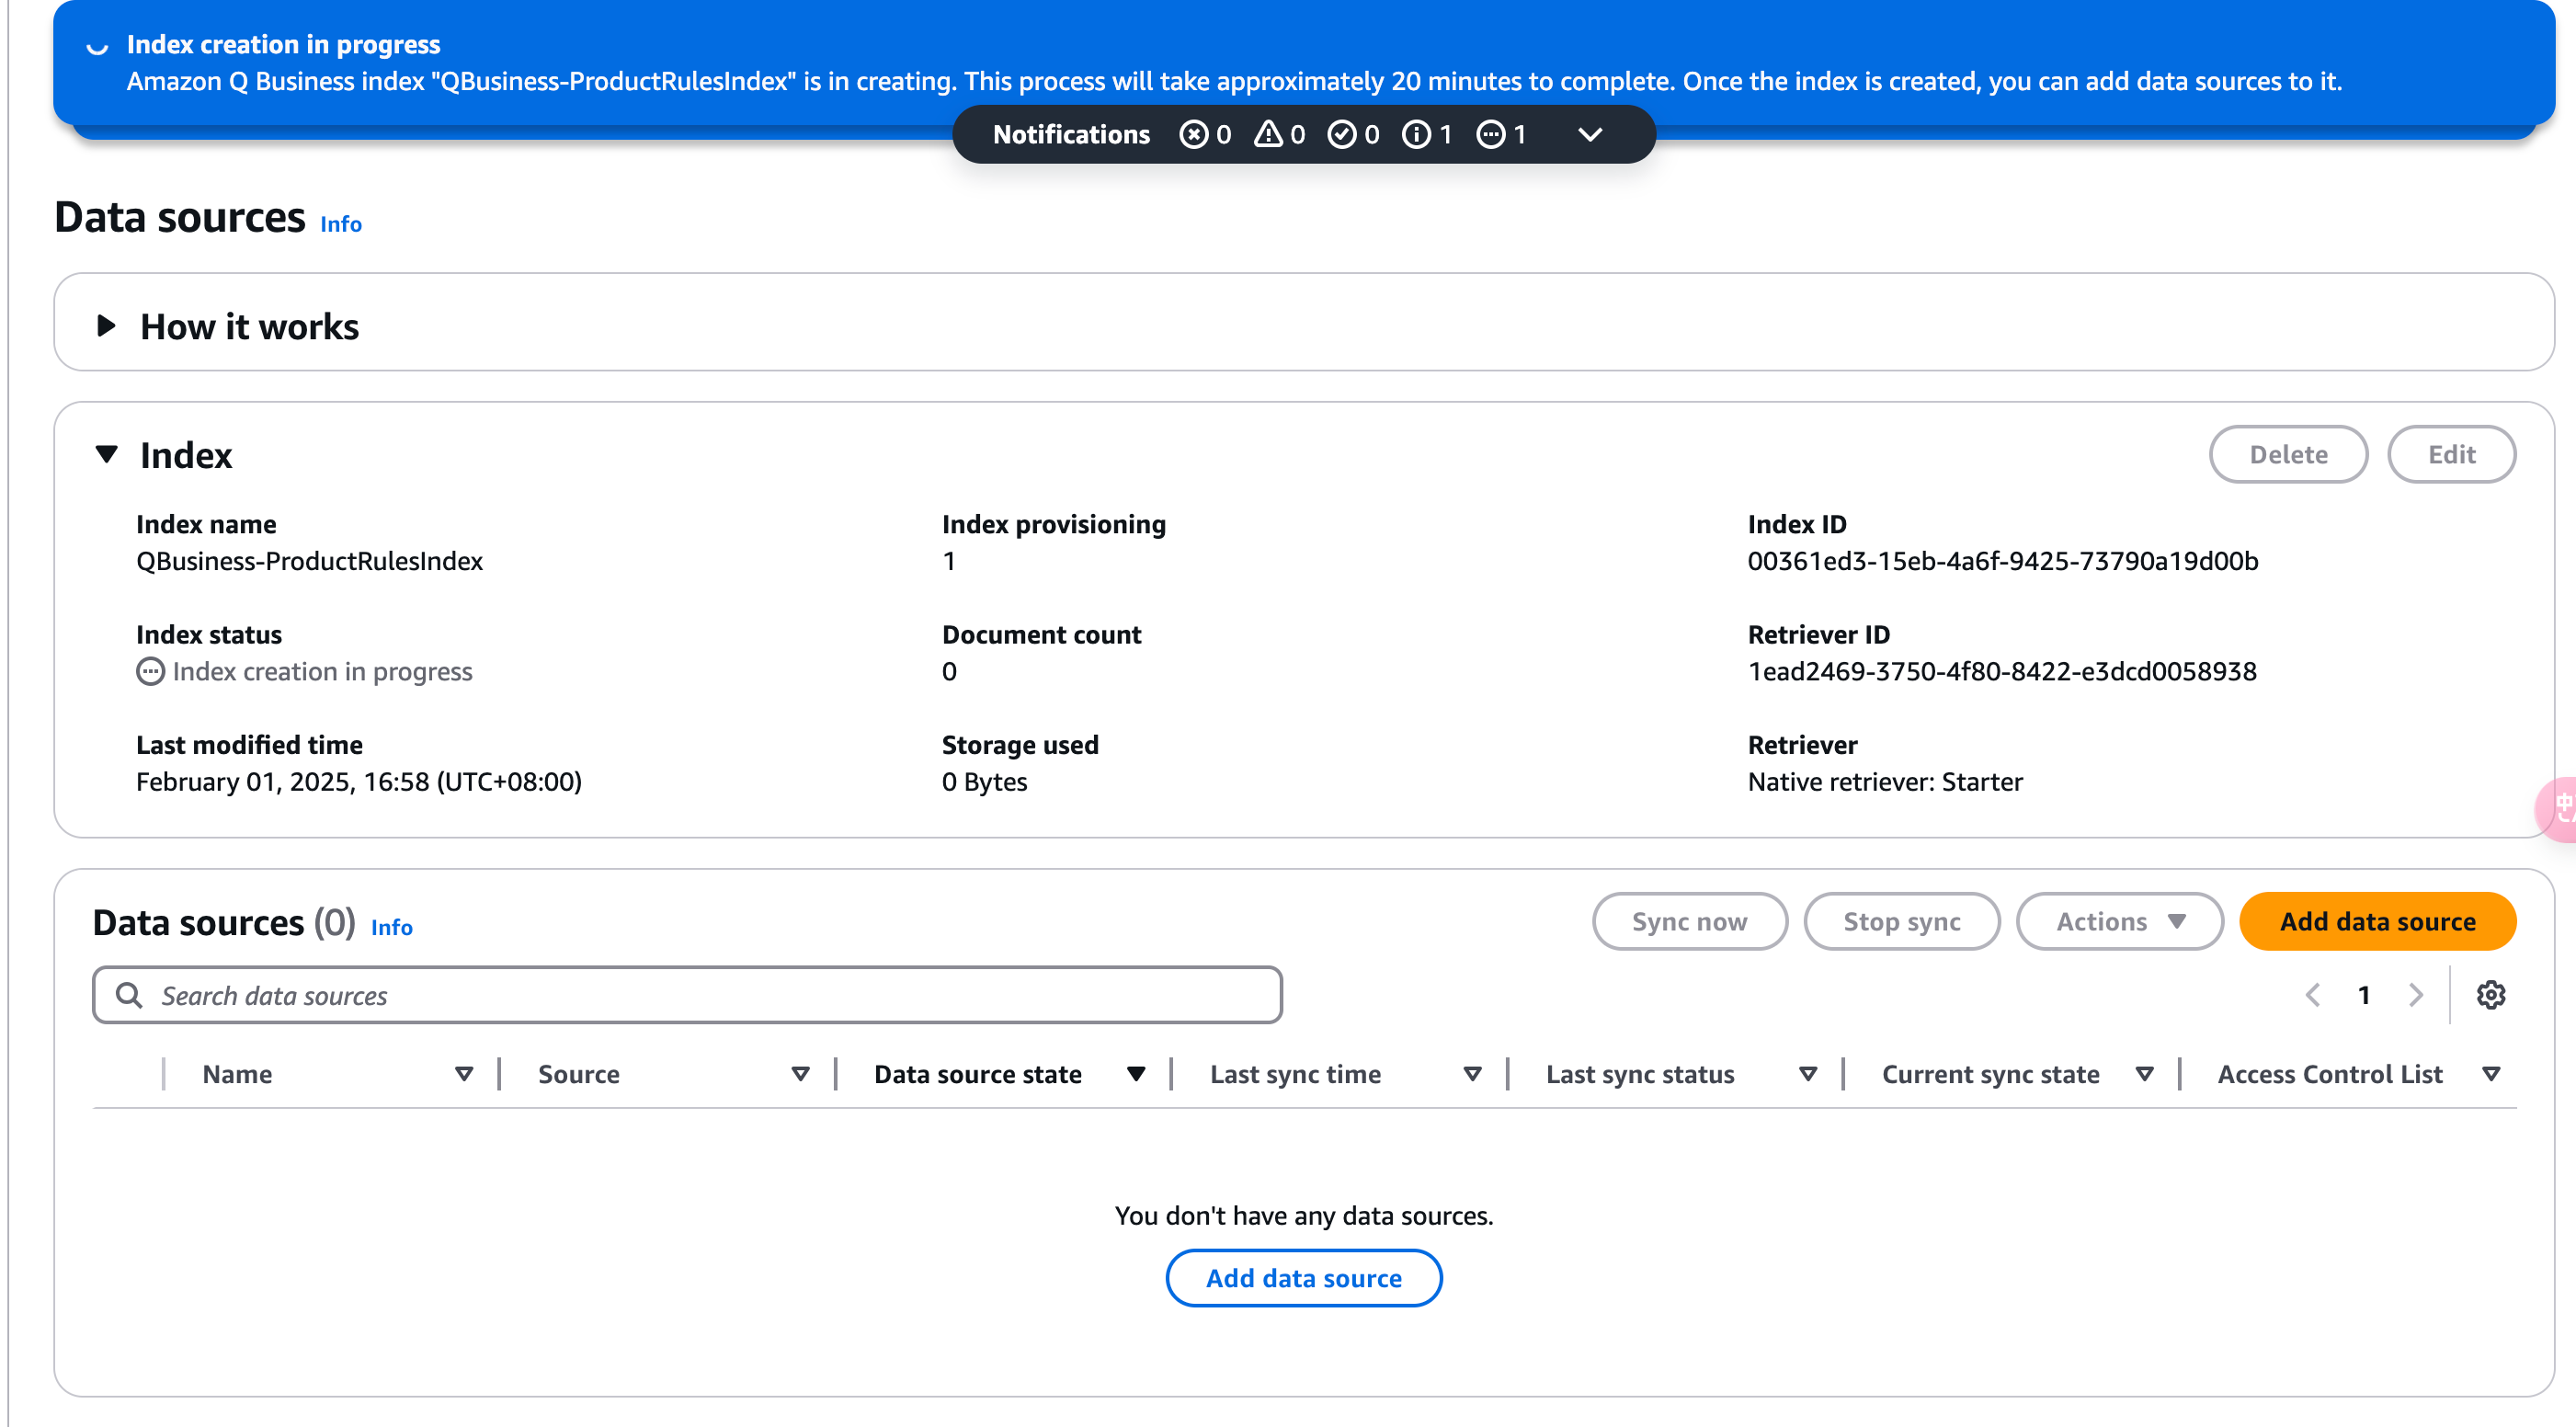
Add an index.
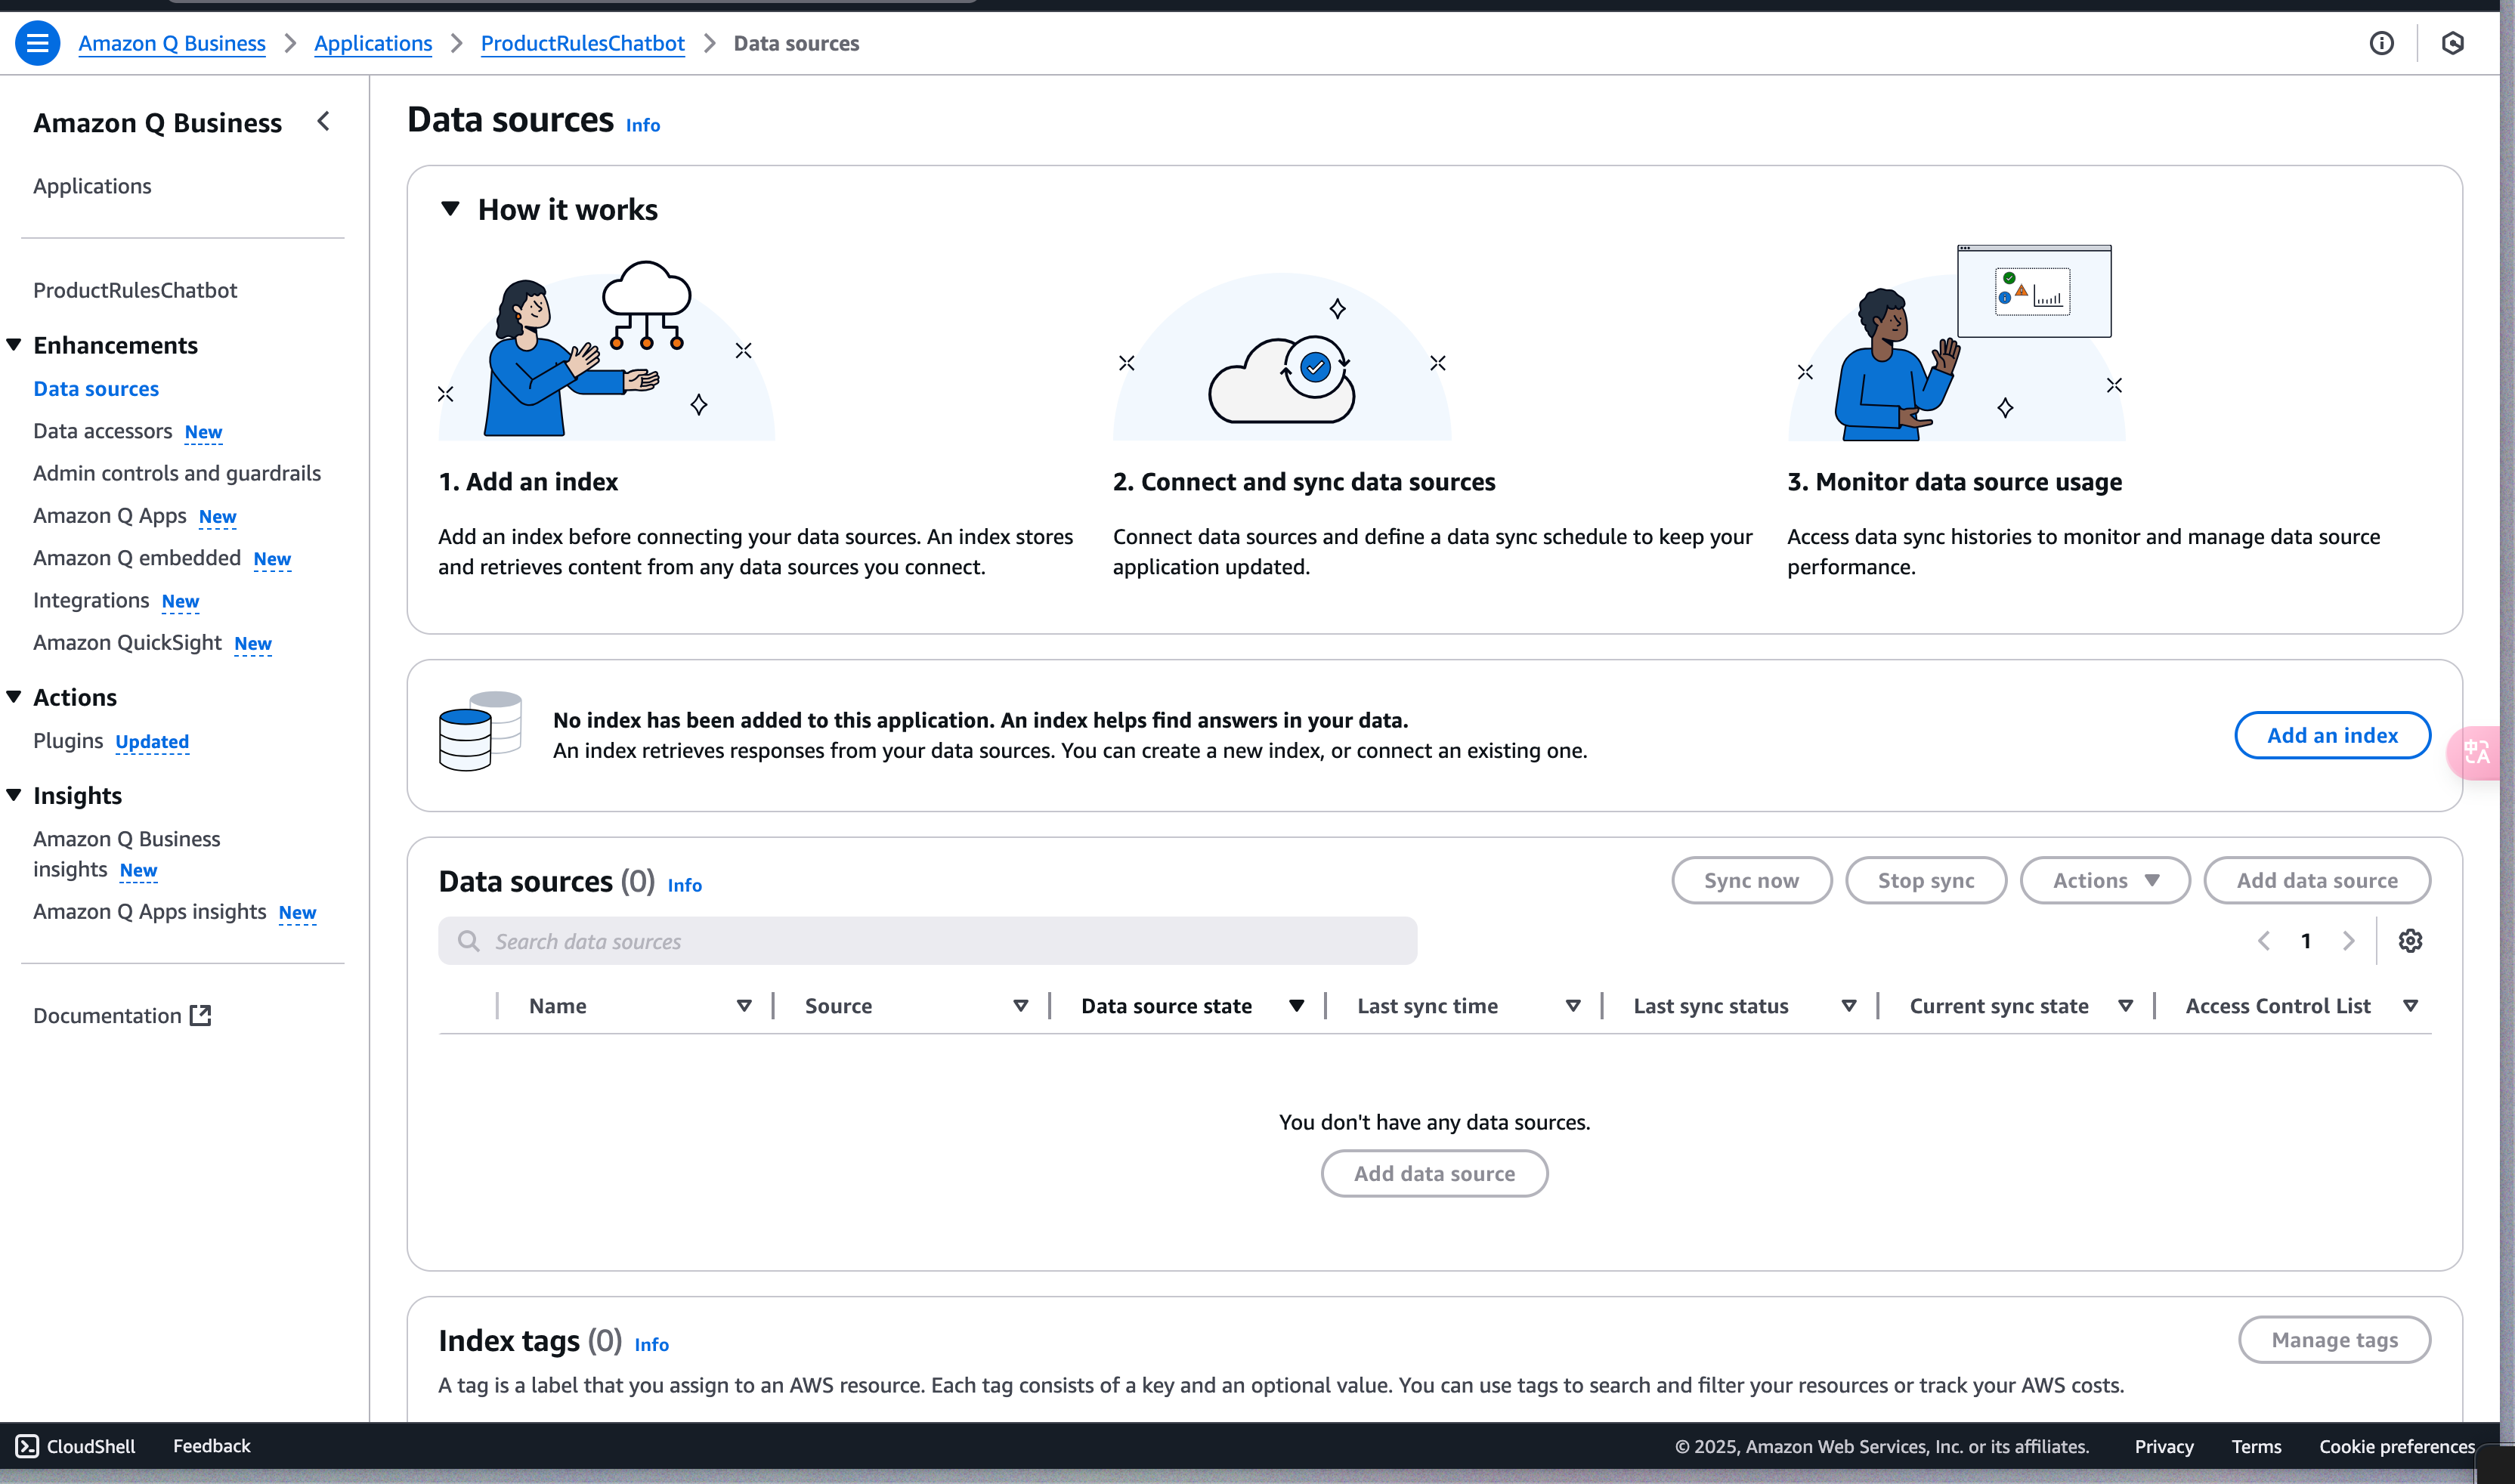
Provisioning the index takes about 20 minutes.
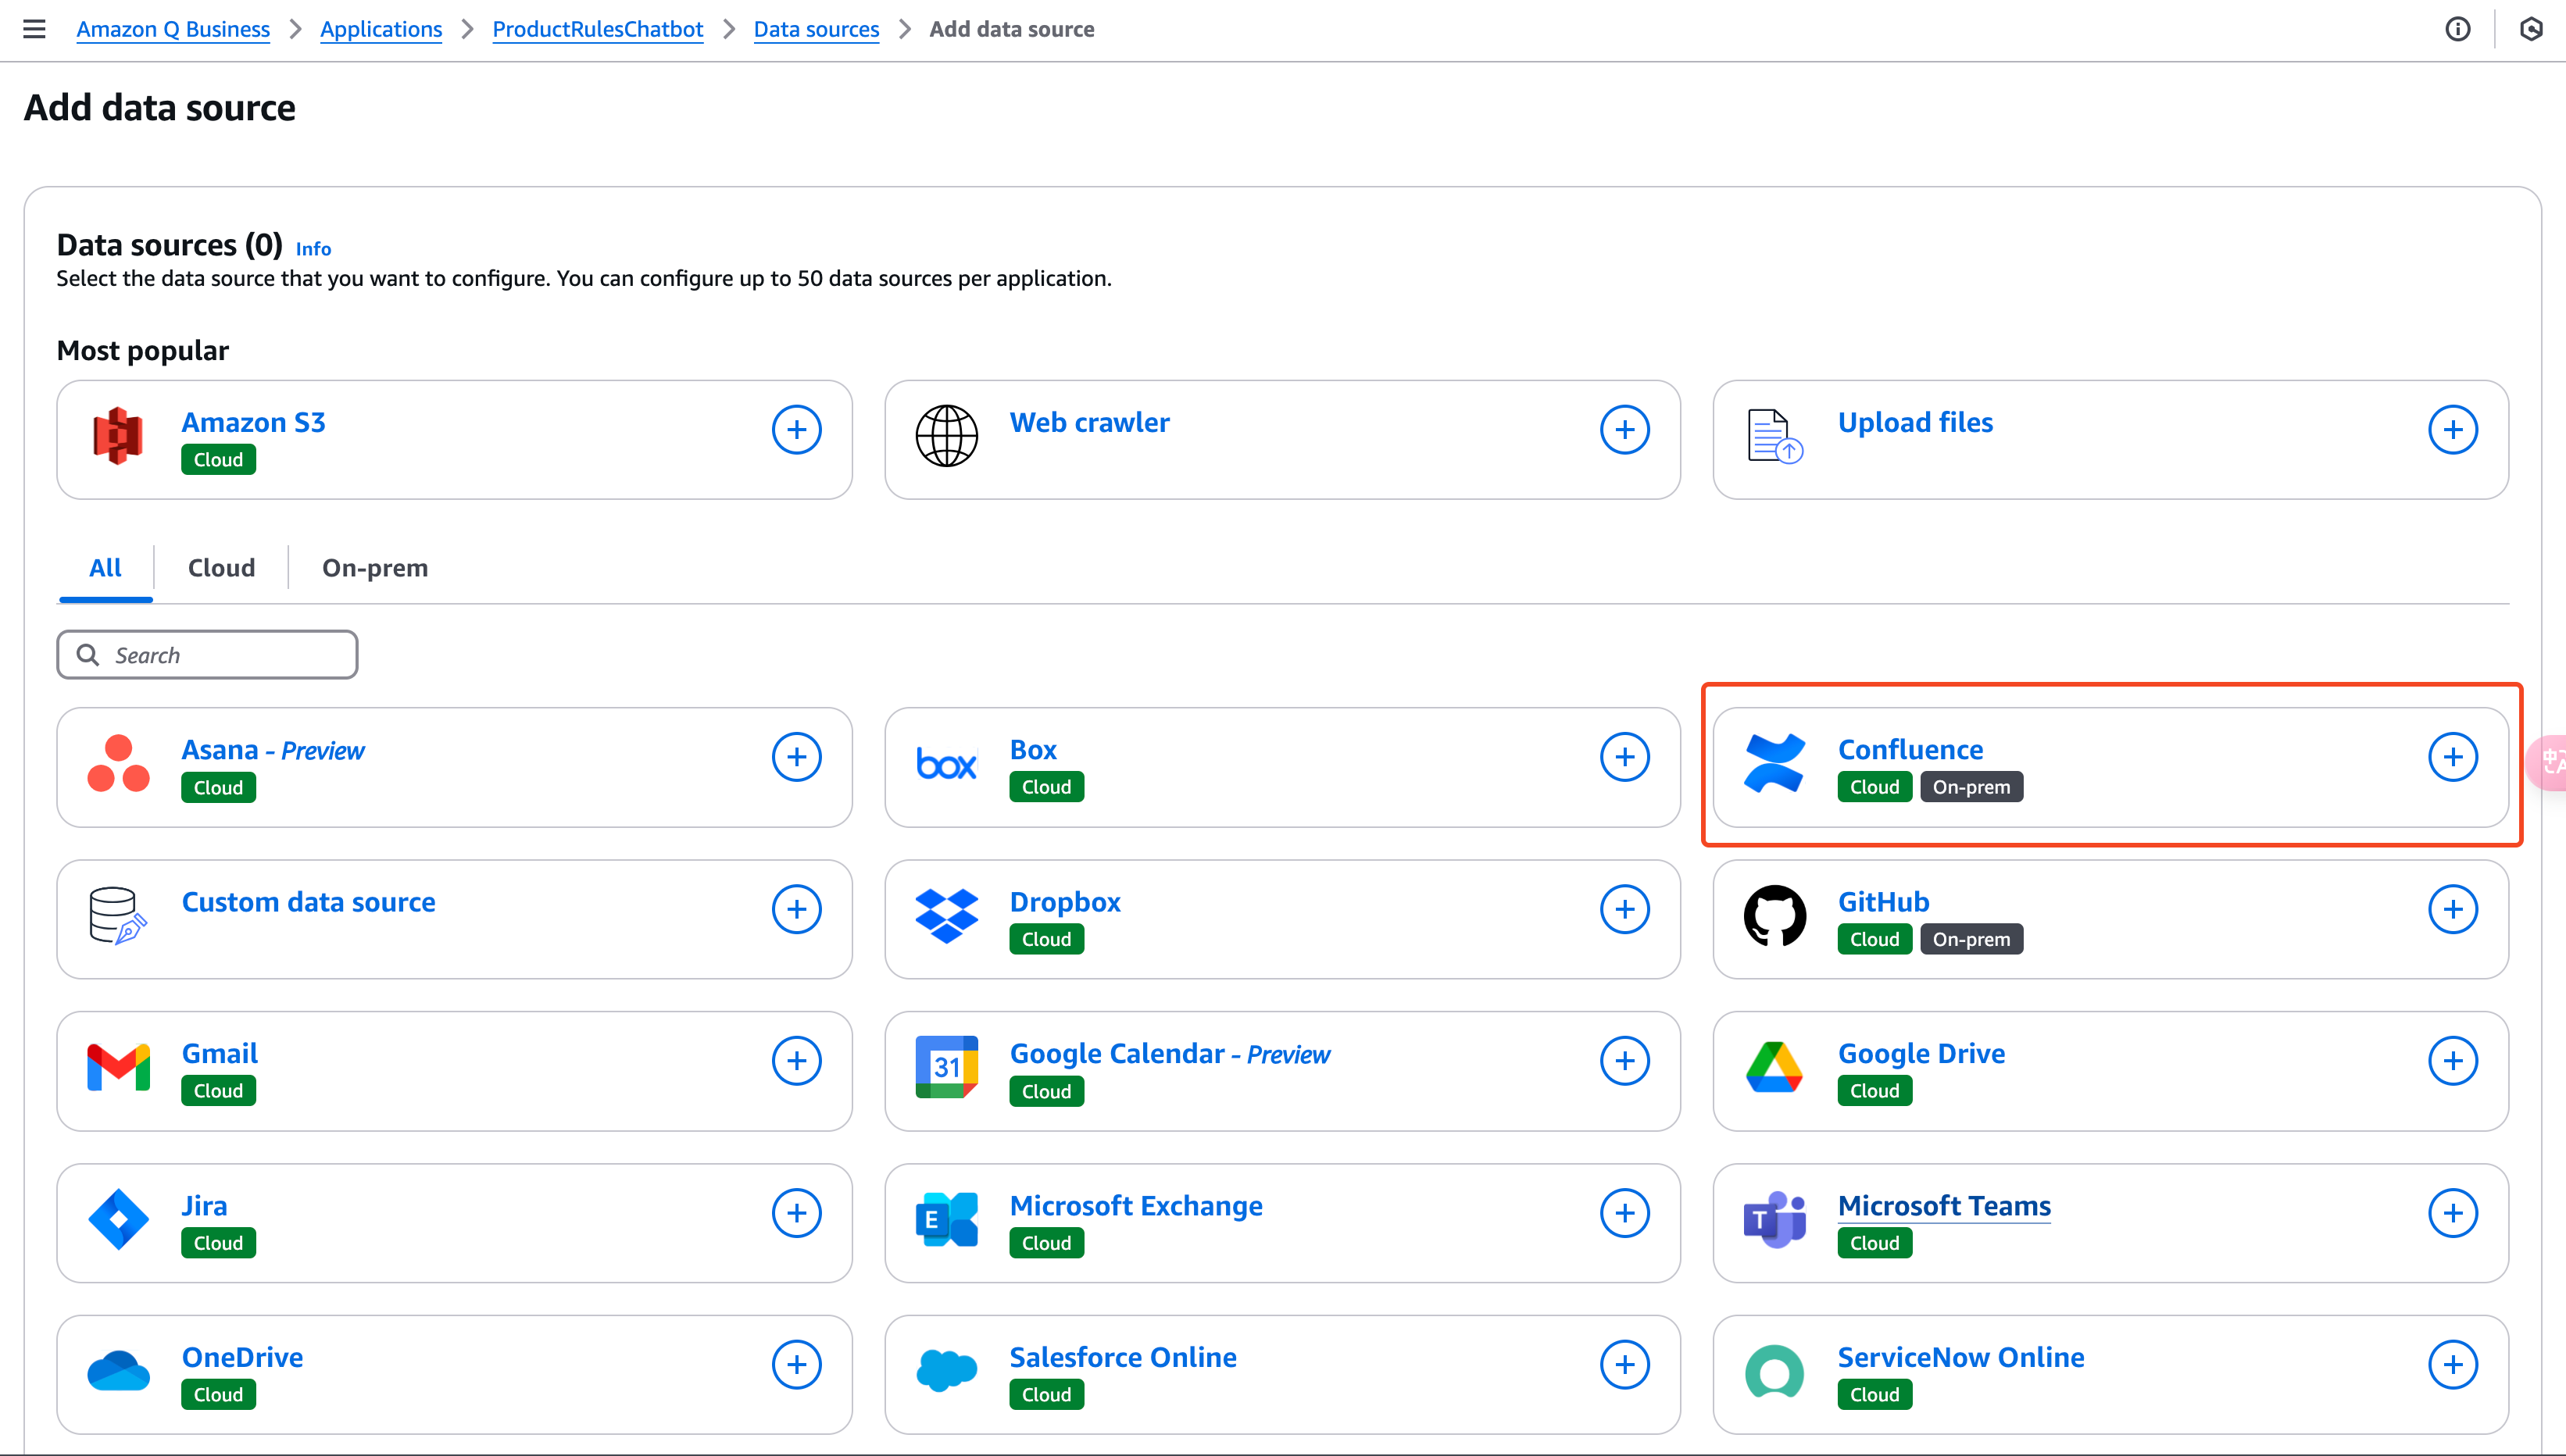
Choose Confluence as the data-source type.
Enter the Confluence URL, API token, and the other required details.
URL
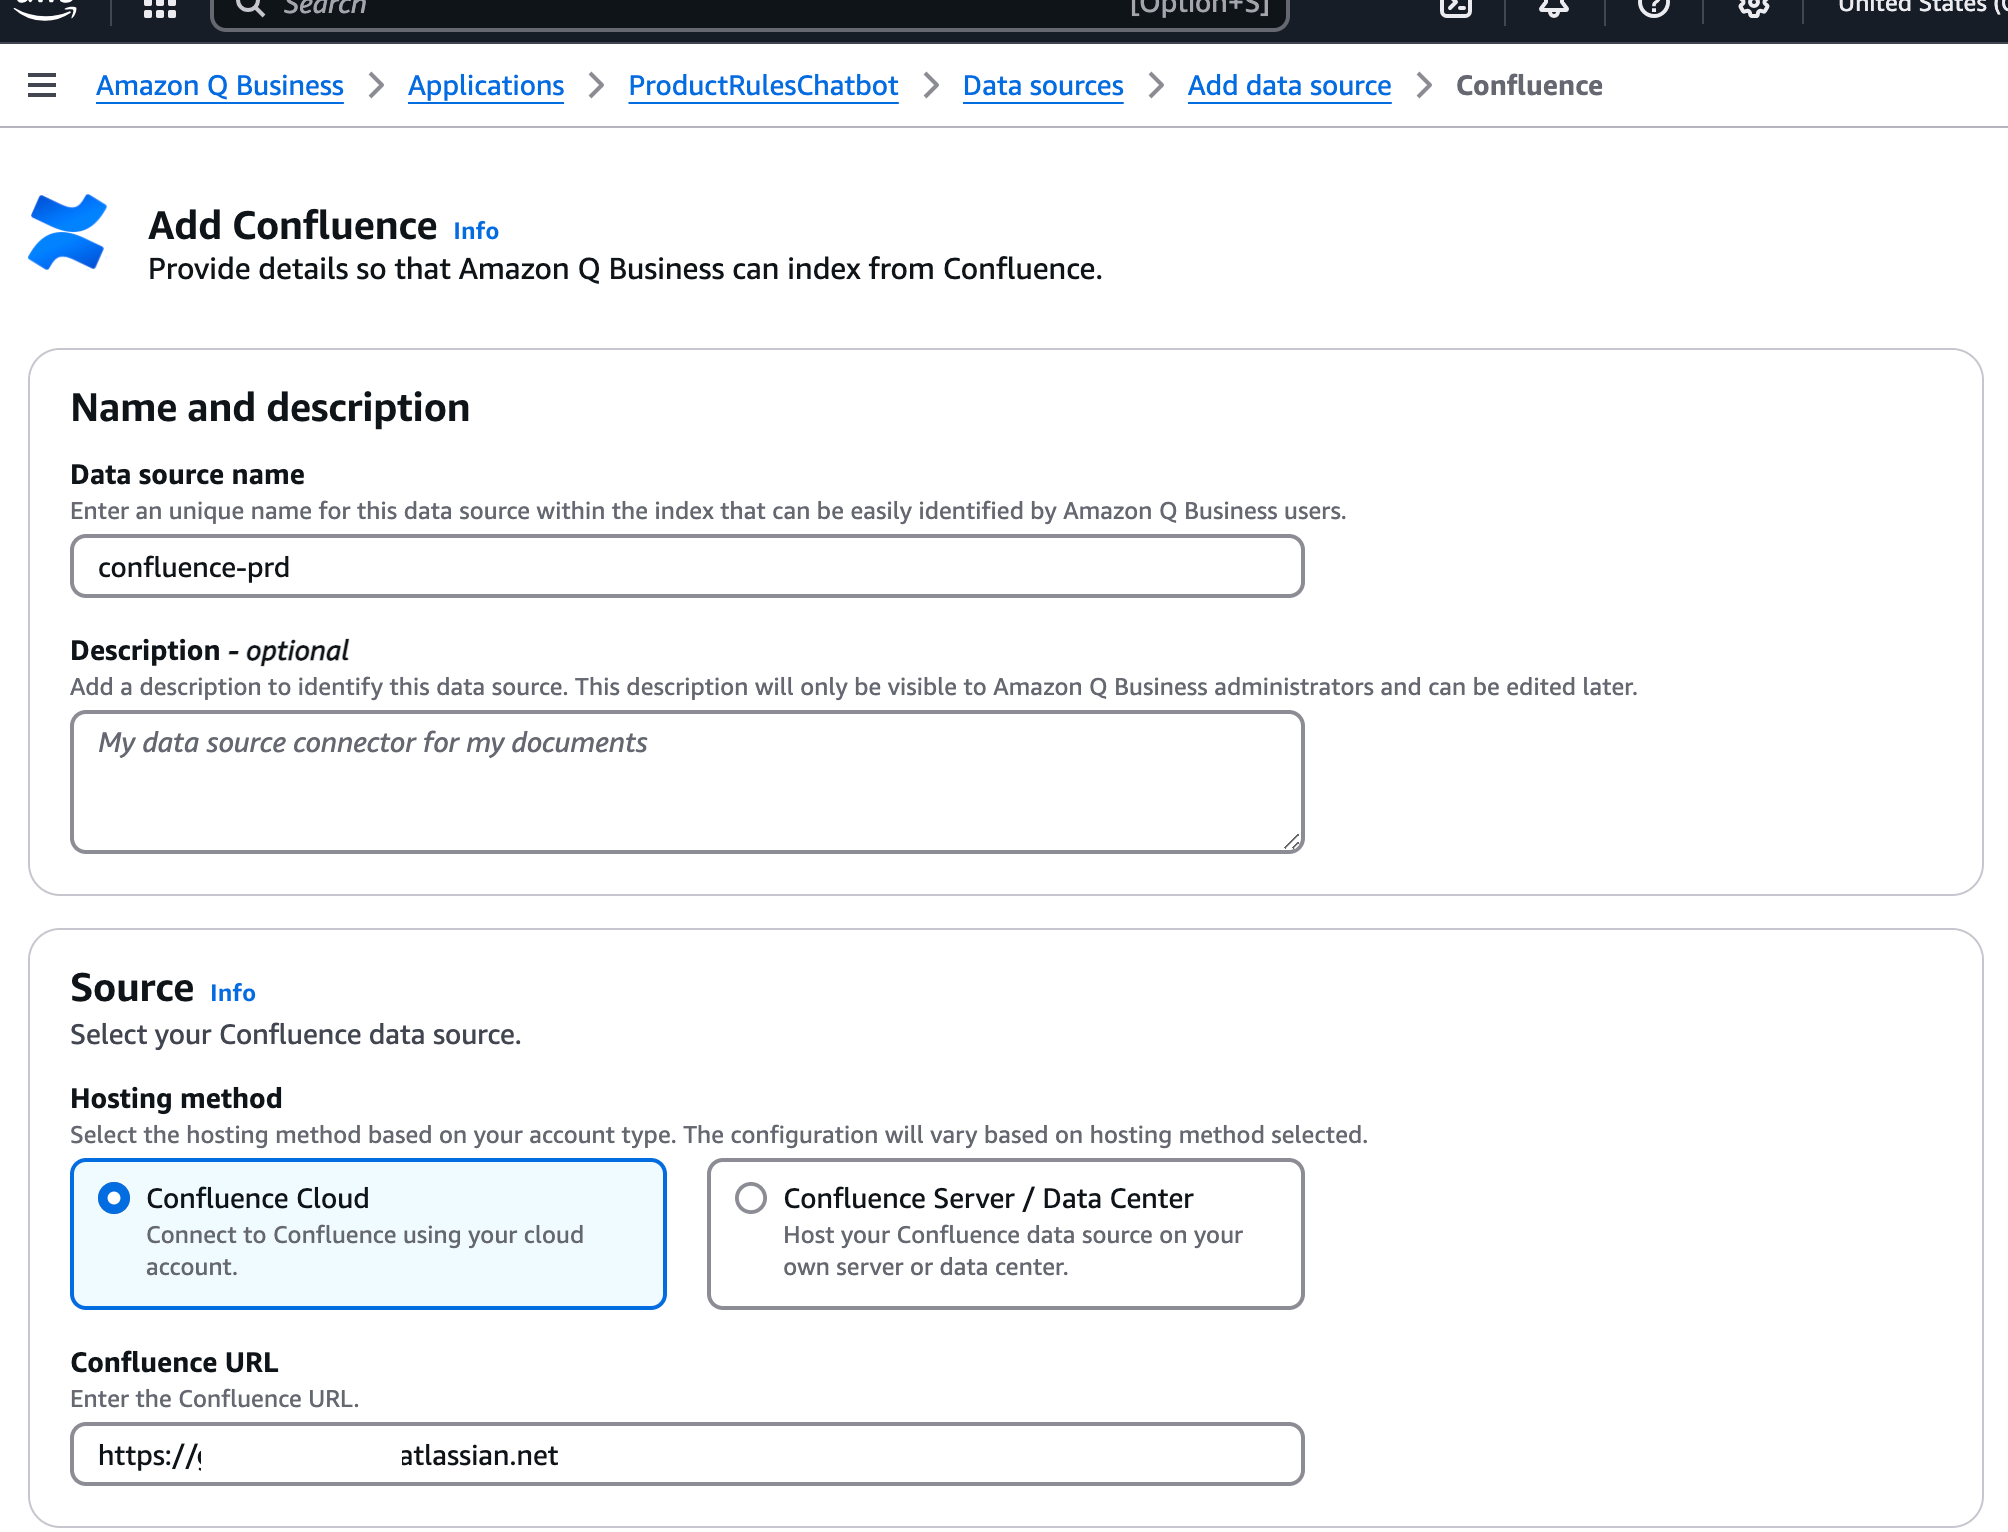
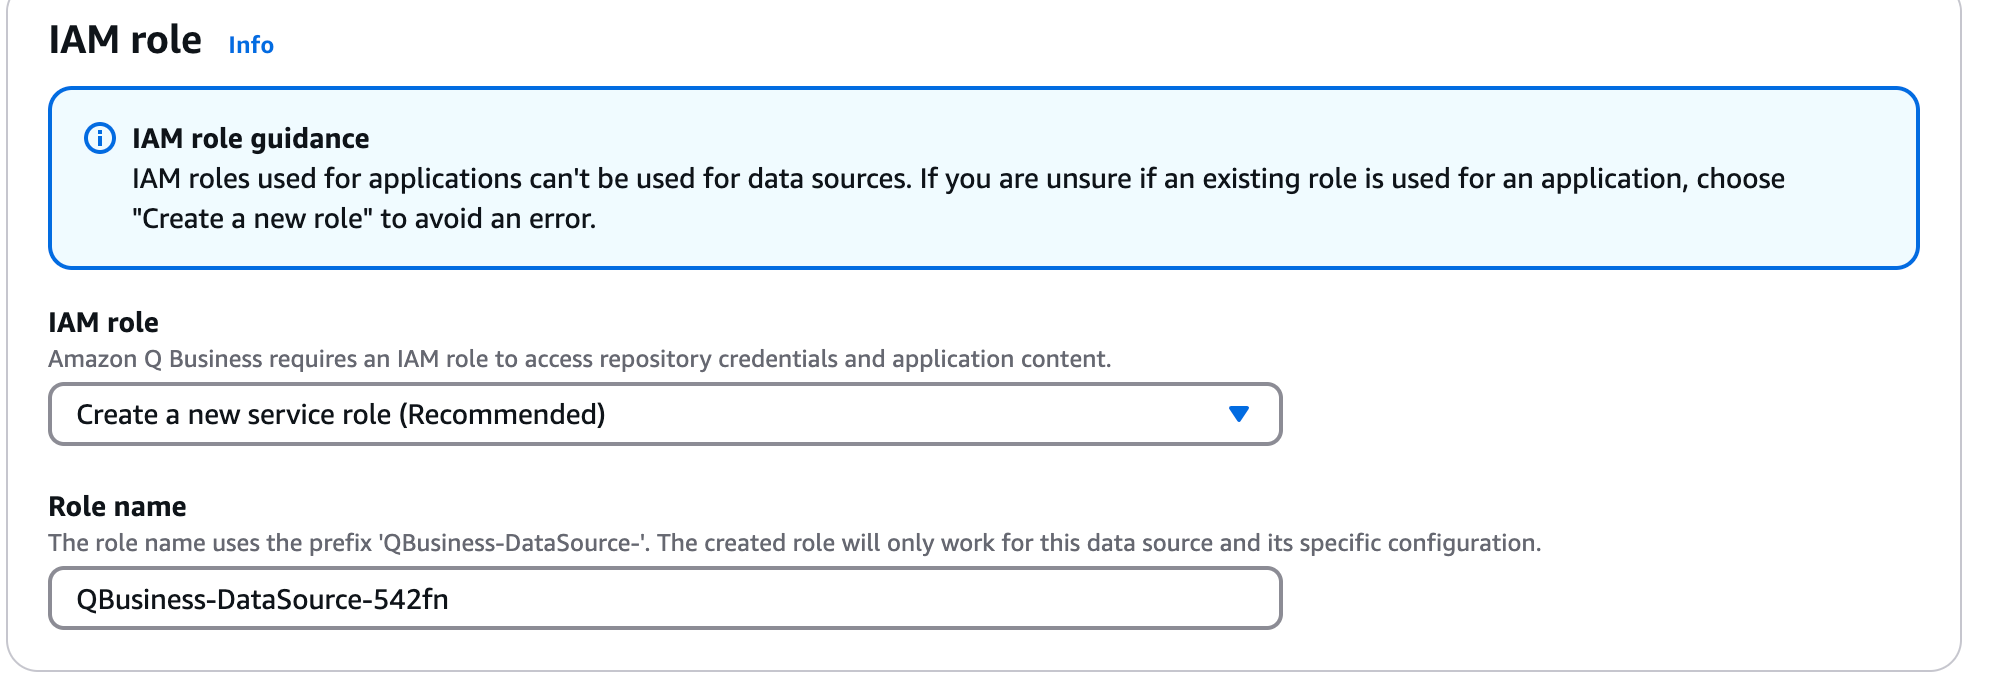
Authentication
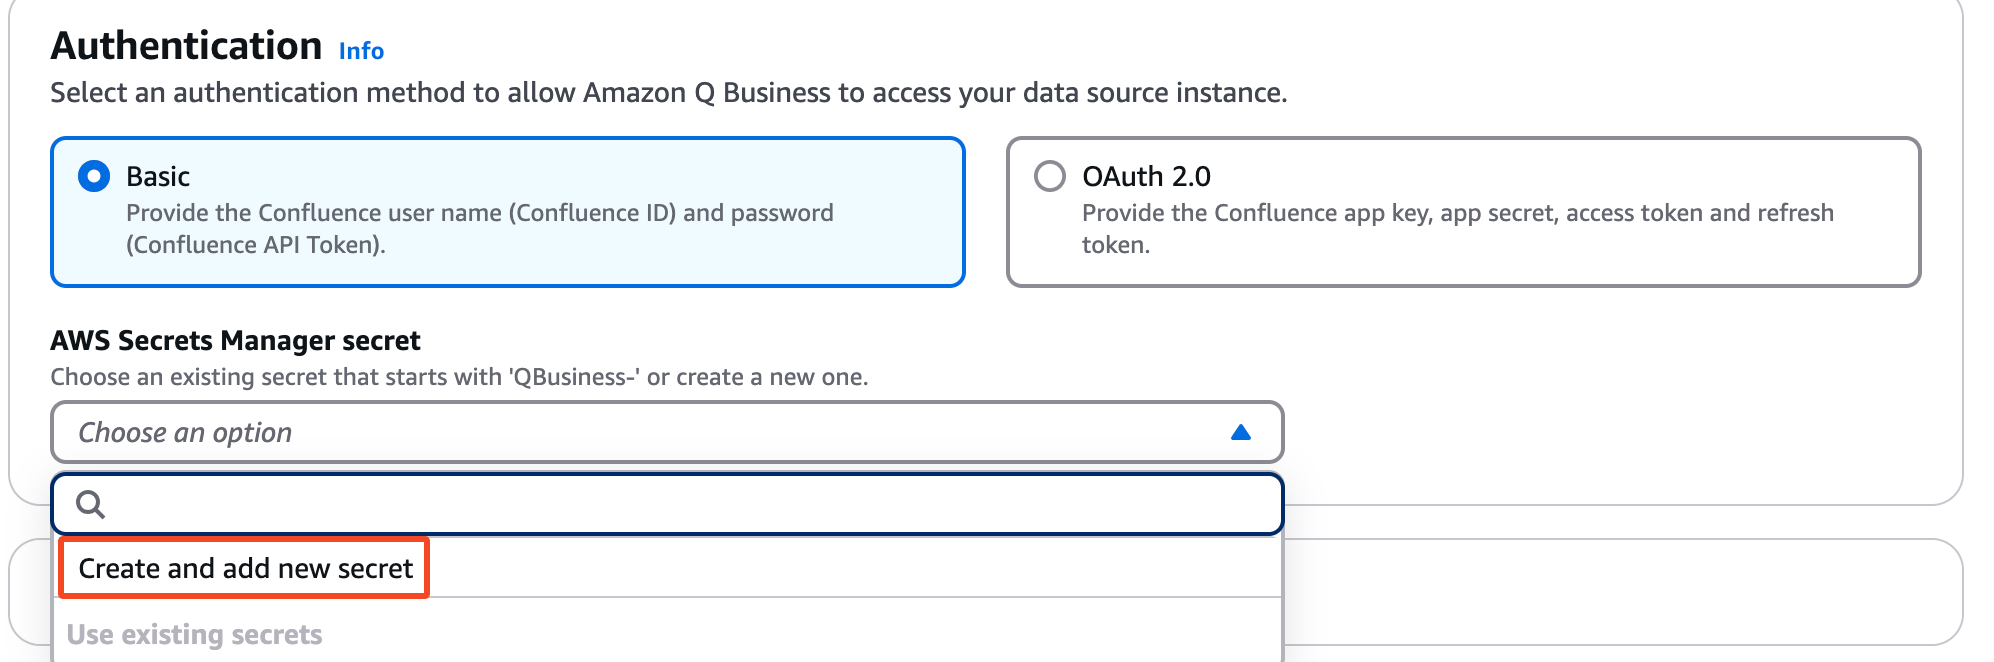
IAM role
Configure the sync frequency (e.g. once per day).
If you want to scope to specific spaces:
Set Include patterns.
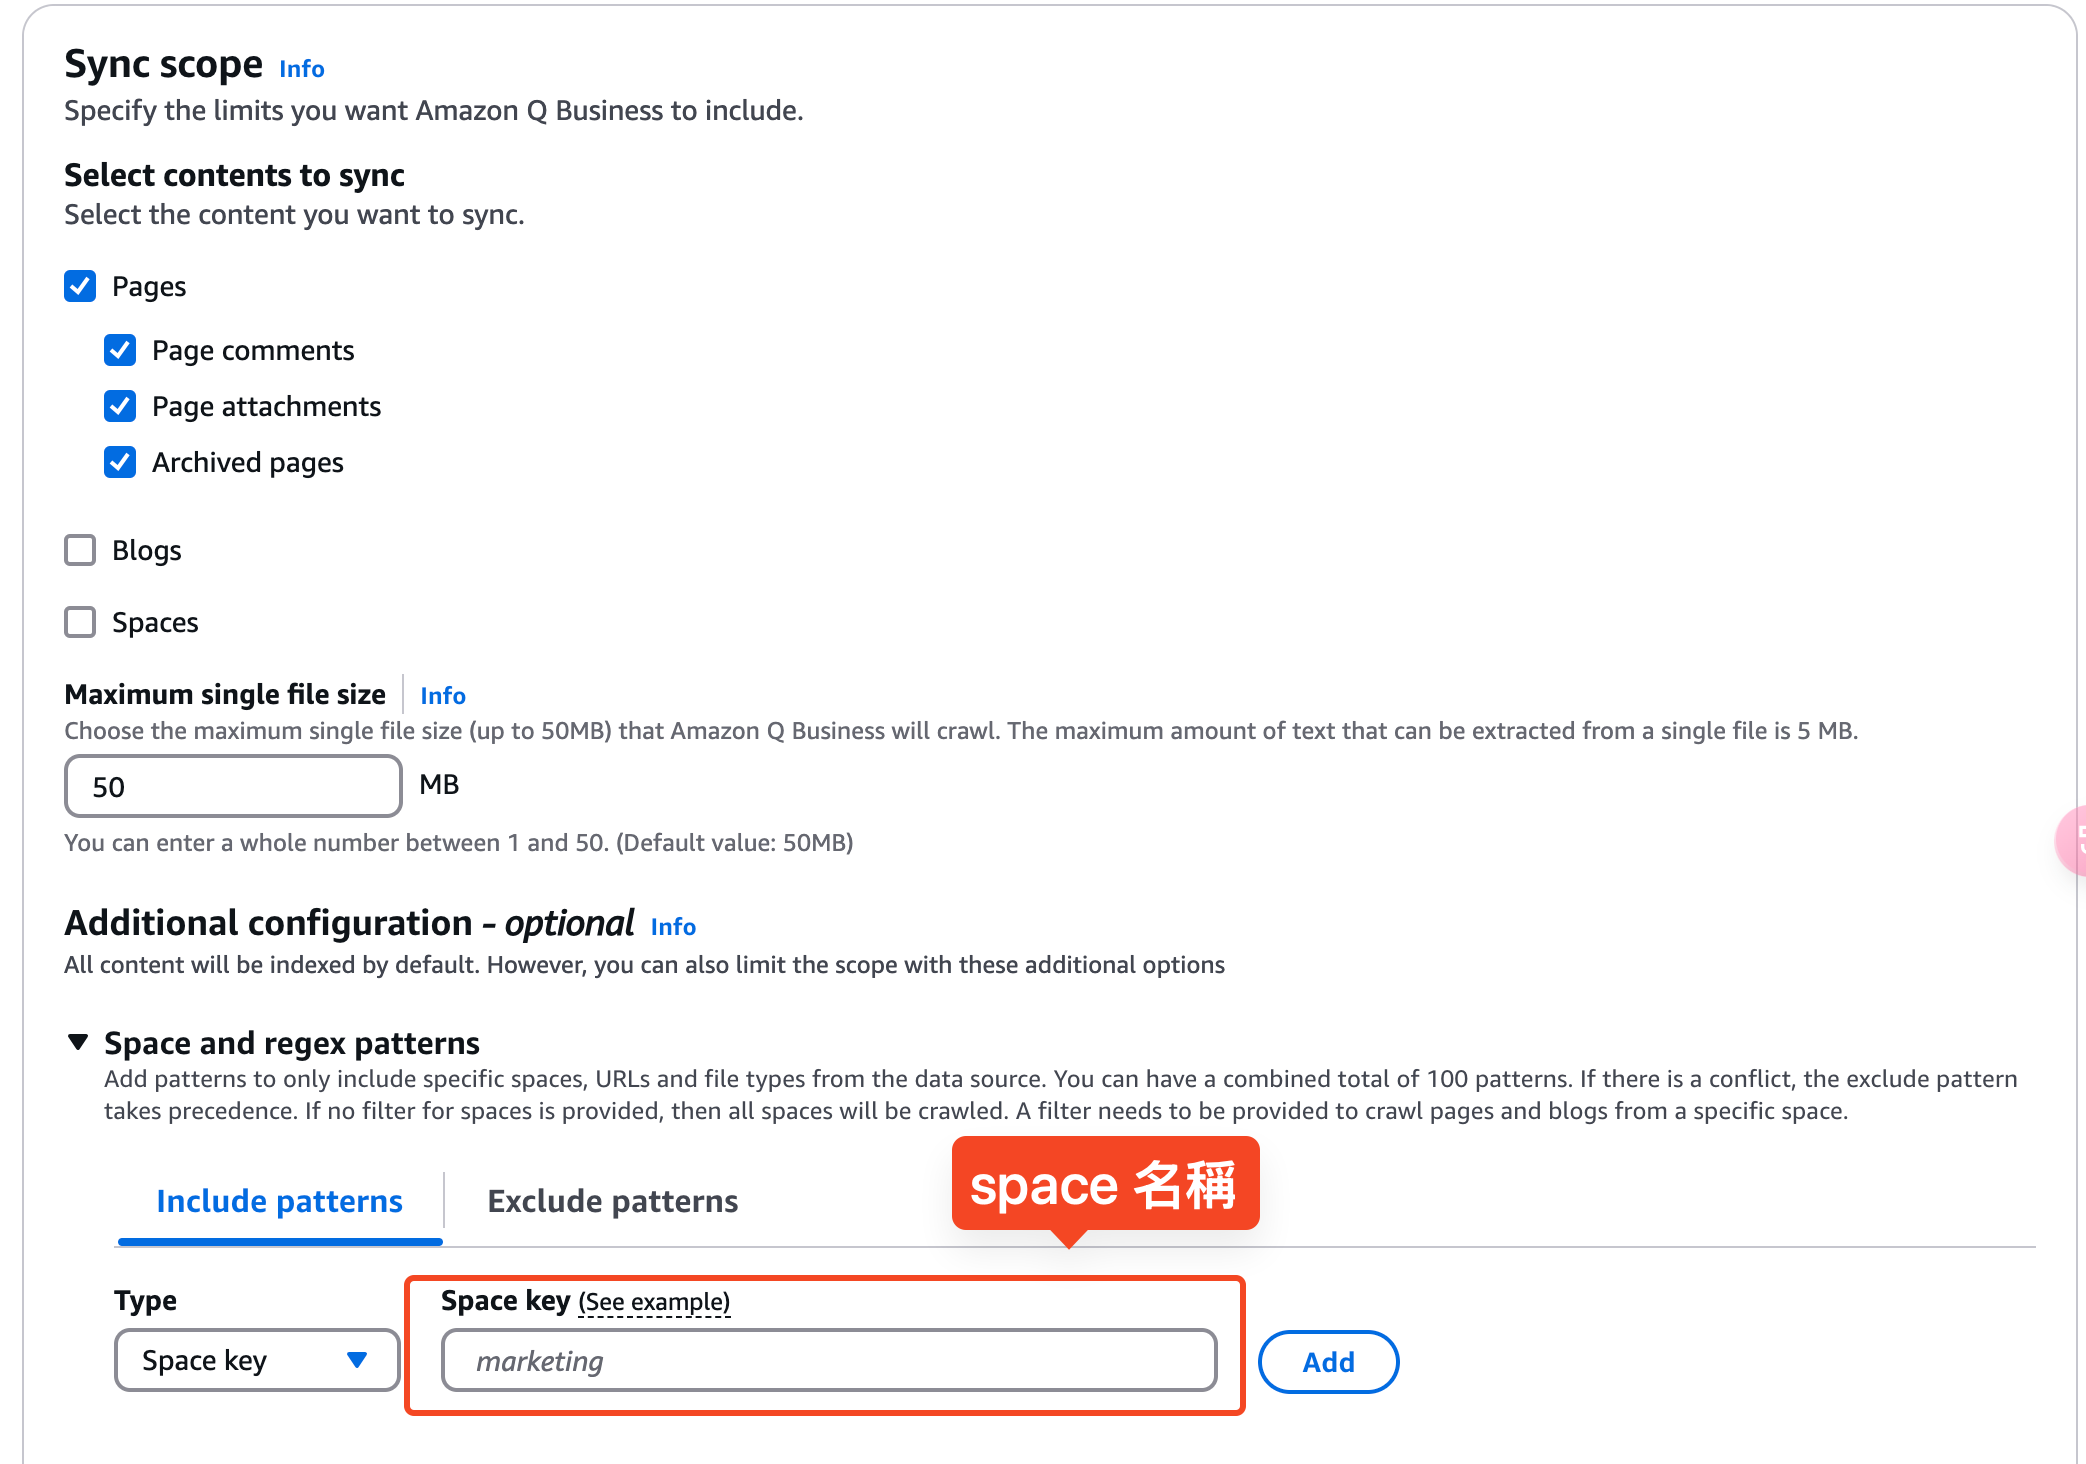
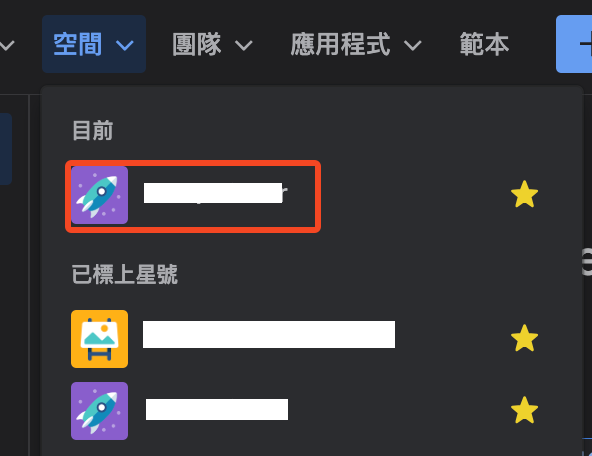
The space key is usually visible in the URL, e.g.:
https://gamania-group.atlassian.net/wiki/spaces/SPACEKEYYou can also find it in the left navigation of the space’s home page.
That’s the configuration done.
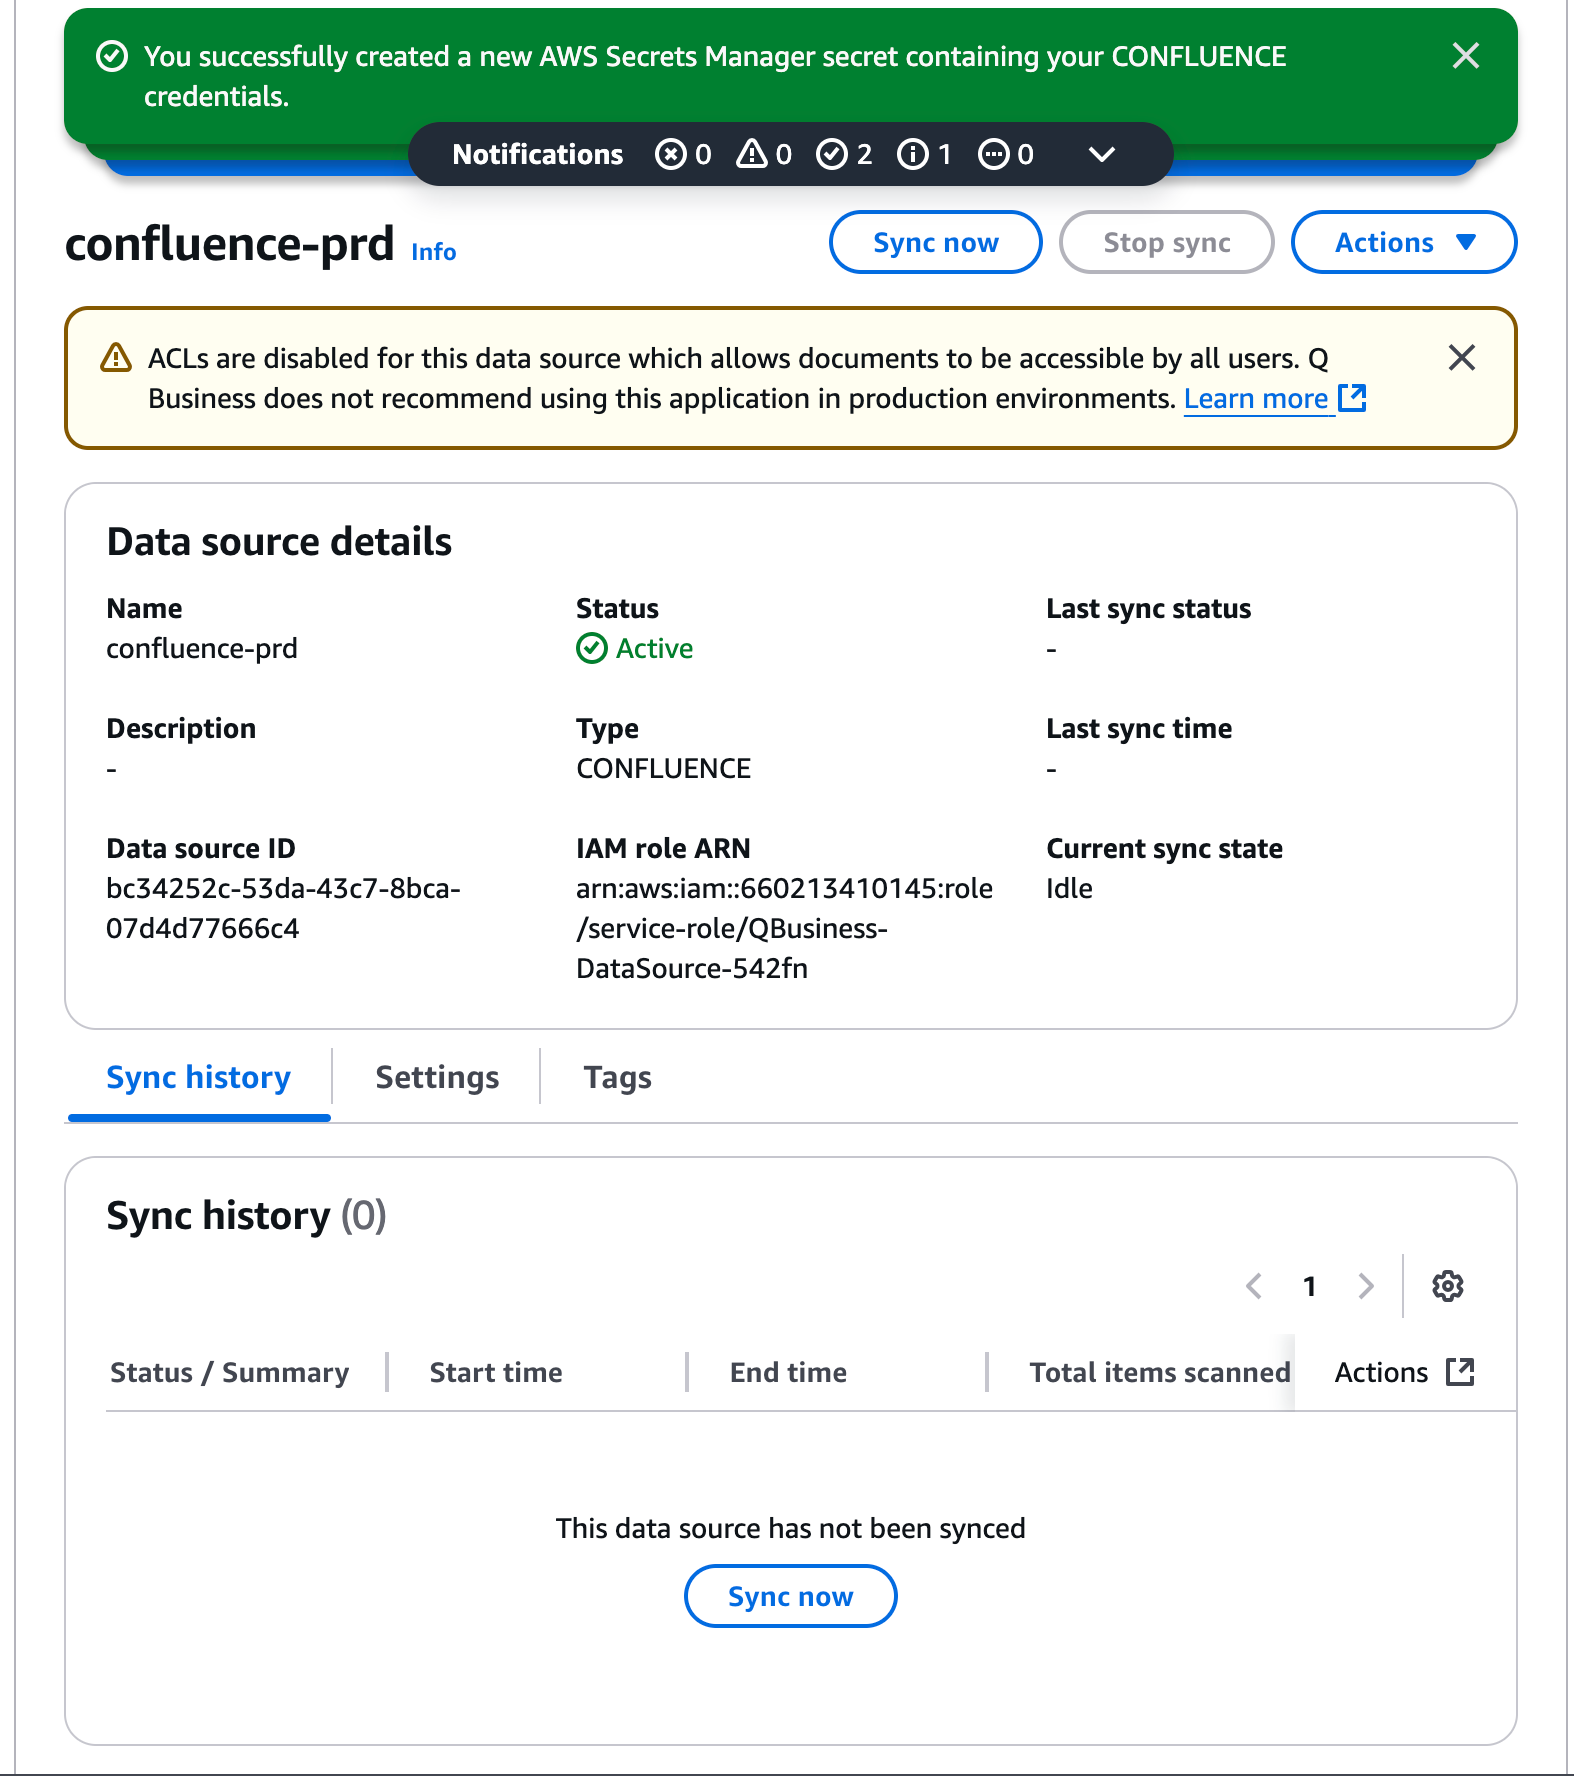
Remember to click Sync now to pull the data in.
3. Index the content
- Upload the Confluence documents, or specify which pages to index.
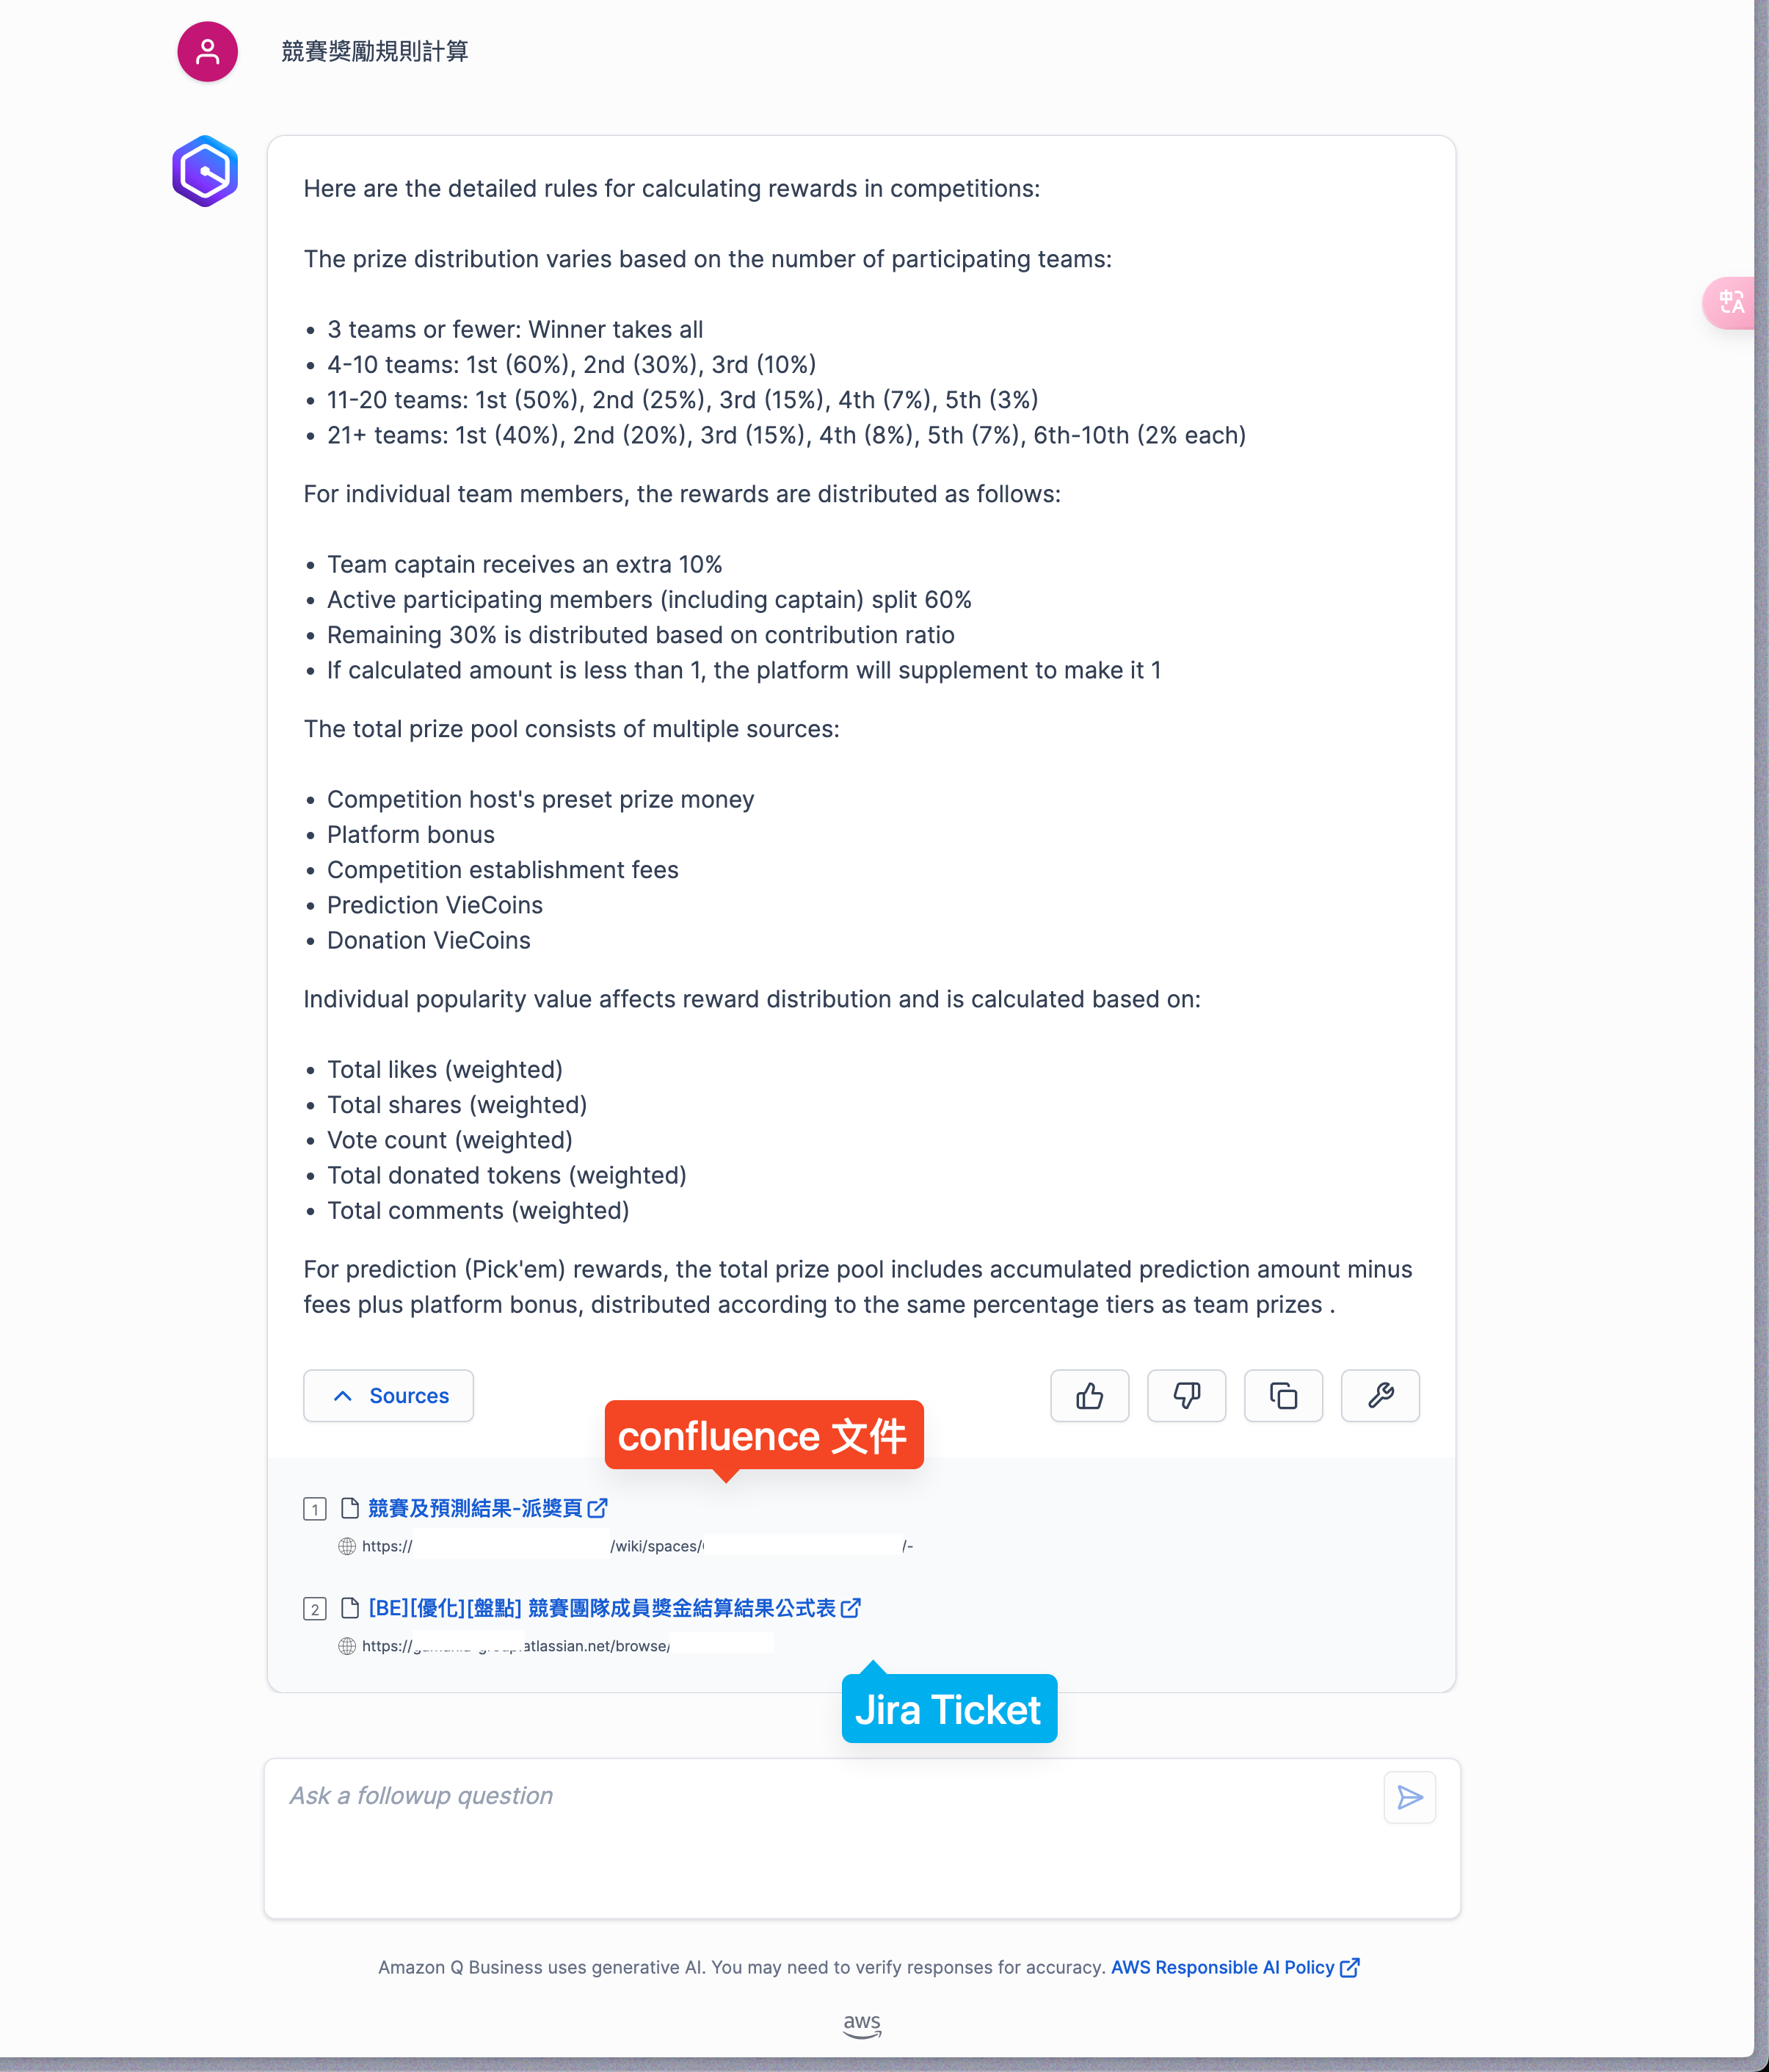
- Amazon Q indexes the content so the assistant can answer questions about your product rules and domain terminology.
The results were solid.

One limitation I ran into: I couldn’t find a setting to make it answer in Traditional Chinese by default.
Appendix 1: Configure the Jira data source
The steps are very similar to Step 2: Integrate the Confluence API.
In the Amazon Q Business console, click Data source.
Choose Jira as the data-source type.
Enter the Jira URL, API token, and the other required details.
URL
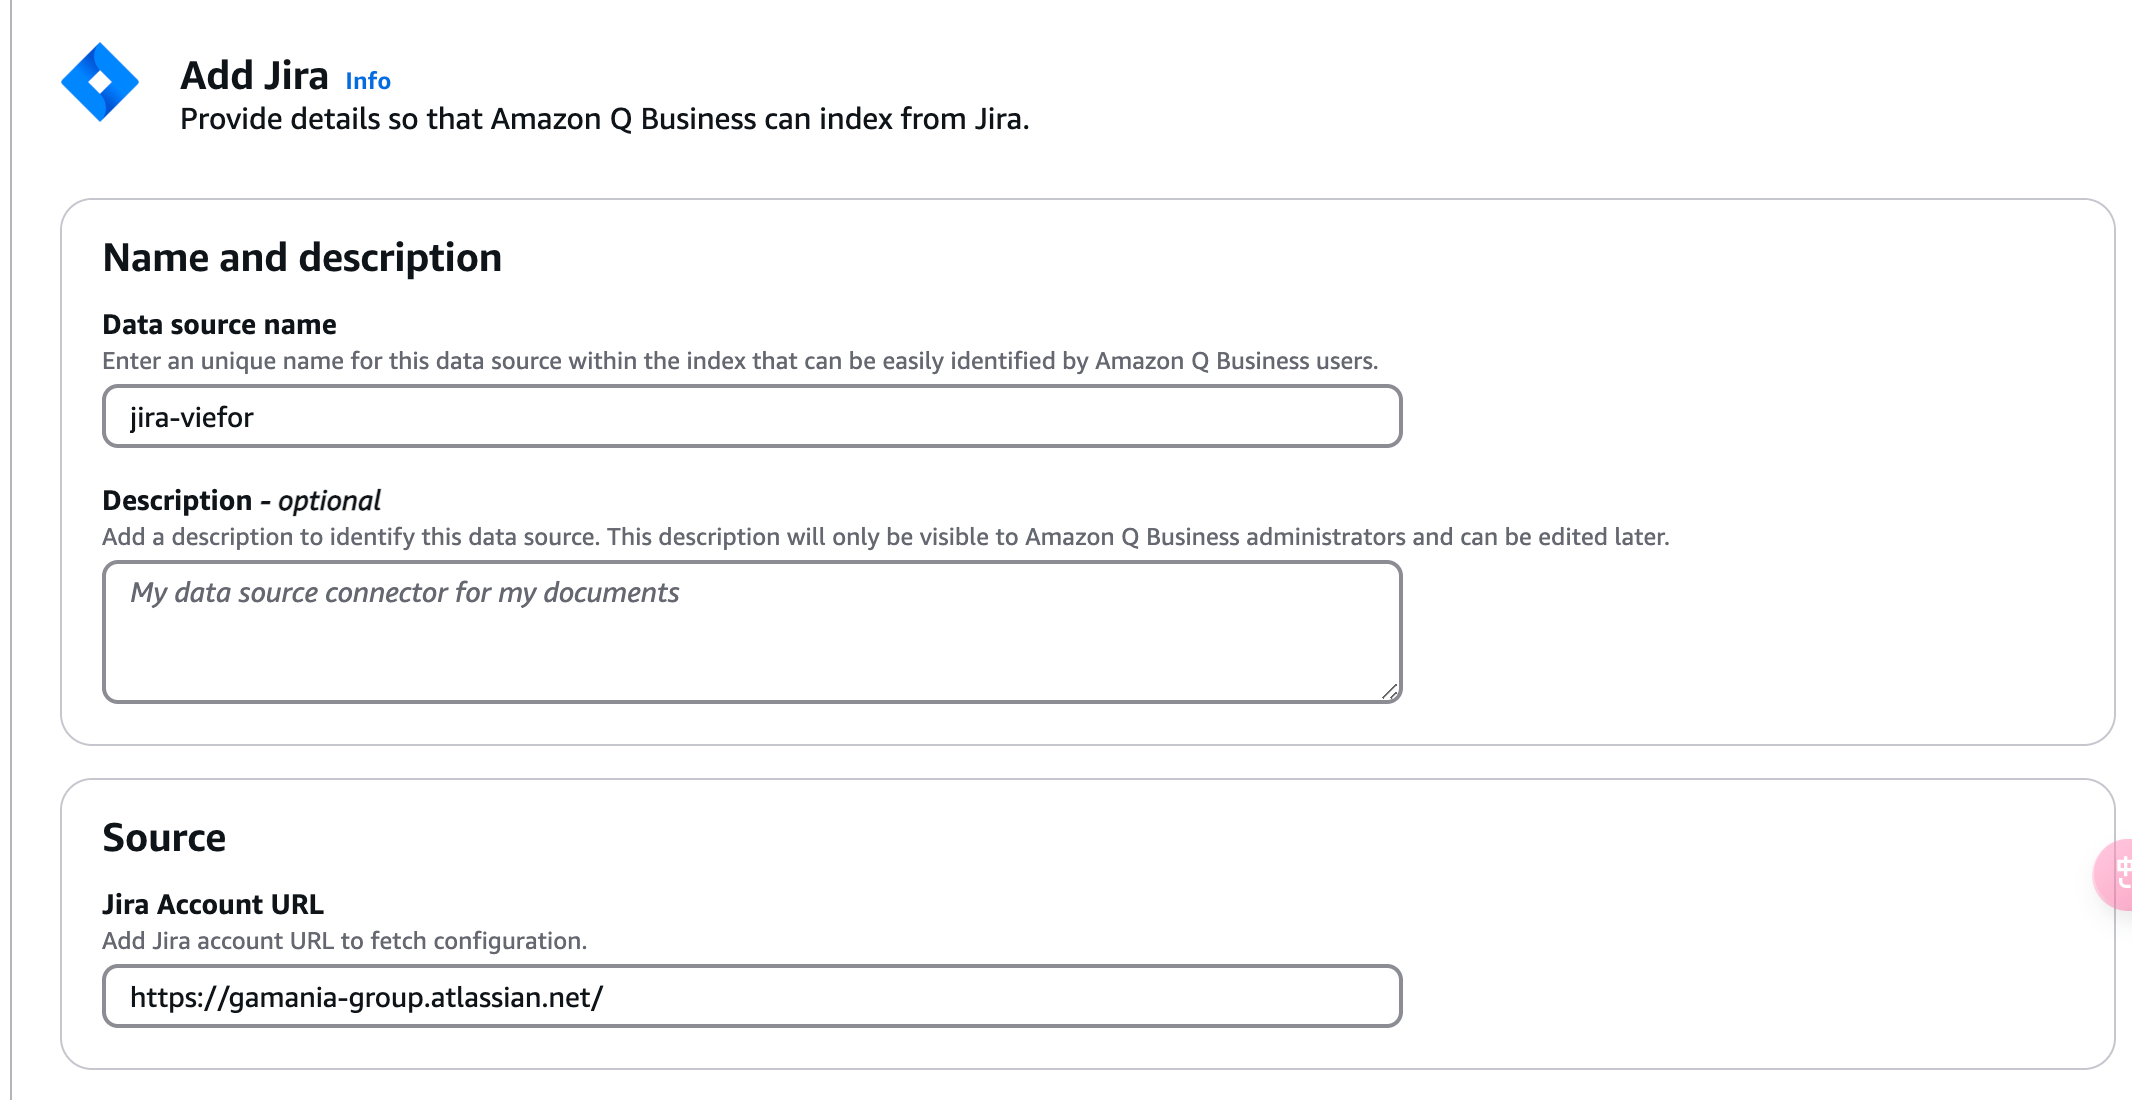
Authentication
Create an API token in Jira, following the same steps as Get a Confluence API token above.
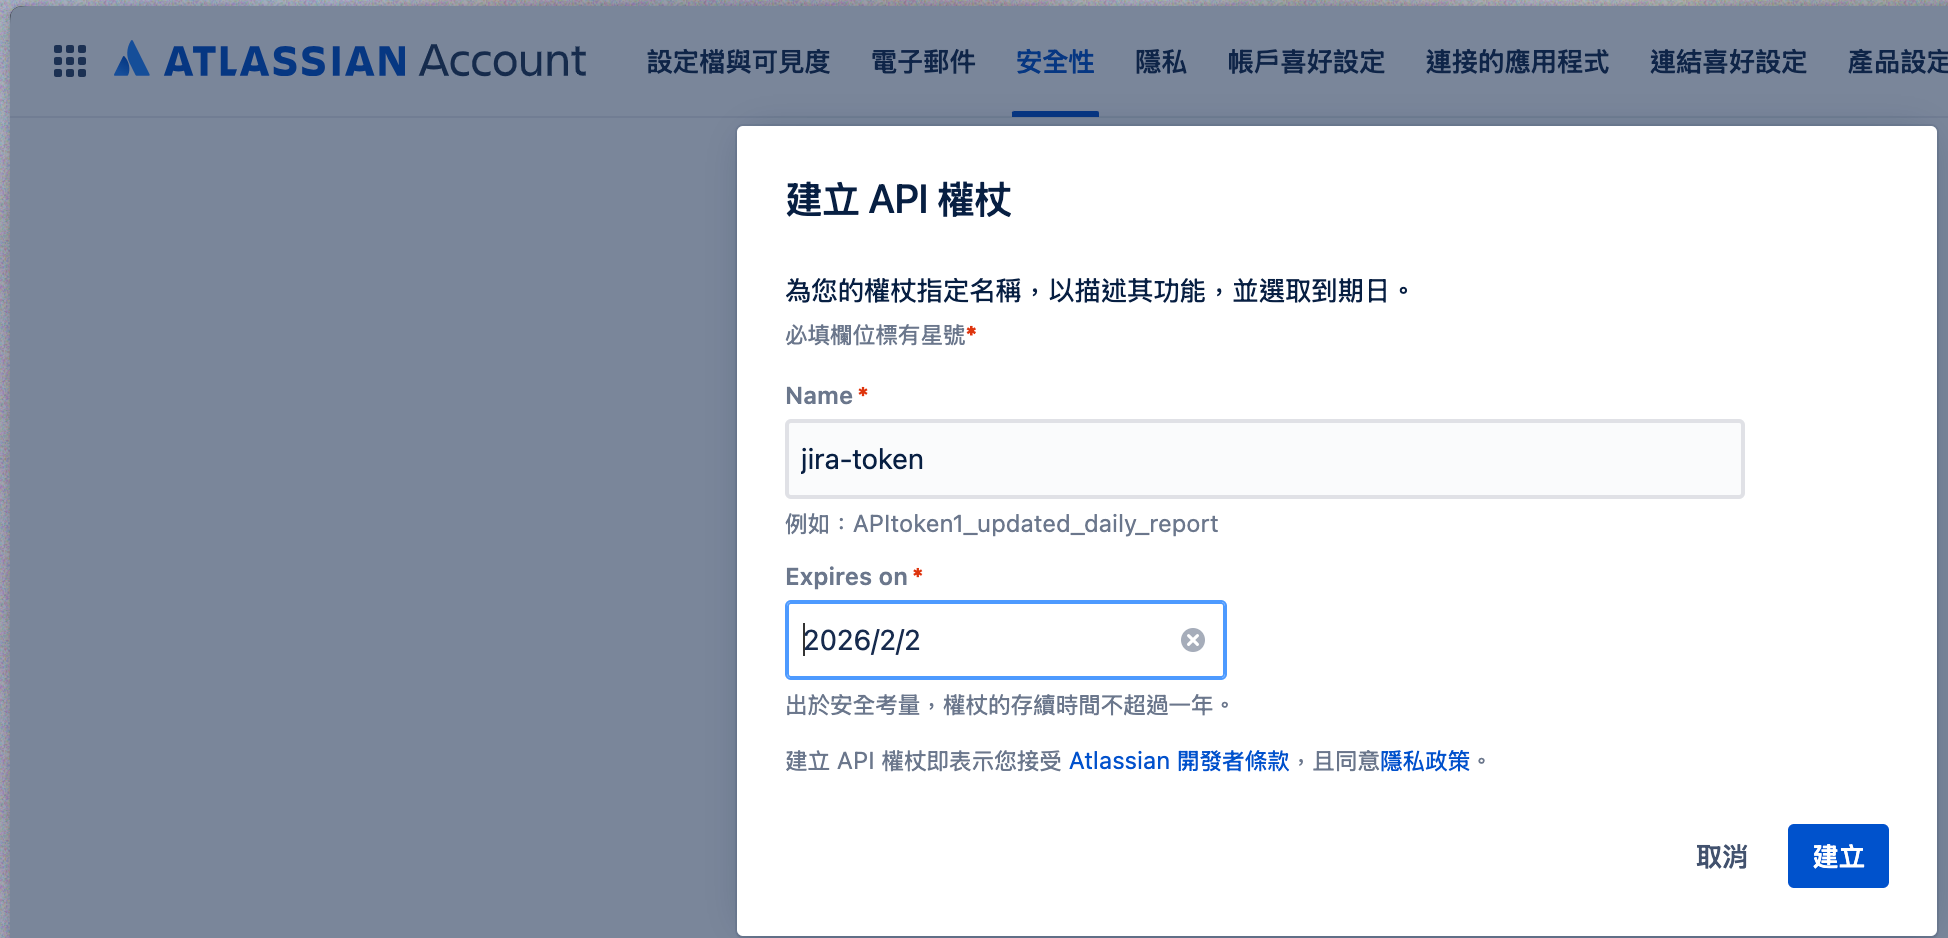
Paste the token in:
- username: your email
- token: the token you generated
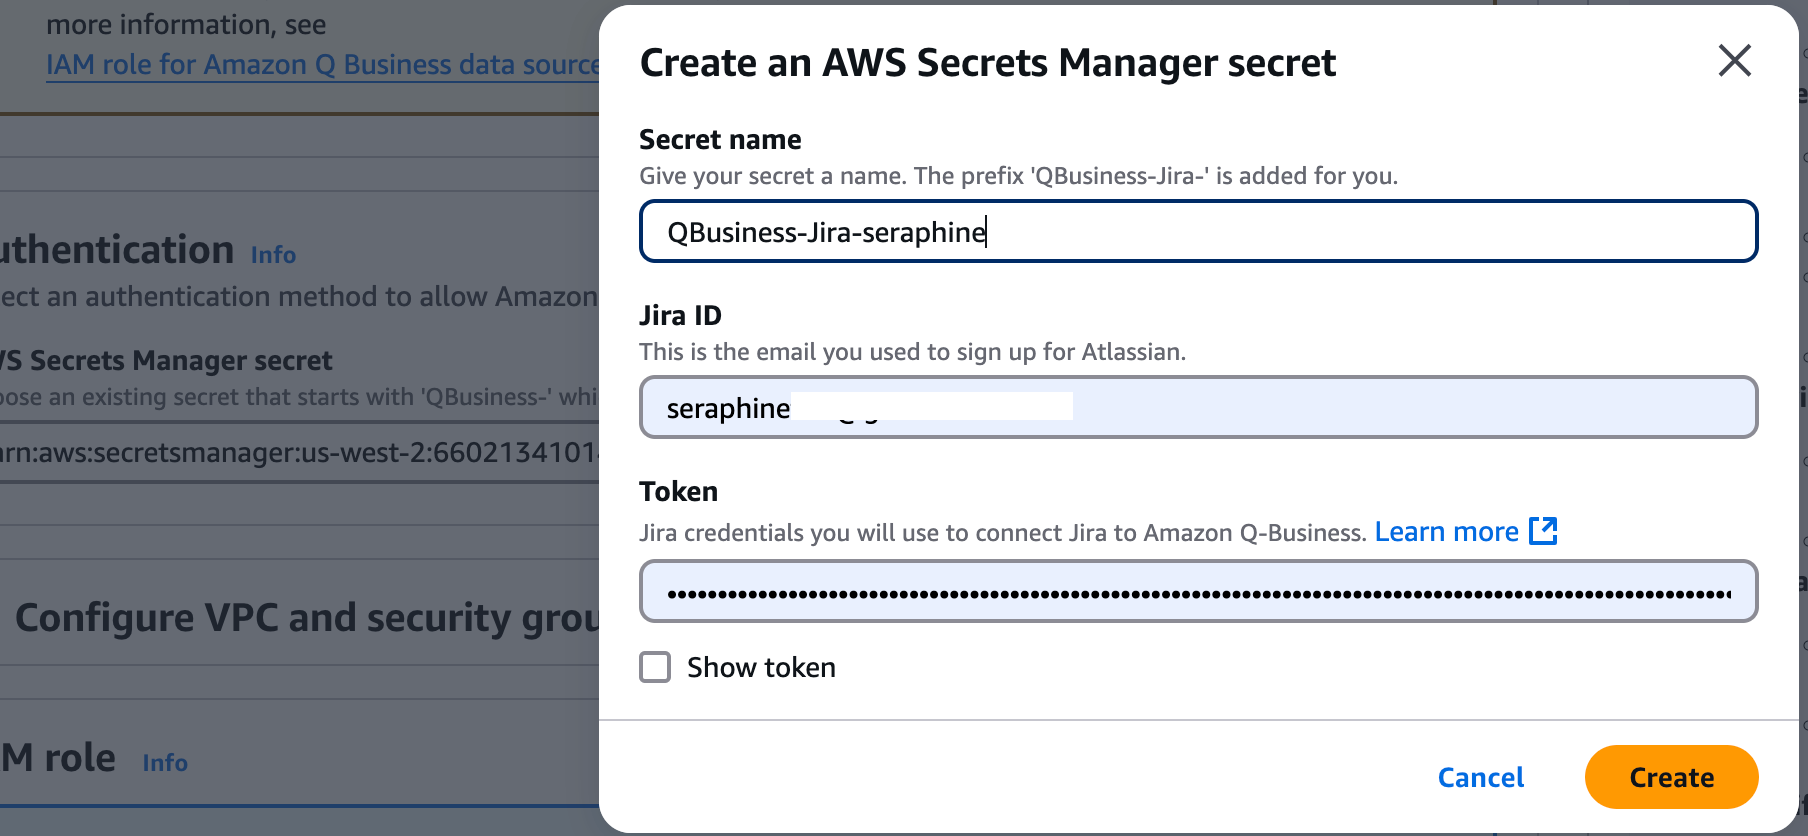
Create a new IAM role.
Scope to the projects you want.


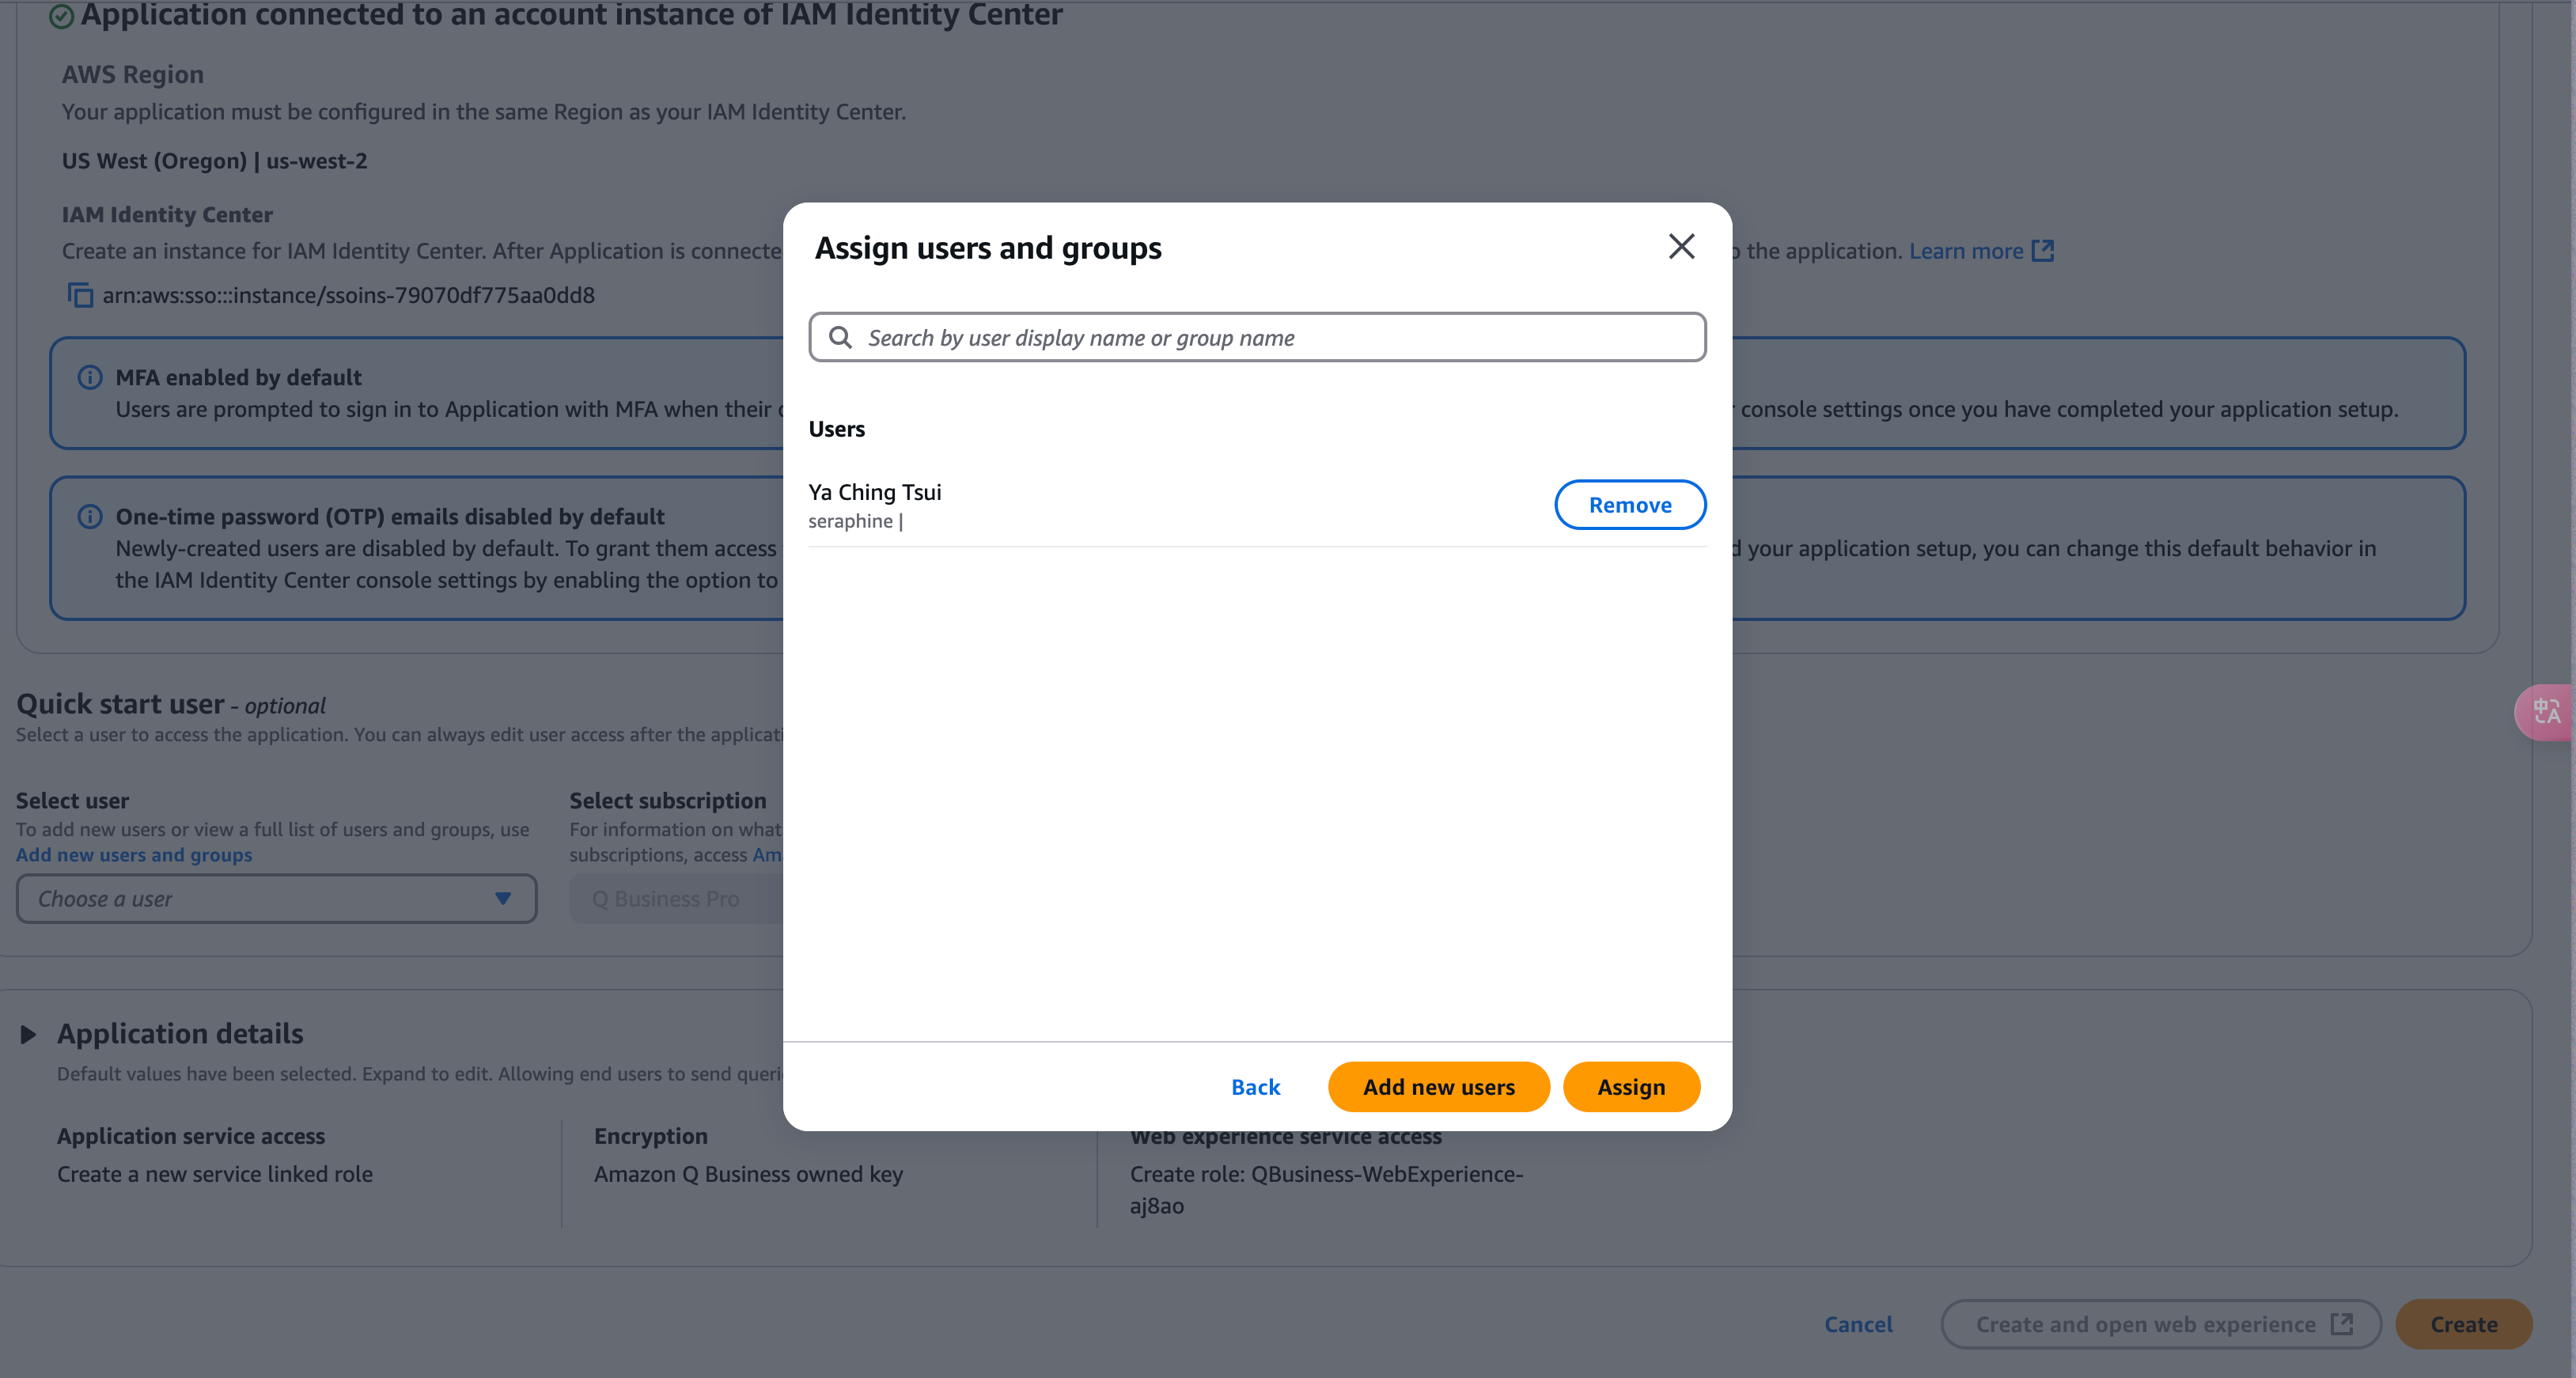
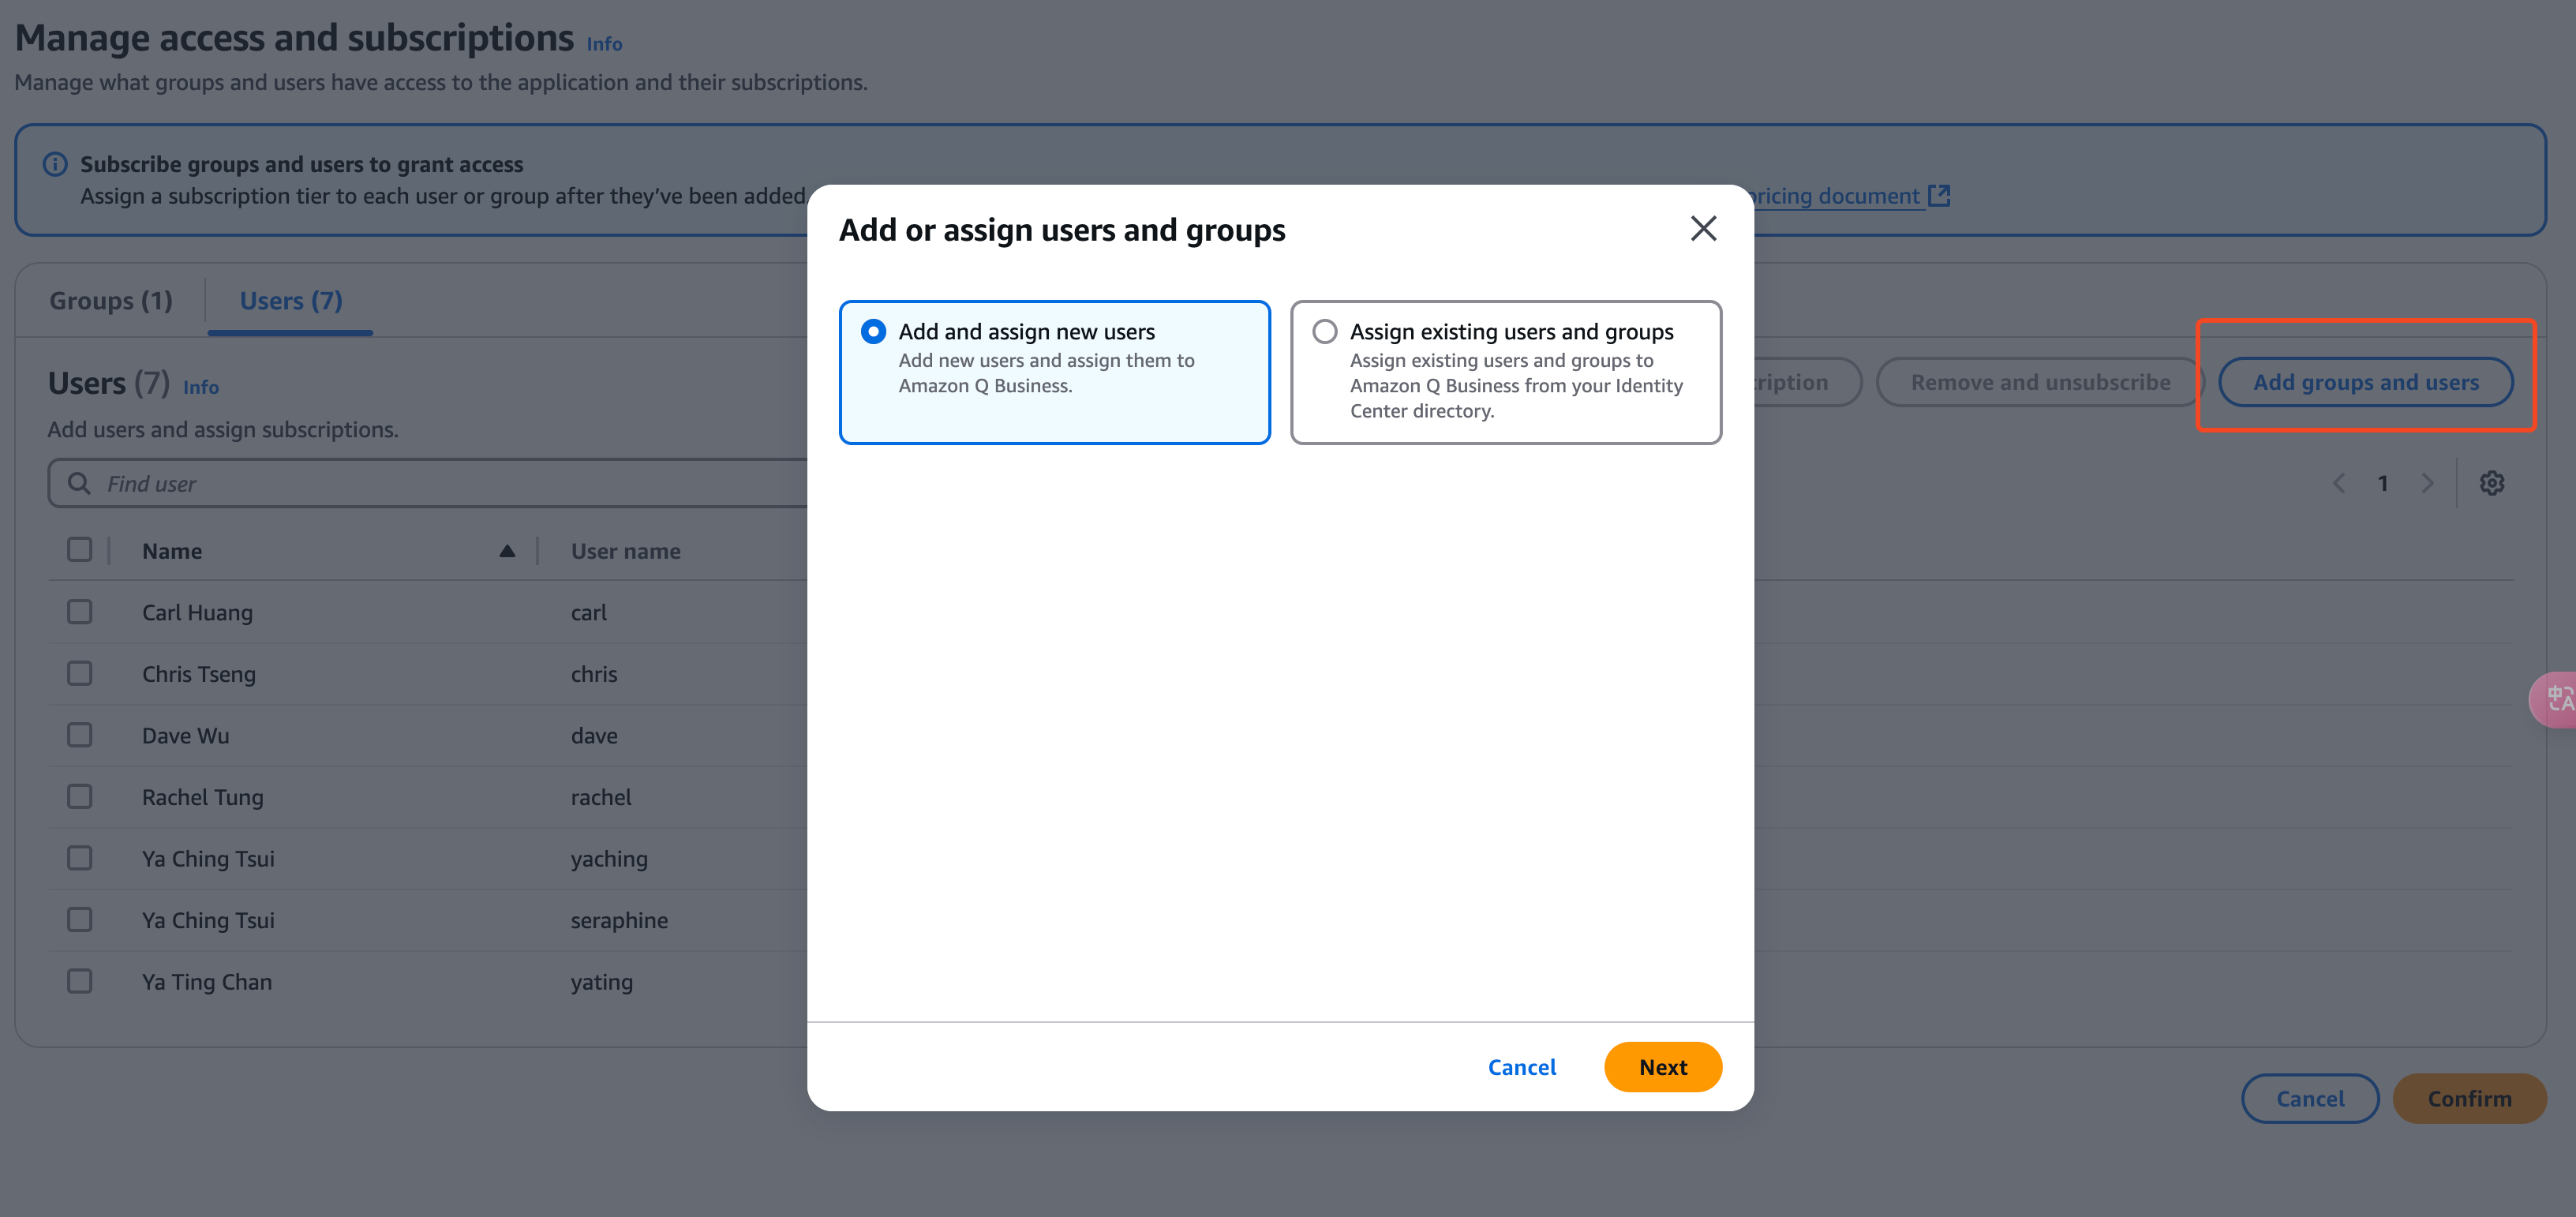
Appendix 2: Add more users to Amazon Q Business
To add more users, go to Manage user access.
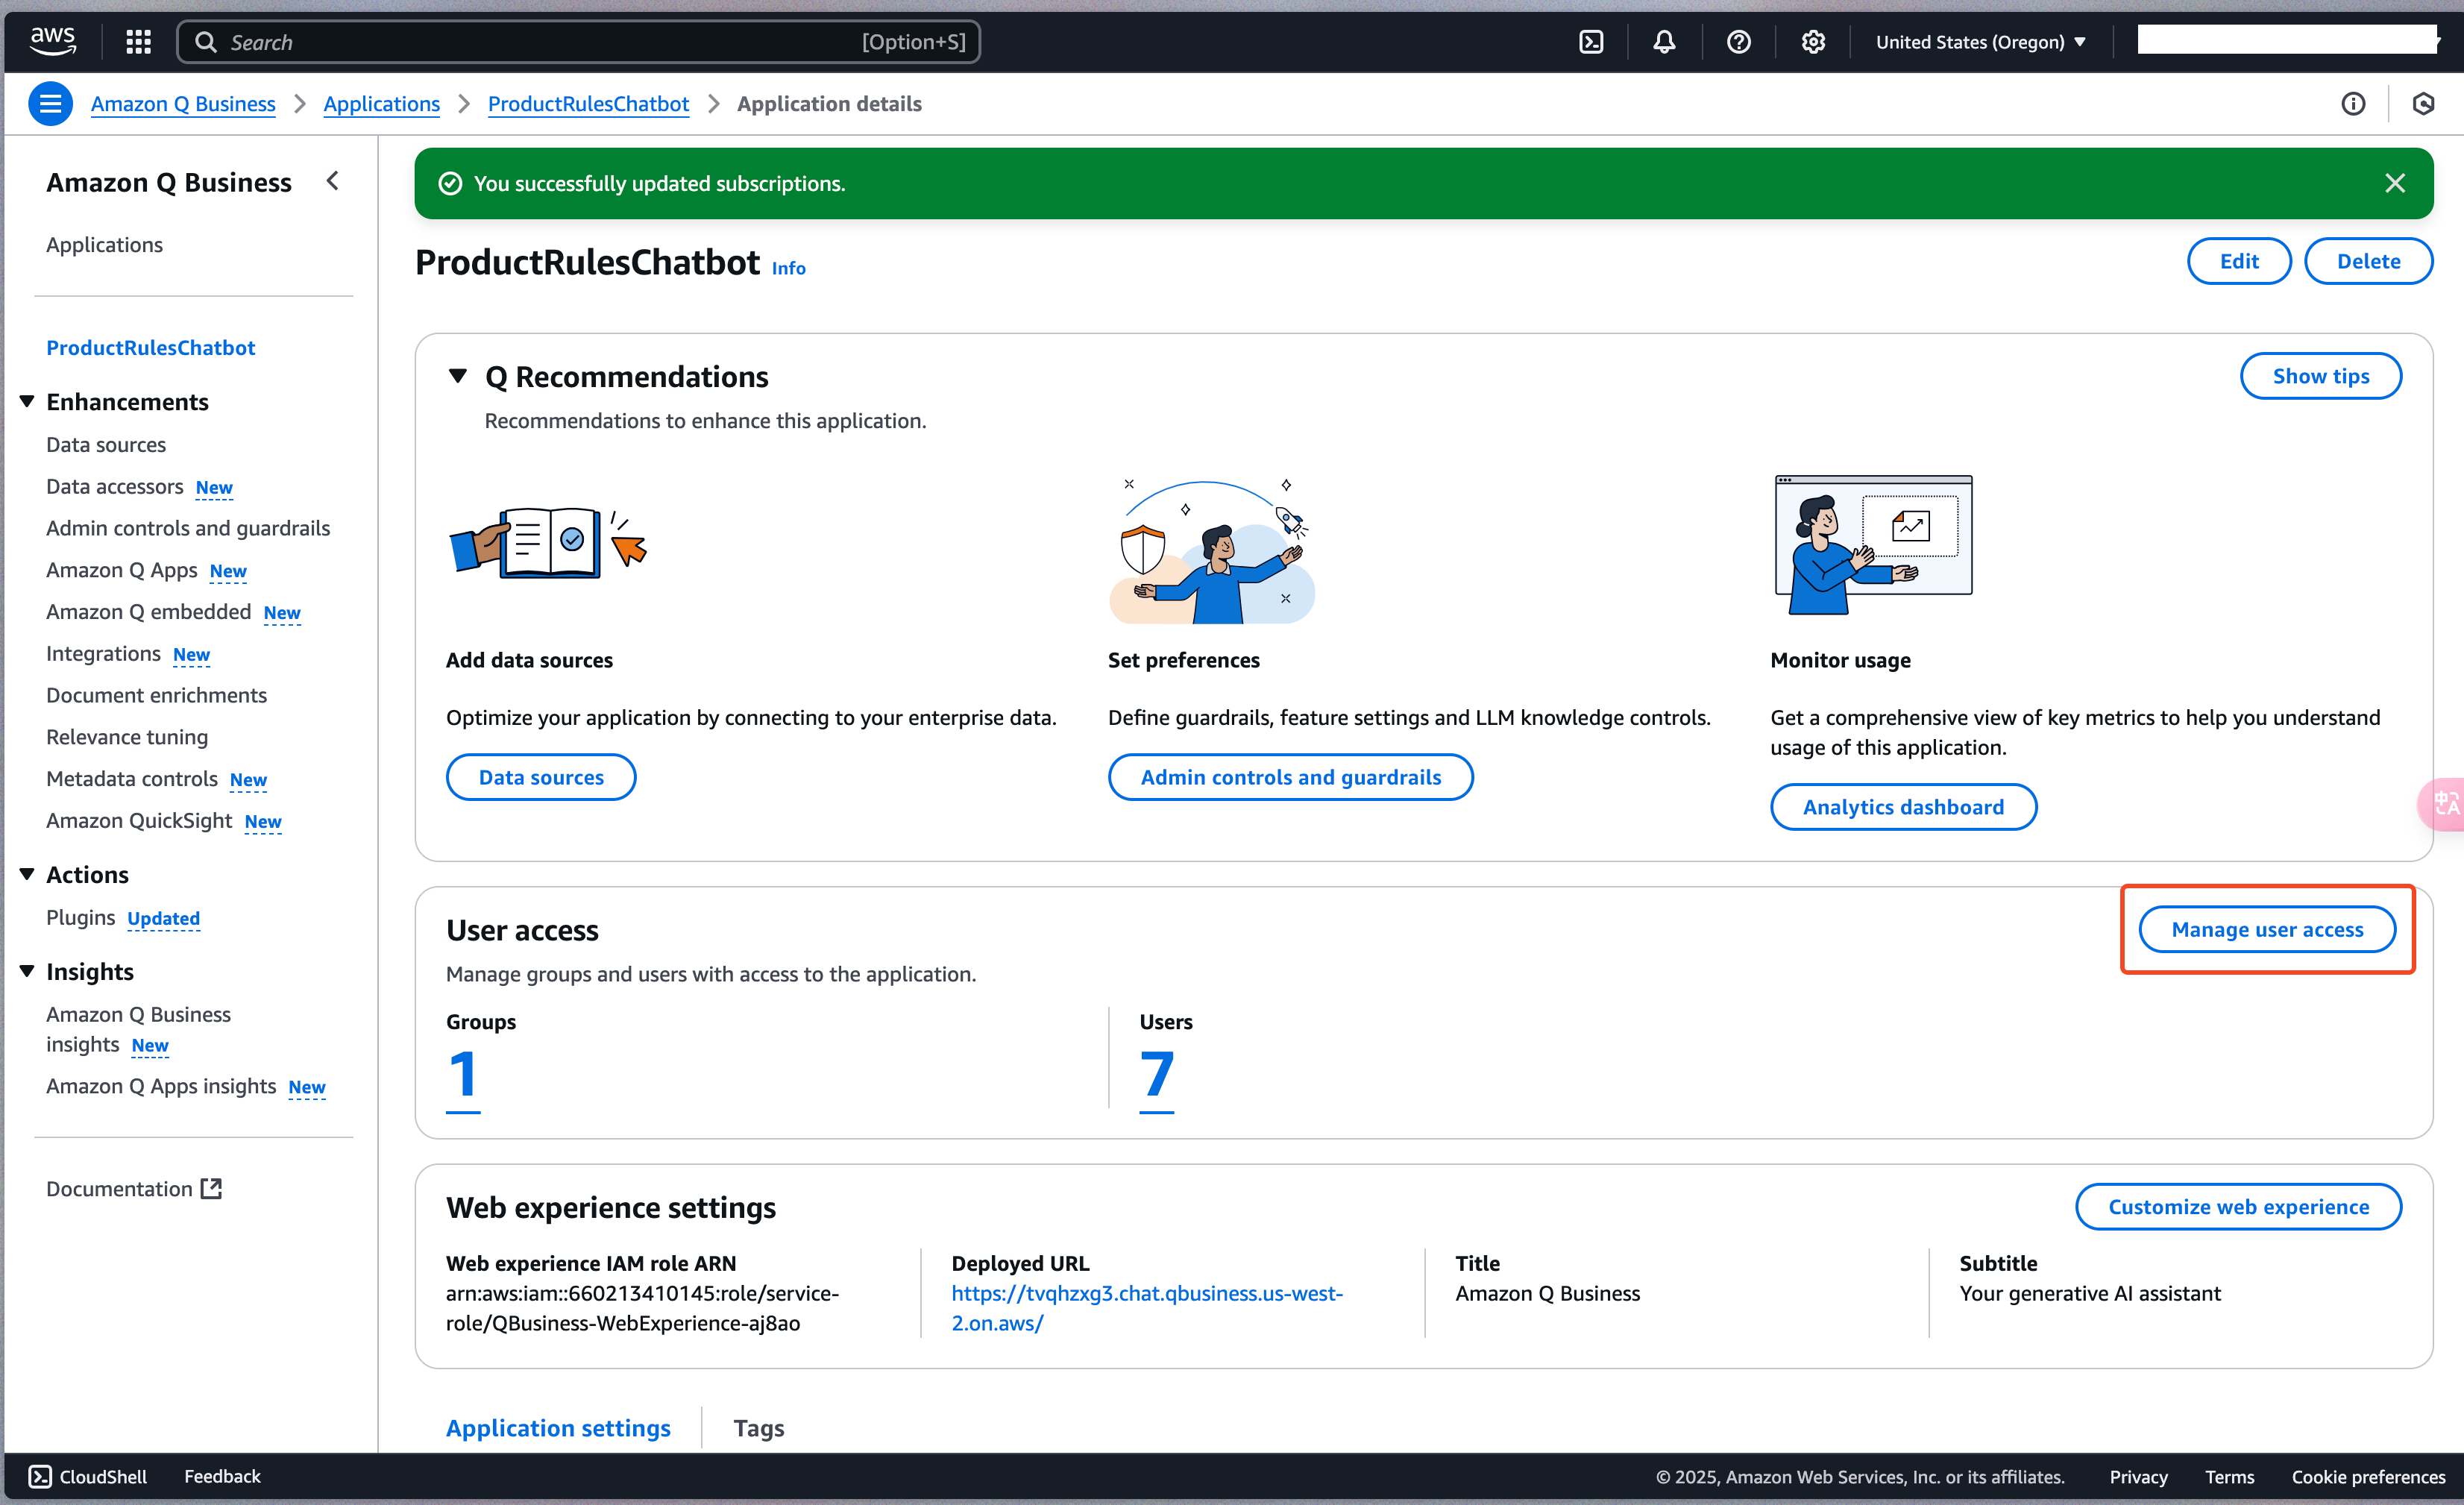
You have two options:
- Add and assign new users
- Assign existing users and groups
Add and assign new users
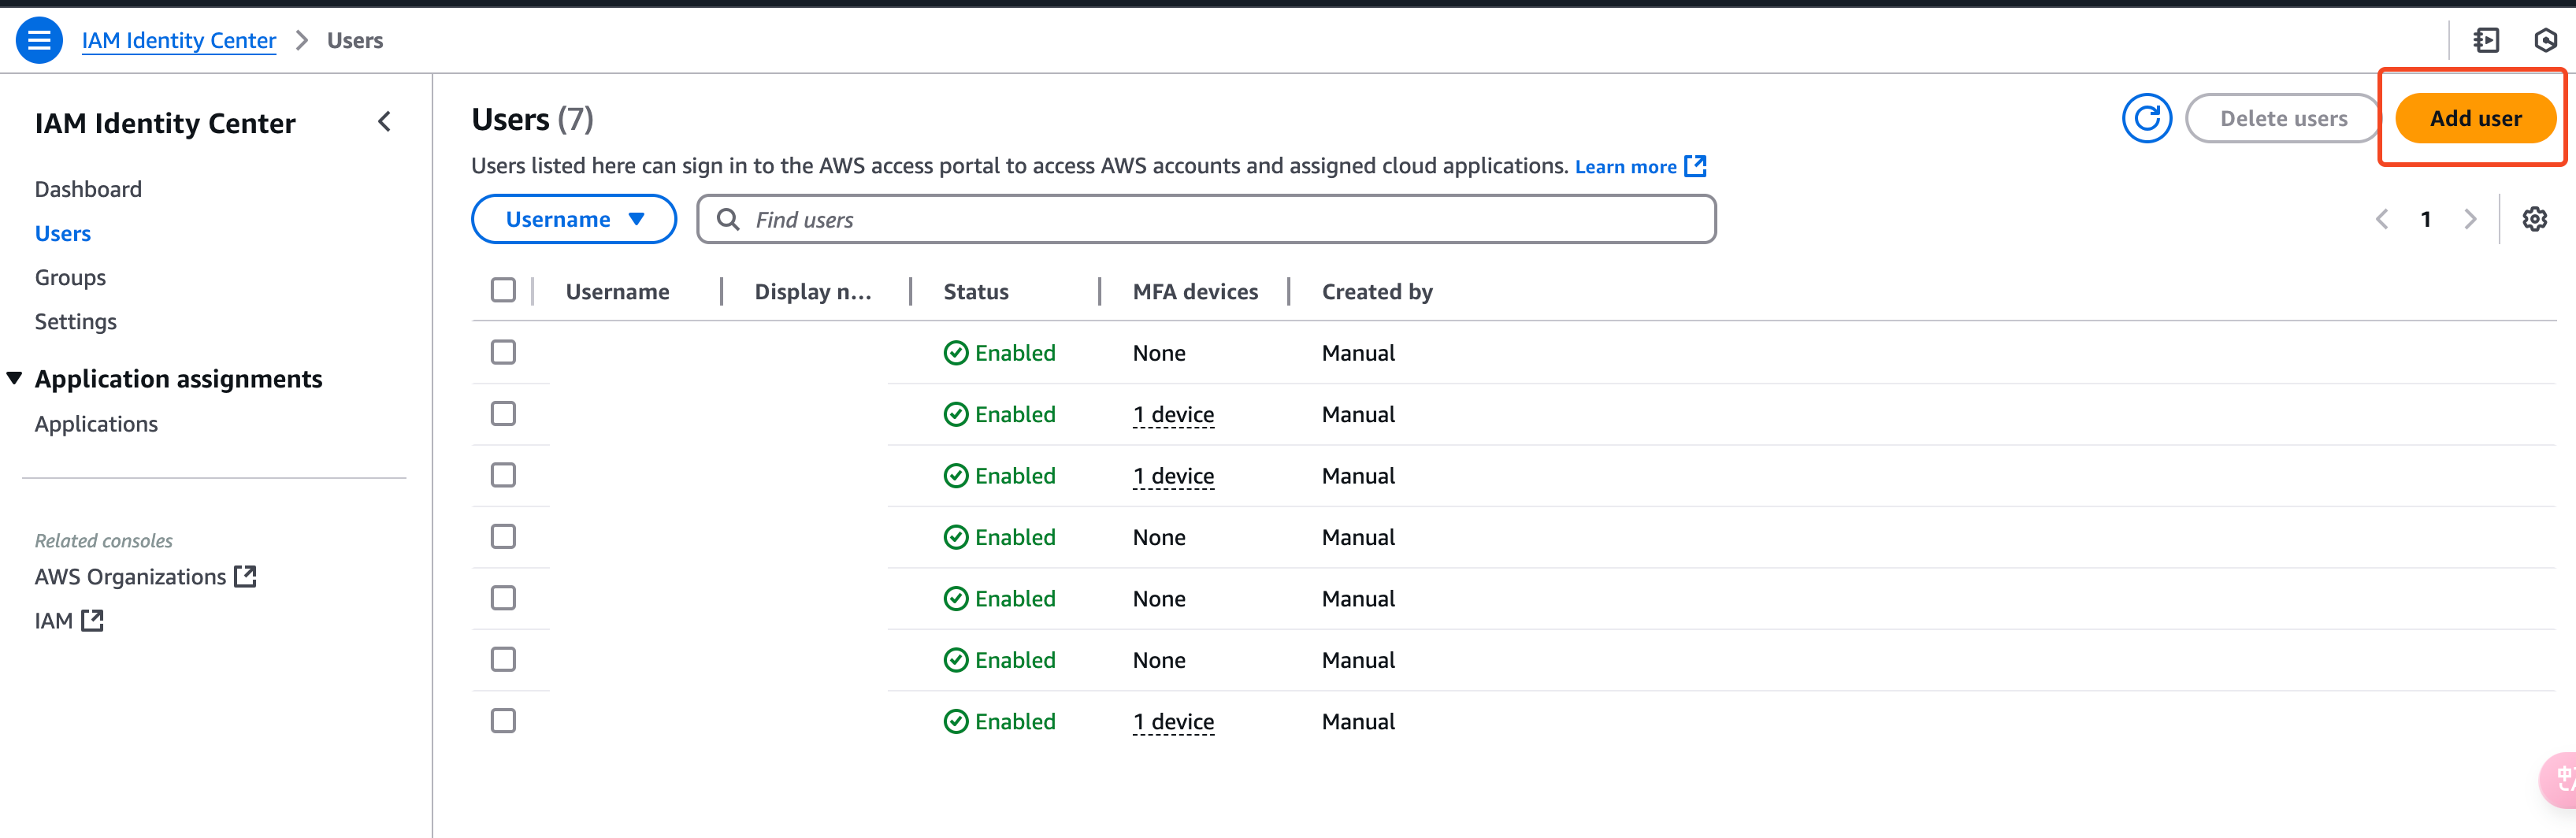
If you create them directly here, you’ll still need to set each user’s password in the IAM Identity Center. I just used the “forgot password” reset flow instead, which avoids the extra trip to IAM Identity Center.

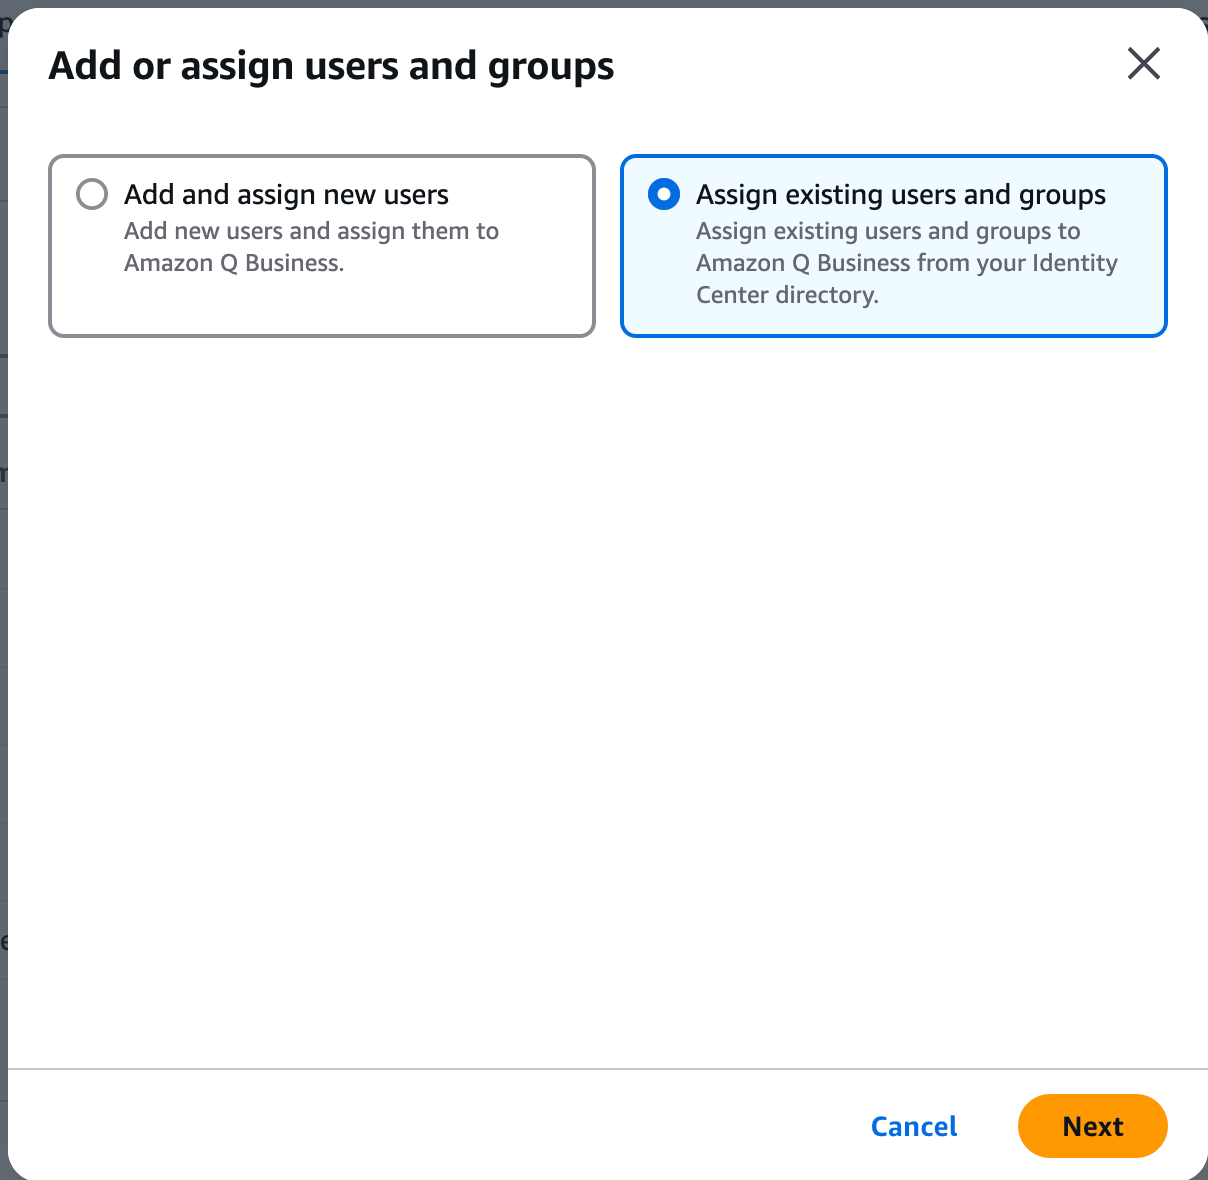
Assign existing users and groups
First add the user in the IAM Identity Center:
Then come back and use Assign existing users and groups:
Search for the user you just added:

Done.
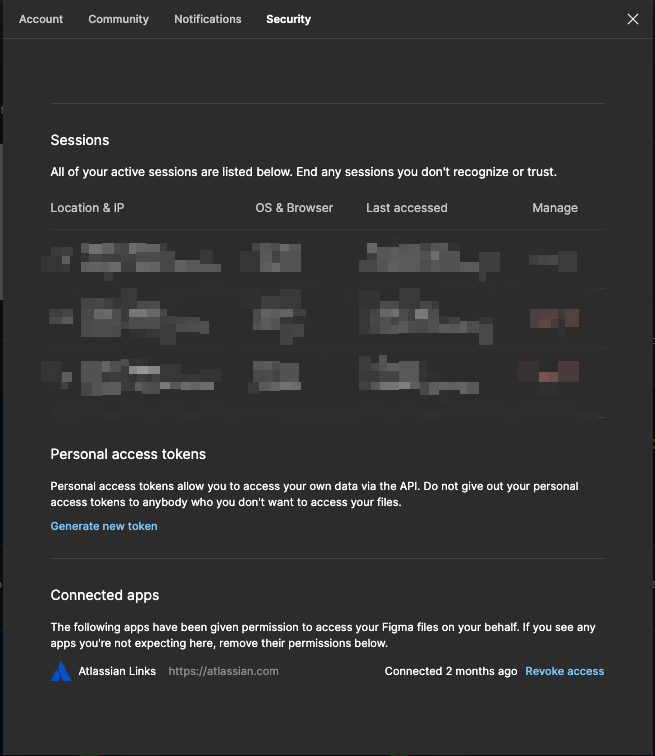
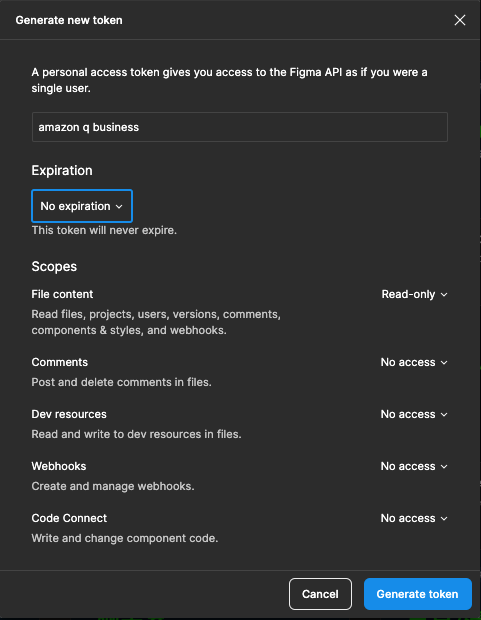
Appendix 3: Configure the Figma data source
Get a Figma API token.
- Sign in to Figma and go to Account settings > Personal access tokens.
- Security tab > Personal access tokens.
- Generate new token > Generate token.
Outcome and cost
The team can now just ask instead of digging through docs. 🎉
Setup was genuinely convenient — the main trade-off is cost.
Pricing is per user:
- Amazon Q Business Lite: $3 per user/month (what I used)
- Amazon Q Business Pro: $20 per user/month
Document indexing uses the Starter Index, priced as:
- $0.140 per hour, per unit
- $0.003 per image ($3 / 1,000 images)
- Each unit includes:
- 100 hours of connector usage per month
- 20,000 documents or 200 MB of extracted text (whichever comes first)
With both Confluence and Jira indexed, I ended up with:
- Document count: 8,215
- Storage used: 11.05 MiB
By my (rough) estimate, indexing came to about $100.80/month — I’m not fully certain on the exact calculation. The first two months are free, so it’s easy to trial at no cost.